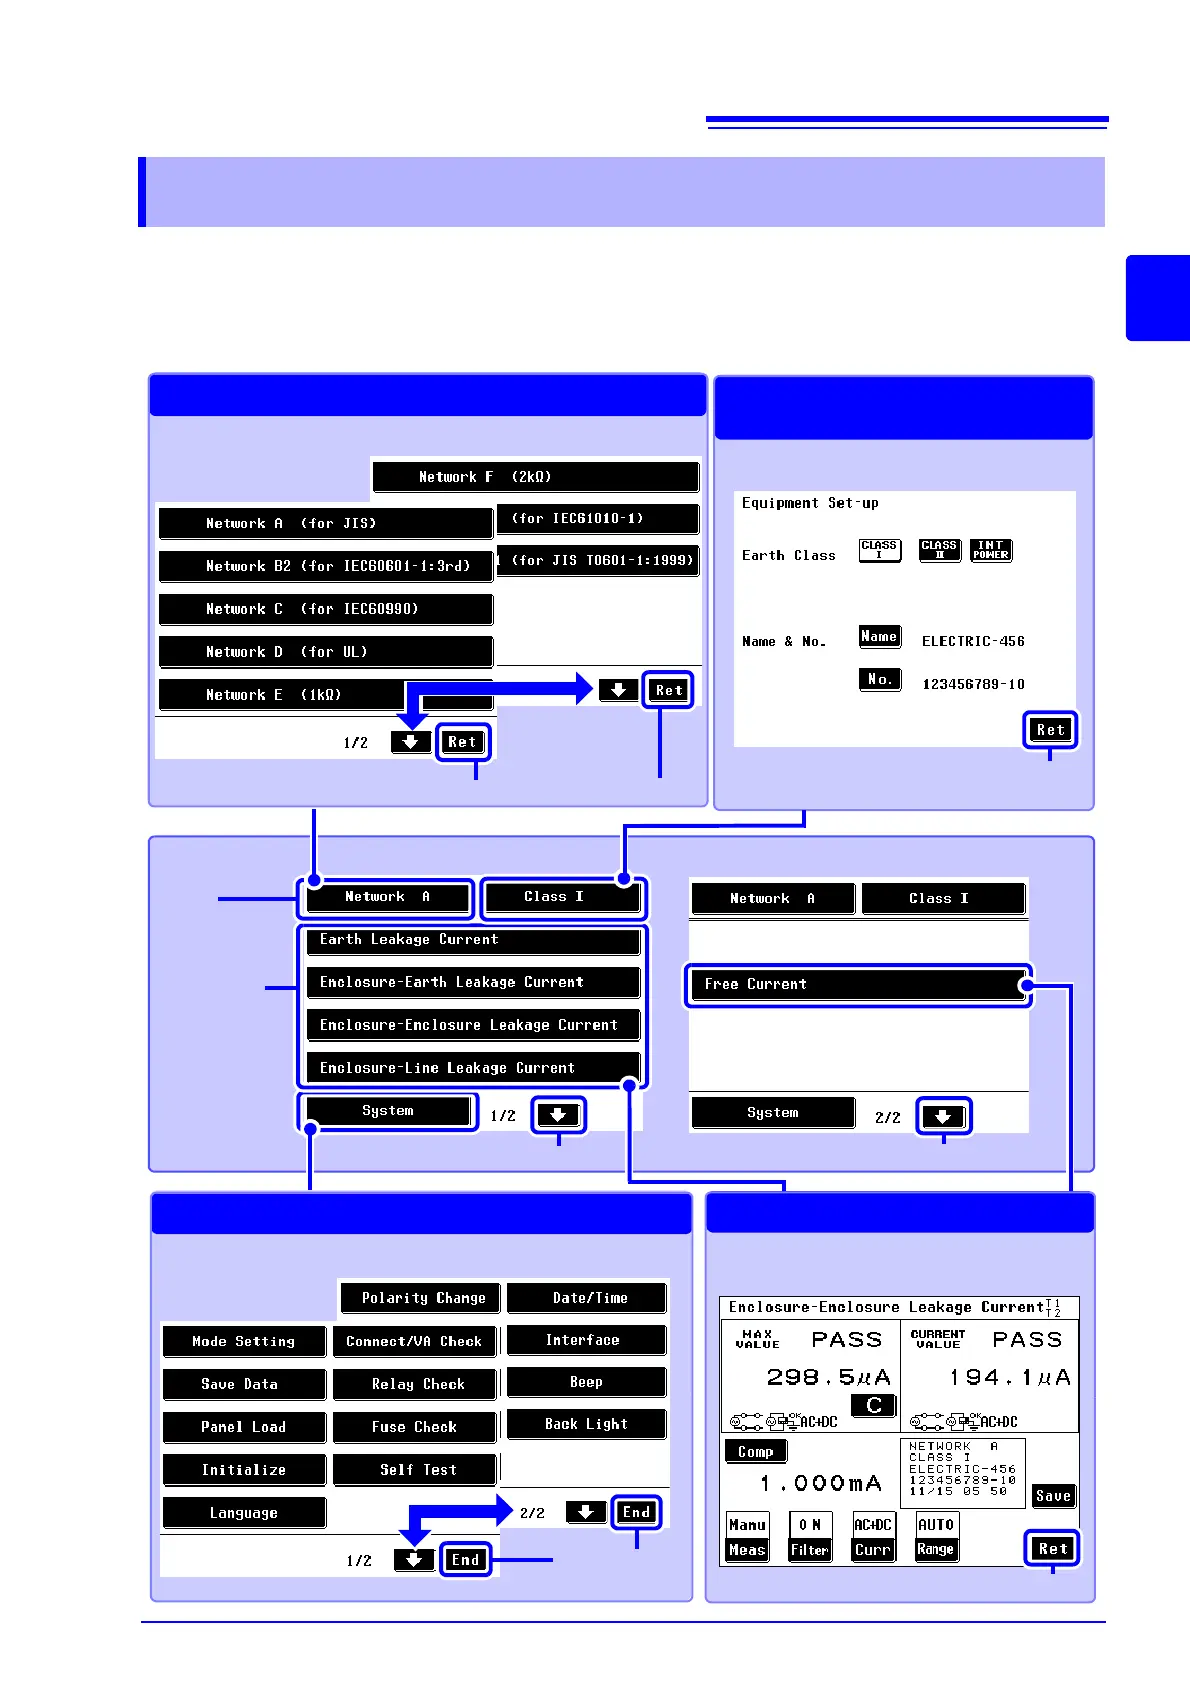
2.2 Screen configuration outline
27
2
Chapter 2 Instrument Labels and Screens
The following example shows screens that appear after selecting network A. (Screens for networks C to
G look the same as the screen for network A only the network keys differ. Due to the larger number of
measurement mode keys, selecting network B1 opens three initial screens and selecting B2 opens four
initial screens.)
2.2 Screen configuration outline
Measurement screen
System screen
Setting screen of
equipment under test
Network select screen
Initial screen 1
Initial screen 2
Select network to use. (p. 48)
Press to set up the system. (p. 115)
Set measurement conditions for the
selected measurement mode. (p. 51)
Set up equipment under test.(p. 49)
Return to initial screen 1.
Go between pages.
Network
key
measurement
mode keys
Go between pages.
Return to initial
screen 1.
Return to initial screen 1.
Return to initial screen 1.
Network select screen 1
Network select
screen 2