THINPREP 2000 INSTALLATION
2.6
ThinPrep 2000 Processor Operator’s Manual
CONNECTING THE WASTE BOTTLE
Caution:
At no time should bleach be present in the waste bottle while it is connected to the
ThinPrep Processor. Refer to Chapter 7, “Maintenance” for details regarding the use of bleach.
1. The waste bottle should be placed at the same height or below the ThinPrep processor. Do not
place the waste bottle above the instrument.
2. Ensure that the waste bottle cap is tightly secured. The waste bottle must rest in an upright posi-
tion. Do not allow the waste bottle to lay on its side.
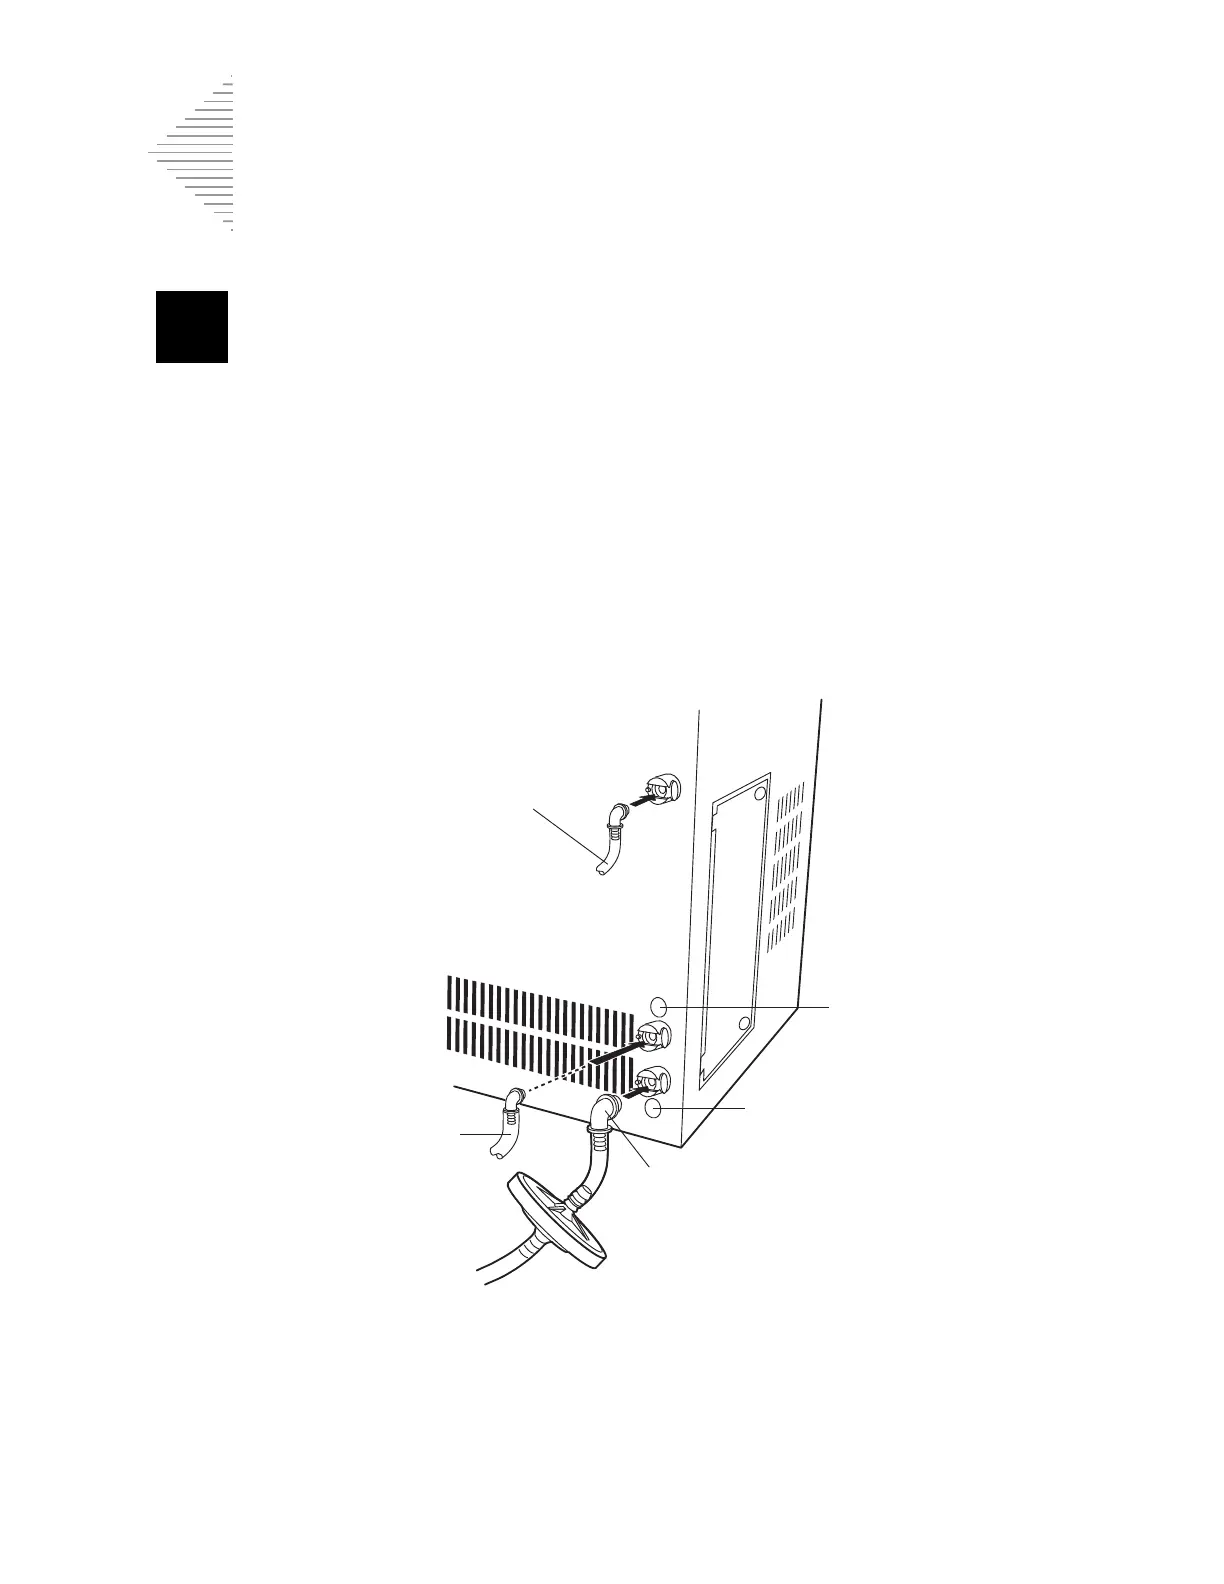
3. Locate the three waste bottle connections at the rear of the ThinPrep processor. Refer to Figure 2-
3. Ensure that the buttons of the connectors are in the down/inward position.
Figure 2-3 Waste Tubing Connections
4. Connect the color-coded waste tubing connectors to the corresponding connectors located in the
rear of the instrument. When the proper connection has been established, the buttons on the con-
nectors pop up/outward with a click sound. It may be necessary to push the button in before
placing the waste tubing connector into the instrument connector.
Sensor tubing
Waste tubing
Vacuum tubing
Blue
Yellow