THINPREP 2000 INSTALLATION
2.2
ThinPrep 2000 Processor Operator’s Manual
•
High-vacuum silicone grease
•
Base liners (absorbent pads)
•
Replacement tubing for evacuation system
•
Waste bottle cap for bottle transport
•
Sealed cylinder for testing
•
Dispenser pump
•
ThinPrep microscope slides 100-pack
Caution:
Turning the power on before instructed to do so can damage the instrument and inval-
idate your warranty.
PREPARATION PRIOR TO INSTALLATION
Location Selection Information
Locate the ThinPrep 2000 processor near a 3-prong grounded power outlet that is free of voltage
fluctuations and power surges. As with most laboratory equipment, it may be necessary to install a
line voltage stabilizer to eliminate power fluctuations and minimize interference from other systems.
During operation the ThinPrep 2000 Processor is sensitive to vibrations. It should be placed on a
sturdy bench that can support the 41 lbs (18.6 kg) that the instrument weighs. The bench should be
away from centrifuges, vortexors, or any other equipment that may cause vibrations. If the location
of the instrument must be in proximity to one of these devices, it should not be operating at the same
time as any of these other devices.
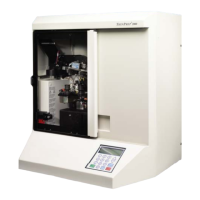
Allowing for adequate clearances, the following space is required for the ThinPrep Processor: H =
22.5"/59 cm W = 24"/61 cm D = 18"/46c m. (Refer to Figure 1-6.)
The waste bottle may be placed either on the bench with the processor or below the processor. The
waste bottle will occupy an area approximately a 6"/15 cm square by 17"/43 cm high.
INTERNAL PACKAGING REMOVAL
The inside mechanism of the ThinPrep 2000 processor is secured for shipment in two areas. A formed
foam insert secures the rotating plate in a vertical position, and a small foam block secures the slide
handler. These internal securements must be removed before operating the instrument. Do not turn
on the power of the processor until instructed to do so.