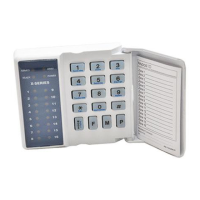
8.3.2. Using Sub-locations
Sub-location programming is the classic IDS programming method. It is a personal choice as
to which method works for the individual installer.
1. Ensure that the panel is in program mode - the READY LED will be flashing.
2. Enter the [LOCATION NO.] of the program location that you wish to view or change.
3. Press the [*] key. The READY LED is on and the ARM and AWAY LEDs will flash.
4. Enter the [SUB-LOCATION NO.] (after you have programmed your location) for the program
location that you wish to view or change.
5. Press the [*] key. The READY LED will remain on. The ARM LED will change from flashing to
steady, with the AWAY LED continuing to flash, indicating sub-location mode.
6. Enter the [NEW DATA] followed by the [*] key. A long beep will indicate a valid entry. The
READY LED is on. The ARM and AWAY LEDs will flash.
7. If you do not wish to change the data within this sub-location, press the [#] key. This takes you
back to the locations programming section. The READY LED is on and the ARM and AWAY LEDs
will flash.
8. Repeat steps 5 - 6 until all sub-locations at the current location have been programmed.
9. Press the hash [#] key to exit from the current location, the ARM and AWAY LED will turn off and
the READY LED will continue flashing.
10. Repeat steps 2 to 9 until all extended locations have been programmed.
11. Press the [#] key again to exit from program mode.
12. The READY LED will stop flashing and the panel will return to standby mode.
When programming a sub-location, any attempt to enter invalid data will result in an error beep (3 short
beeps).
The AWAY and ARM LEDs will remain on after the error beeps. Re-enter the correct data. There is no
need to press the [#] key.
EXAMPLE:
[INSTALLER CODE] [*] [1] [*] [1] [*] [1] [*] [2] [*] [2] [*] [3] [*] [4] [*]
NOTE:
When you enter a location containing sub-locations and press the [*] key, you will initially enter the first
sub-location. Each time you press the [*] key you will jump to the next sub-location. If you enter a digit,
you will be changing the information stored in that sub-location itself. At the end of the allowed sub-
locations, there will be a long beep to indicate that you are back at the first sub-location.
8.4 Programming a Location or Sub-location with a Bitmap
A bitmapped location allows the installer to program multiple panel features within a single
location. This is achieved by using the individual zone LEDs to indicate which features are enabled or
disabled.
By referring to the appropriate location reference tables, the installer can view the entire selection of
features associated with that location.
1. Ensure that the panel is in program mode - the READY LED will be flashing.
2. Enter the [LOCATION NO.] of the program location that you wish to view or change.
3. Press the [*] key. The READY LED is on. The AWAY LED flashes whilst in bitmap programming
mode.
4. Each LED represents a specific state of a feature. A lit zone LED indicates that a feature is
enabled. An unlit LED indicates that a feature is disabled.

 Loading...


