6
2.2.2 Remove accessories
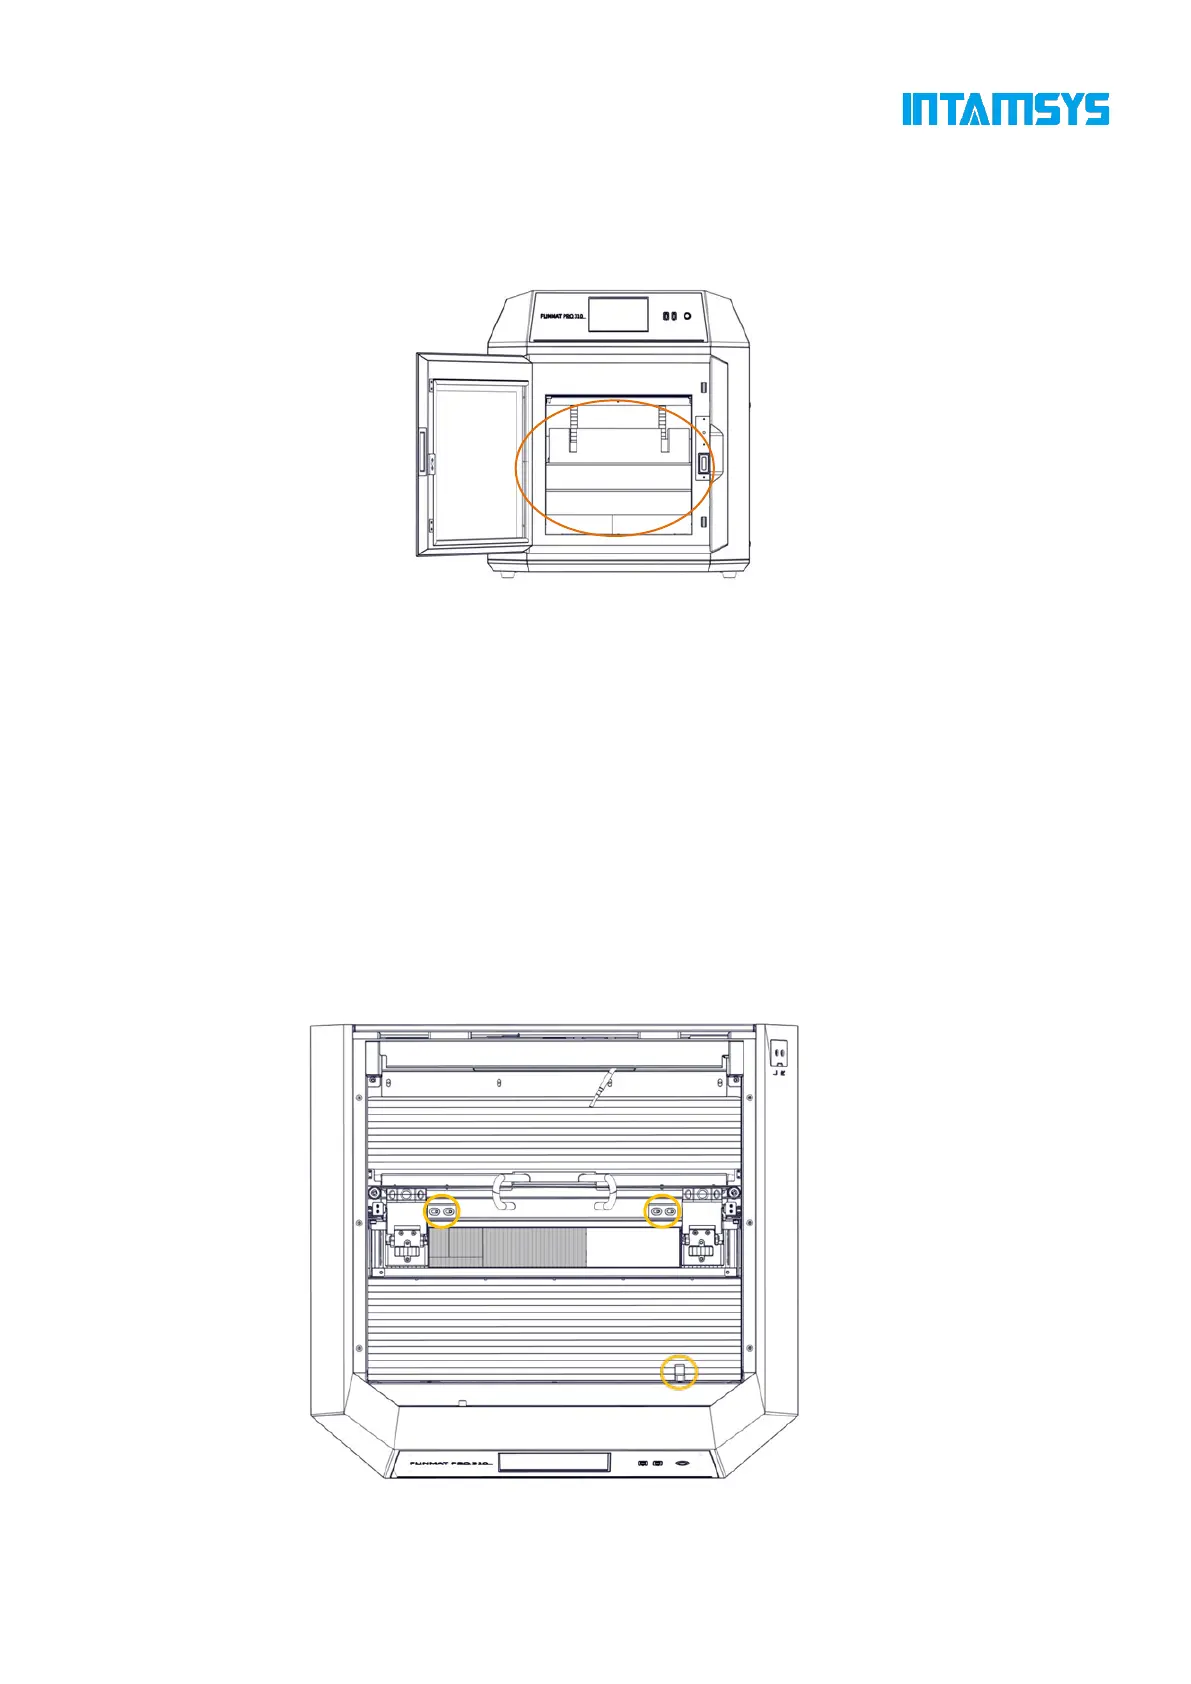
Open the front door of the device from the front, and carefully take out the accompanying
accessories and filament boxes from below.
Fig. 2.4 Remove Accessories
2.2.3 Unbuckle X-axis and Y-axis
Step 1: Open the top cover of the printer;
Step 2: The fixing block on the X-axis guide rail is used to ensure the stability of the extruder
during transportation. Unscrew the two screws on the fixing block with an M4 Allen wrench (the
4mm Allen wrench is placed in the spare parts box), and then remove the X-axis fixing block;
Step 3: Remove the Y-axis fixing block fixed on the front side sheet metal in the same way,
and then install the spare screws in the plastic bag back to their original positions;
Step 4: When the power is off, gently push the print head leftward in X direction to move out
enough operating space, and remove the right fixing block of Y-axis with the same method;
Fig. 2.5 Position of X-axis and Y-axis Fixing Blocks