53
5.1.2 Power off the printer
Press the power button (which is also used to turn on the printer) on the front side of the printer.
Note: This operation is only to turn off the printer. To power off the printer, the power switch must
be switched to the (O) position.
Note: If the printer is not in use for a long time, disconnect the power cord from the AC power
supply socket.
5.2 Preparation of Print Materials
This section guides you on how to load materials into nozzles. When completing the required steps,
be sure to follow the operation prompts displayed on the touch screen.
The printer is supplied with an external Independent Filament Box that can hold up to two rolls of
1 kg material. The left compartment is used for printing by the left extruder, mainly for model
materials, and the right compartment is used for printing by the right extruder, mainly for supporting
materials.
Note: Make sure that there are no print parts or other debris on the printing platform when loading
or unloading materials. Because the X-axis, Y-axis, and Z-axis will be reset during this operation,
and any print parts or other debris on the printing platform can collide with the extruder or X beam.
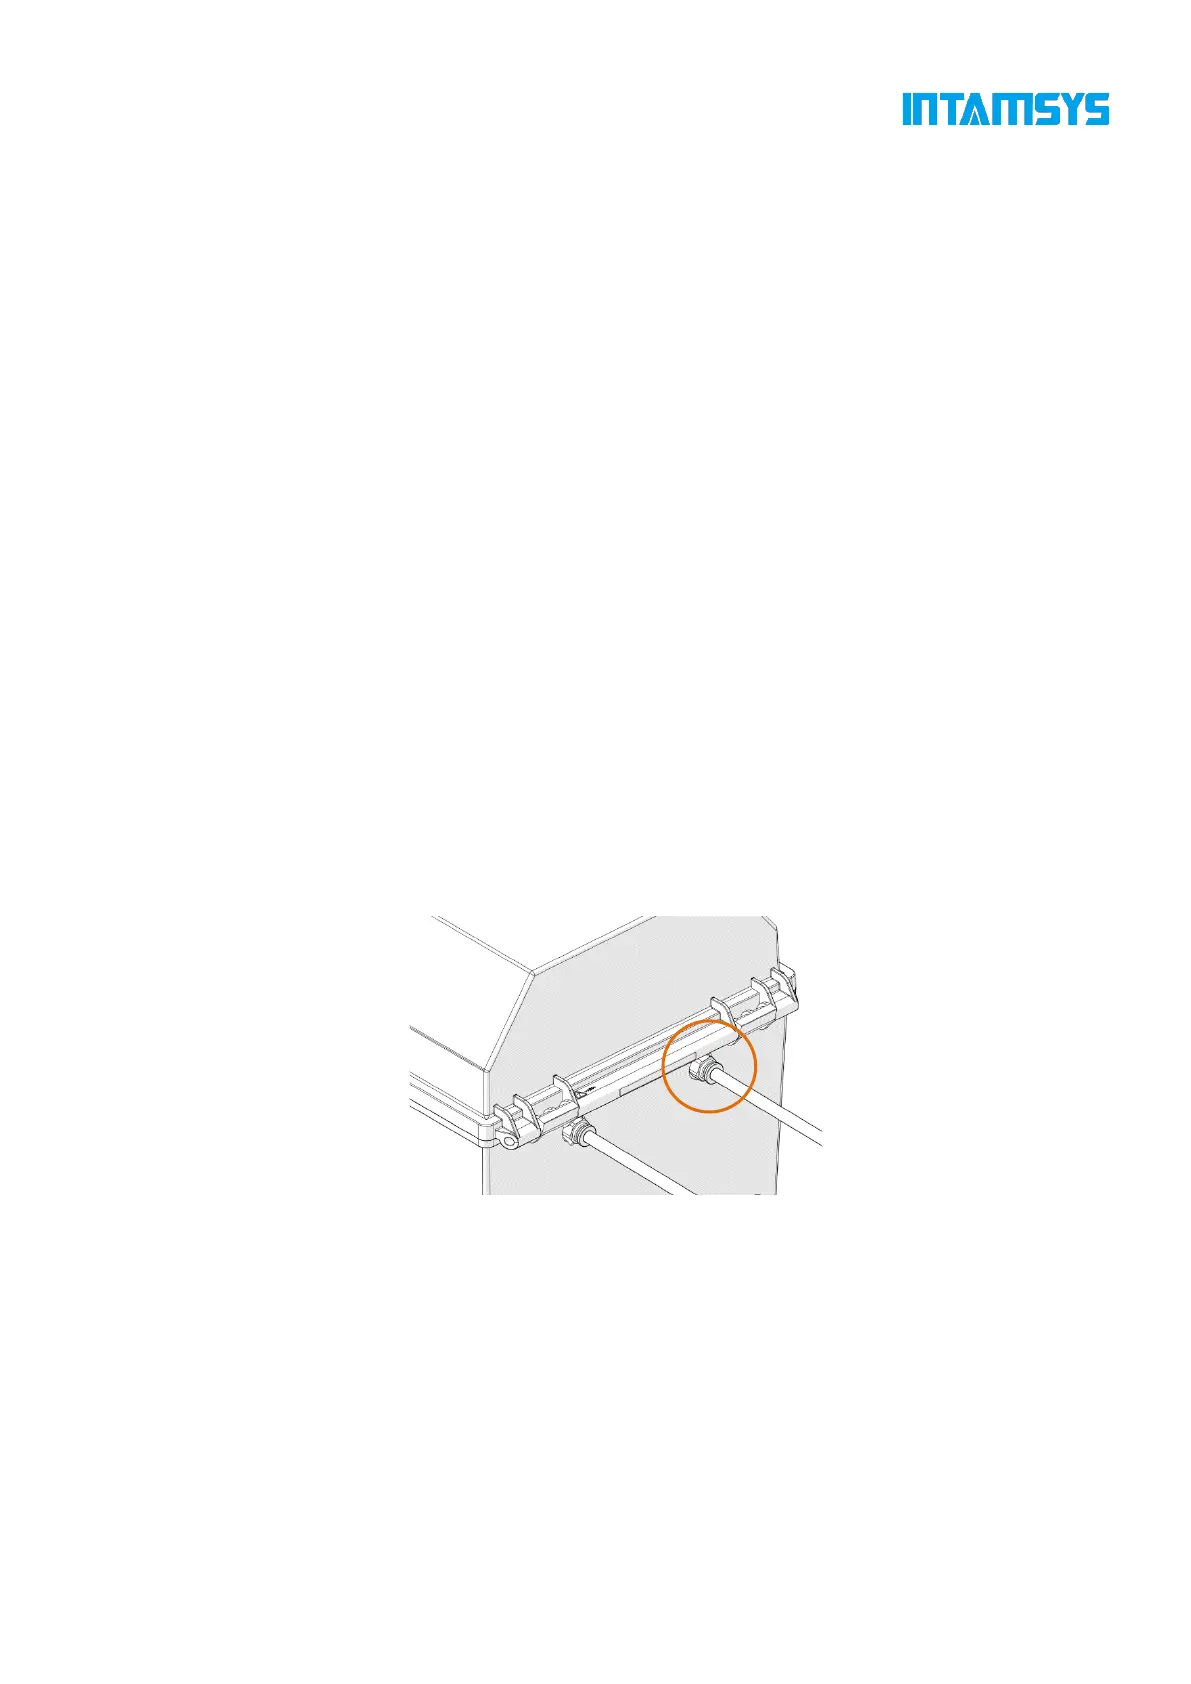
1. The filament box is placed on the right side of the printer, as shown in the figure. Insert one end
of the feeding pipe in the accompanying accessories of the filament box into the quick connector
and the other end into the quick connector located on the right side of the printer. The feeding
pipe should be inserted to the bottom for smooth feeding.
Fig. 5.3 Schematic Diagram for Installation of Feeding Pipe
2. Unbuckle the upper cover of the filament box, place the drying box in the front slot of the
filament box, put the wire rod on the roller of the filament box as shown in the figure, and then
thread the wire rod through the quick connector at the rear end until the material protrudes from
the feeding pipe of the printer. After manual loading is completed, buckle the upper cover.