GL16 Repair
7-25
WARNING
The safety interlock switches
should only be defeated
temporarily while the
procedure is being done.
Never operate the unit unless
all safety systems are
working correctly.
Serious Injury Could Result.
8. Place a tarp, plastic drop cloth, heavy pa-
per, or another temporary protective cov-
ering over the feed ribbons, ironing cylin-
der, and return ribbons.
9. Cut the tie tapes securing the compres-
sion roll cover. Pull off the old compres-
sion roll cover and pad. Remove old ce-
ment from the compression roll with a
scraper, coarse sandpaper, or a steel brush.
Wipe away remaining residue with a clean
cloth.
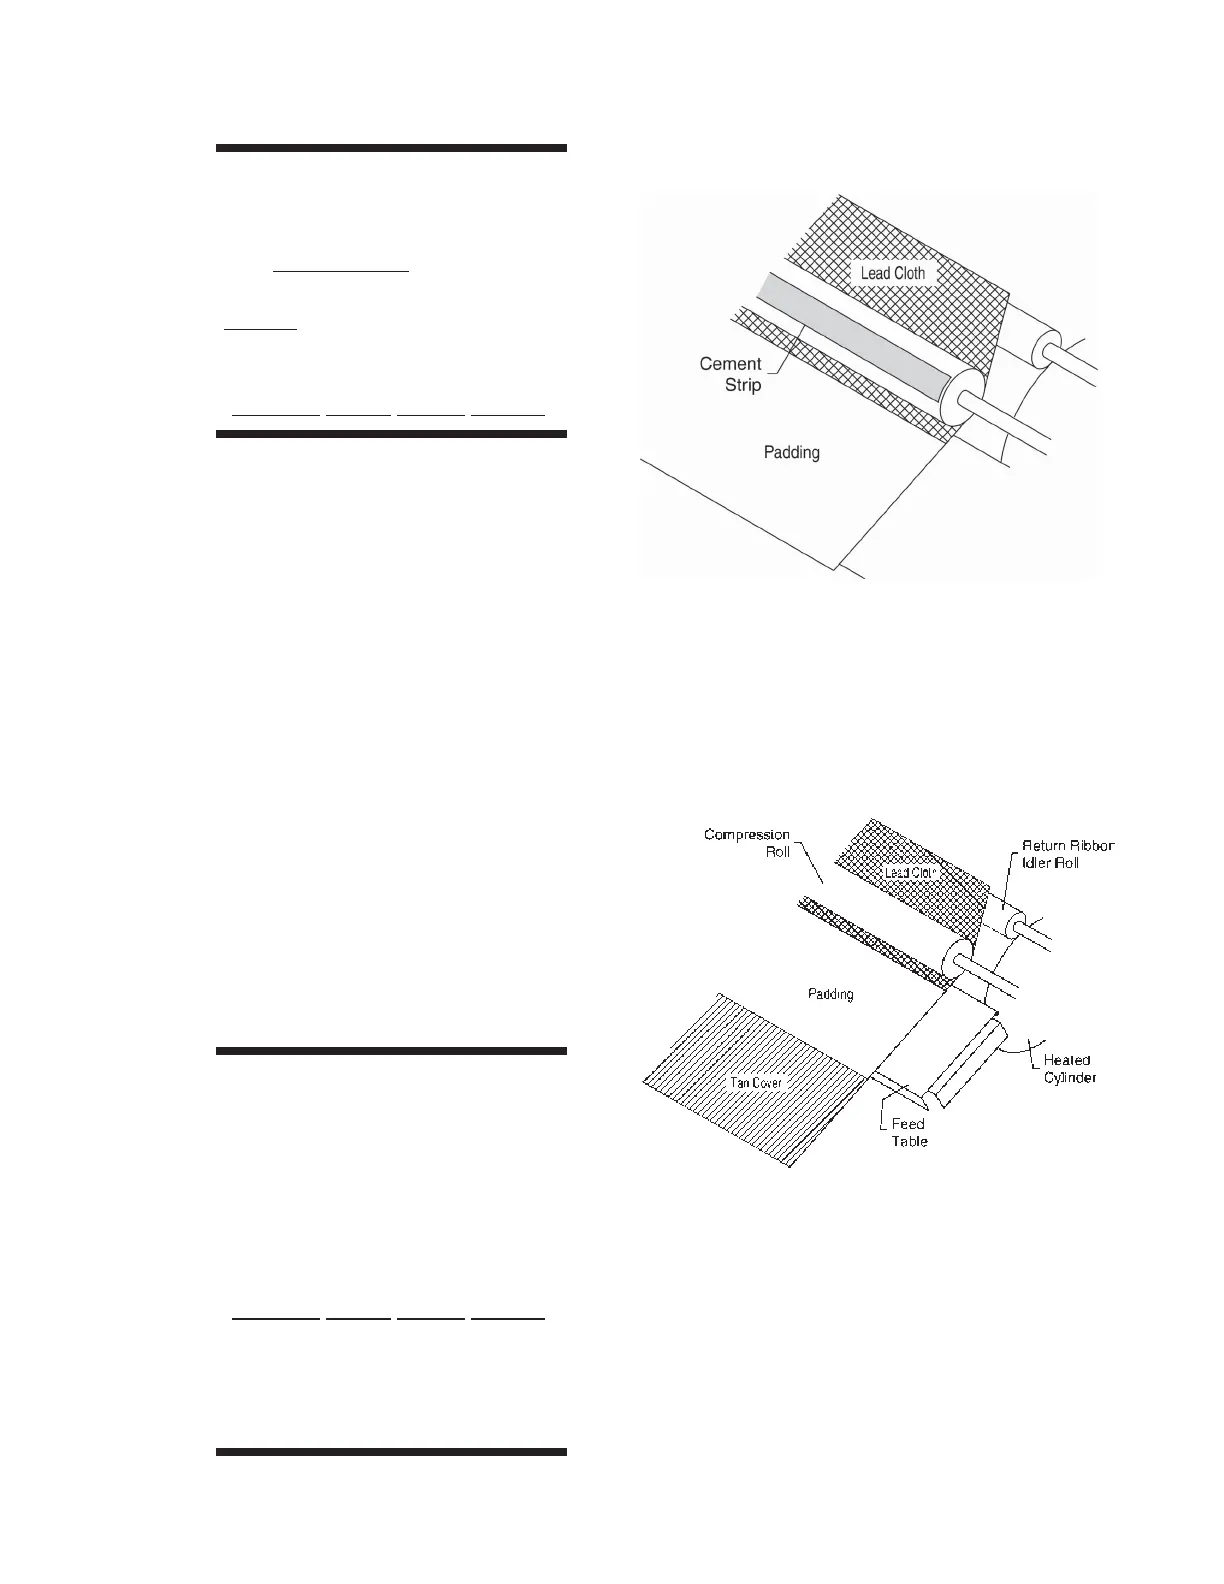
10. In a strip along the full length of the com-
pression roll, apply the cement on 1/4 to
1/3 of the surface of the roll (Figure 7-23)
and smooth with a putty knife.
11. Position the replacement cover on the front
receiving shelf so the padding material is
facing up and the tan cover is directly on
the shelf (Figure 7-24).
WARNING
Your hands will be extremely
close to the moving rolls of
the ironing section. Take
every precaution to keep
hands and loose clothing
from coming into contact
with any of the moving rolls.
Serious Injury Could Result.
One person should be
ready at a red STOP button
at all times to stop the
unit if necessary.
Figure 7-23: Cement is used to bond the lead cloth
to the compression roll.
Figure 7-24: The pad should be face up when
directing the lead cloth under the
compression roll.
 Loading...