Repair GL16
7-26
12. Hand feed the white lead cloth under and
around the back of the compression roll.
Temporarily anchor the material under the
compression roll. The weight of the com-
pression roll is enough to hold the lead cloth
in place.
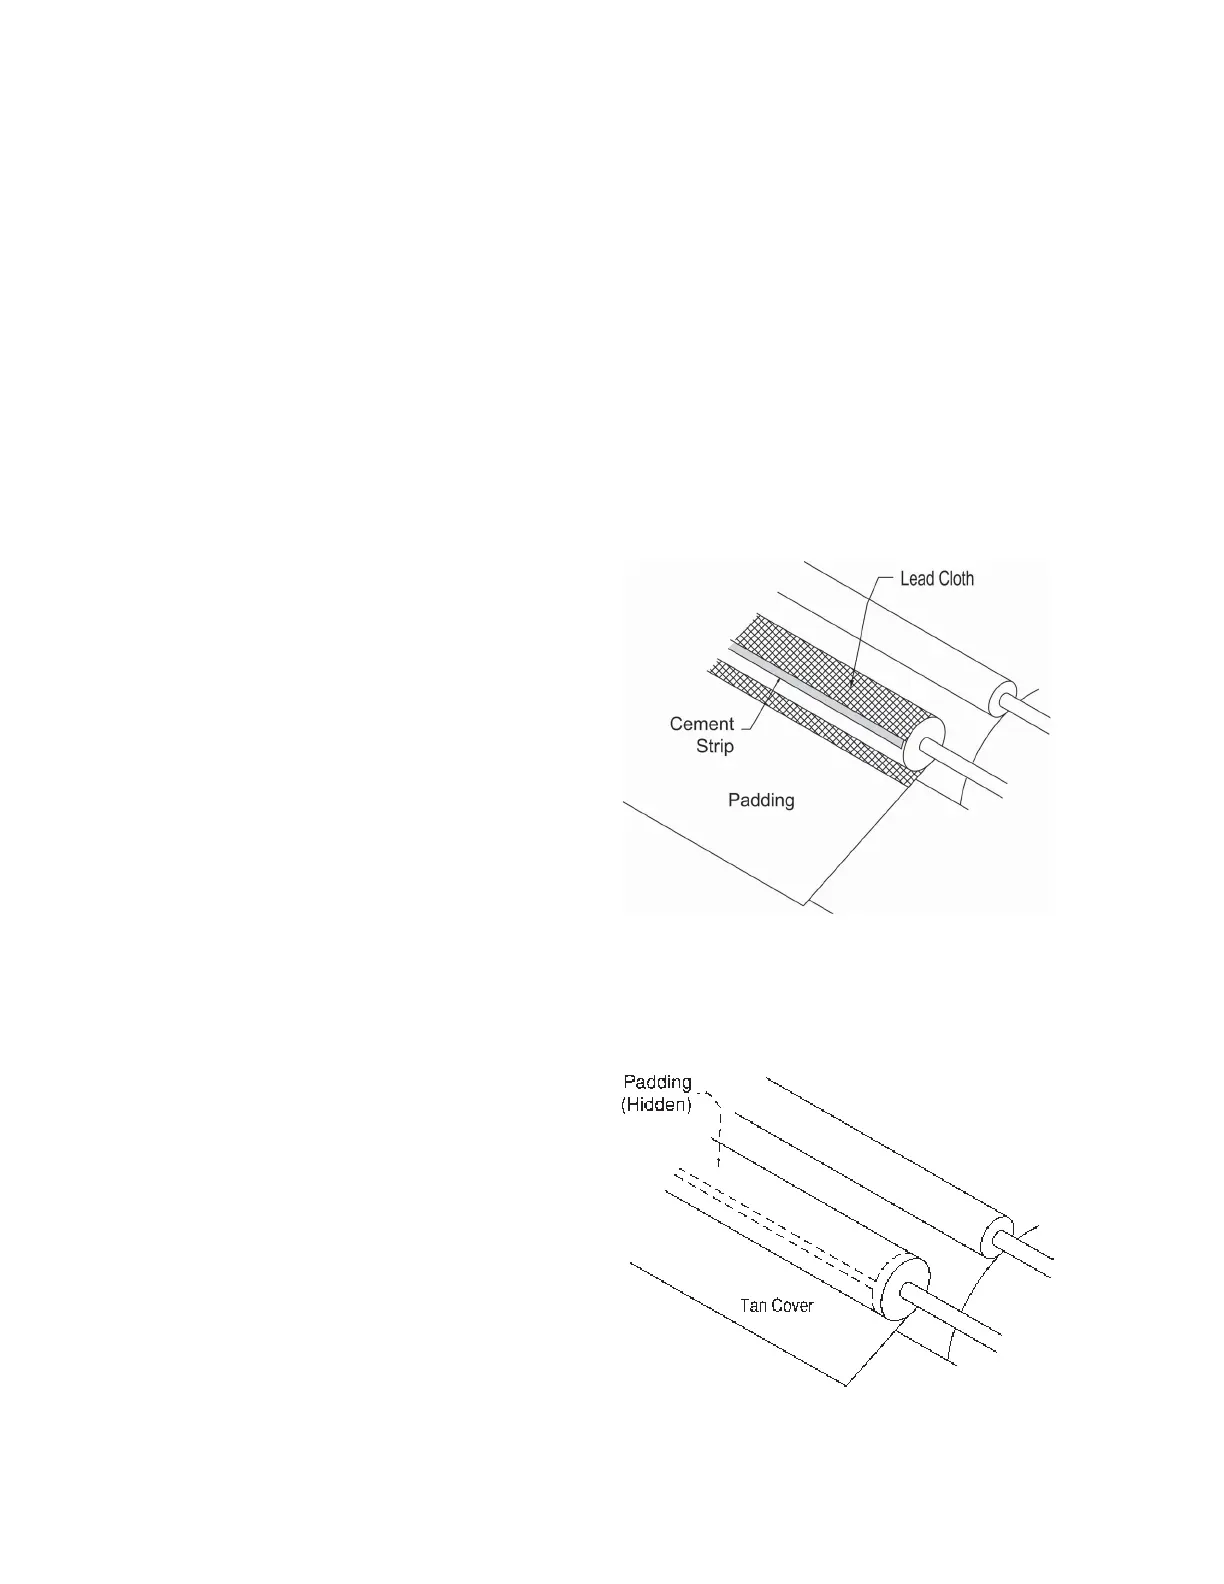
13. Position and smooth the leading edge of
the lead cloth straight across the compres-
sion roll. Place the leading edge about half
way over the cement strip. This will allow
the trailing edge to bond with the other half
of the cement (Figure 7-25). Be sure the
cover is smooth and tight against the
compression roll for a good bond with
the cement.
14. Station one person at a red STOP button
during this entire step. Turn power ON at
the main disconnect switch
15. Press the green START button, and turn
the SPEED knob to the slowest speed.
16. Allow the lead cloth and pad (NOT the
tan cover) to wind onto the compression
roll. Do not allow the material to wrinkle.
17. Press a red STOP button. Turn the power
OFF at the main disconnect switch.
18. Check the gap between the front and trail-
ing edges of the pad (Figure 7-26). There
should be a gap of 3/16" to 1/4" (5 mm to 6
mm). If the gap is wider than this, or un-
even, unwind the pad and repeat Steps 13
to 15. Make sure the pad is straight and
tight.
19. Turn the power ON at the main discon-
nect switch.
20. Press the green START button.
21. Wind the tan cover onto the compression
roll. Allow the cover and pad to turn a few
times, smoothing out any small wrinkles.
22. If wrinkles do not smooth out, press a red
STOP button. Turn the power OFF at the
main disconnect switch.
Figure 7-26: There should be a small gap between
the edges of the pad material.
Figure 7-25: A smooth, tight fit is required to
correctly secure the compression roll
cover material.
23. Unwind the material and check the lead-
ing edge for a straight edge on the com-
pression roll. Repeat Steps 13 to 21 as
required.
24. Press a red STOP button. Turn the power
OFF at the main disconnect switch.
25. Cut four lengths of tie tape, each approxi-
mately 3' (1 m) long. Position the tapes at
equal intervals along the length of the com-
pression roll (Figure 7-27). Tuck one end
of each tape into the opening in the tan
cover.
 Loading...