Harddiskdrive(HDD)locationvs.harddiskdrivesignalmappingtable
HDD
location
(Front
HDD)
HDD0
(Front
HDD)
HDD1
(Front
HDD)
HDD2
(Front
HDD)
HDD3
(Front
HDD)
HDD4
(Front
HDD)
HDD5
(internal
connector)
SATA1/
SATADOM
(internal
connector)
SATA2/Not
use
PCHSATA
mode
SATAport
3
SATAport
4
SATAport
5
SATAport
6
sSATA
port1
sSATA
port2
SATAport
1
SATAport
2(Notuse)
PCHSW
RAID
mode
(RST e)
ID2ID3ID4ID5ID0ID1
SATAport
1
SATAport
2(Notuse)
HBA
adapter
installed
(RAID
mode)
Slot0Slot1Slot2Slot3Slot4Slot5SATAport
1
SATAport
2(Notuse)
Readthesafetyinformationin“Safety”onpagevand“Installationguidelines”onpage75.
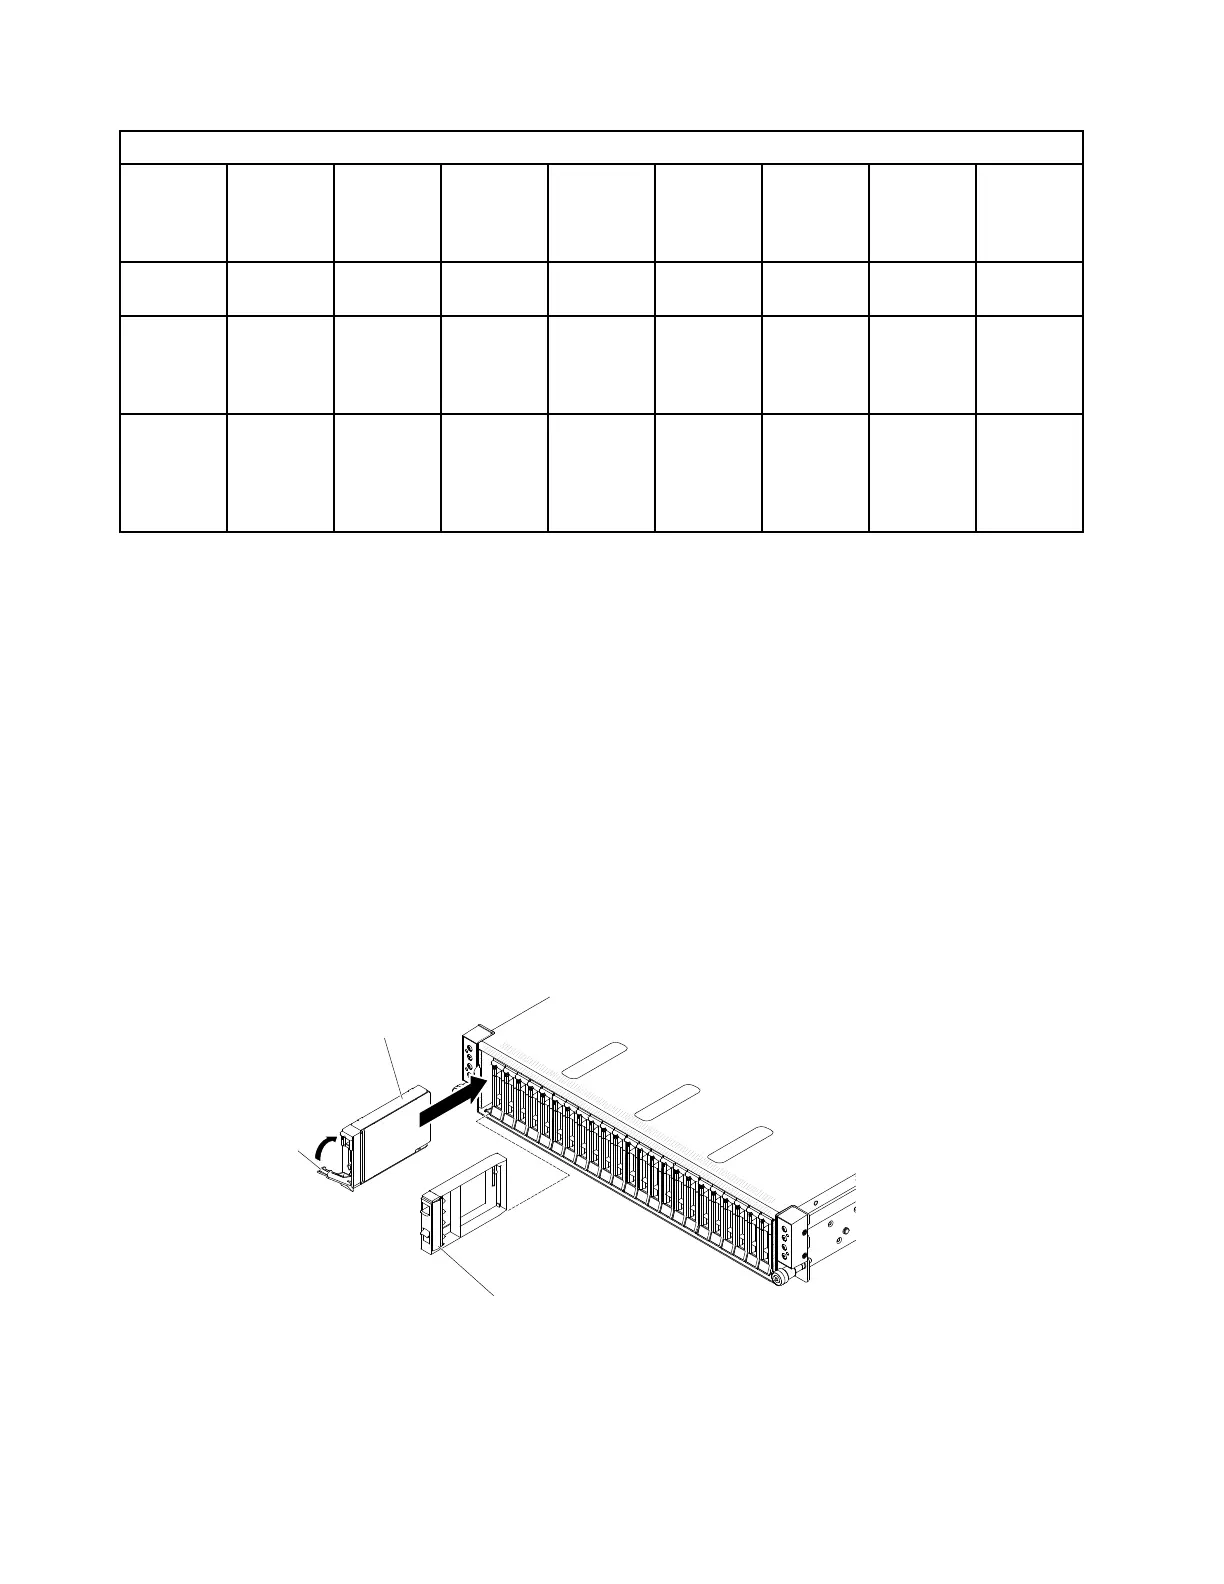
Toinstallahot-swapSASorSATAharddiskdrive,completethefollowingsteps:
Note:Ifyouhaveonlyoneharddiskdrive,youmustinstallitintheleftdrivebay.
Attention:Toavoiddamagetotheharddiskdriveconnectors,makesurethattheservercoverisinplace
andfullyclosedwheneveryouinstallorremoveaharddiskdrive.
Step1.Removethefillerpanelfromtheemptydrivebay.Keepthefillerpanelinasafeplace.
Step2.Touchthestatic-protectivepackagethatcontainsthedrivetoanyunpaintedmetalsurfaceonthe
server;then,removethedrivefromthepackageandplaceitonastatic-protectivesurface.
Step3.Installtheharddiskdriveinthedrivebay:
a.Makesurethatthetrayhandleisintheopen(unlocked)position.
b.Alignthedrivewiththeguiderailsinthebay.
0000000000000000000000
0000000000000000000000
0000000000000000000000
0000000000000000000000
0000000000000000000000
0000000000000000000000
0000000000000000000000
0000000000000000000000
0000000000000000000000
0000000000000000000000
0000000000000000000000
00000000000000000000
00000000000000000000
00000000000000000000
00000000000000000000
00000000000000000000
00000000000000000000
00000000000000000000
00000000000000000000
00000000000000000000
00000000000000000000
Filler panel handle
Handle
2.5-inch hot-swap
hard disk drive
Figure31.Hot-swapharddiskdriveinstallation
c.Gentlypushthedriveintothebayuntilthedrivestops.
d.Rotatethetrayhandletotheclosed(locked)position.
92LenovoThinkServersd350ServerType5493,LenovoThinkServern400EnclosureType5495InstallationandServiceGuide