Ifyouarereplacingaservercomponentorinstallinganoptionaldeviceintheserver,youneedtotake
outthenodeoutfromtherackenclosure,turnofftheserverandperipheraldevices,anddisconnectall
externalcables.
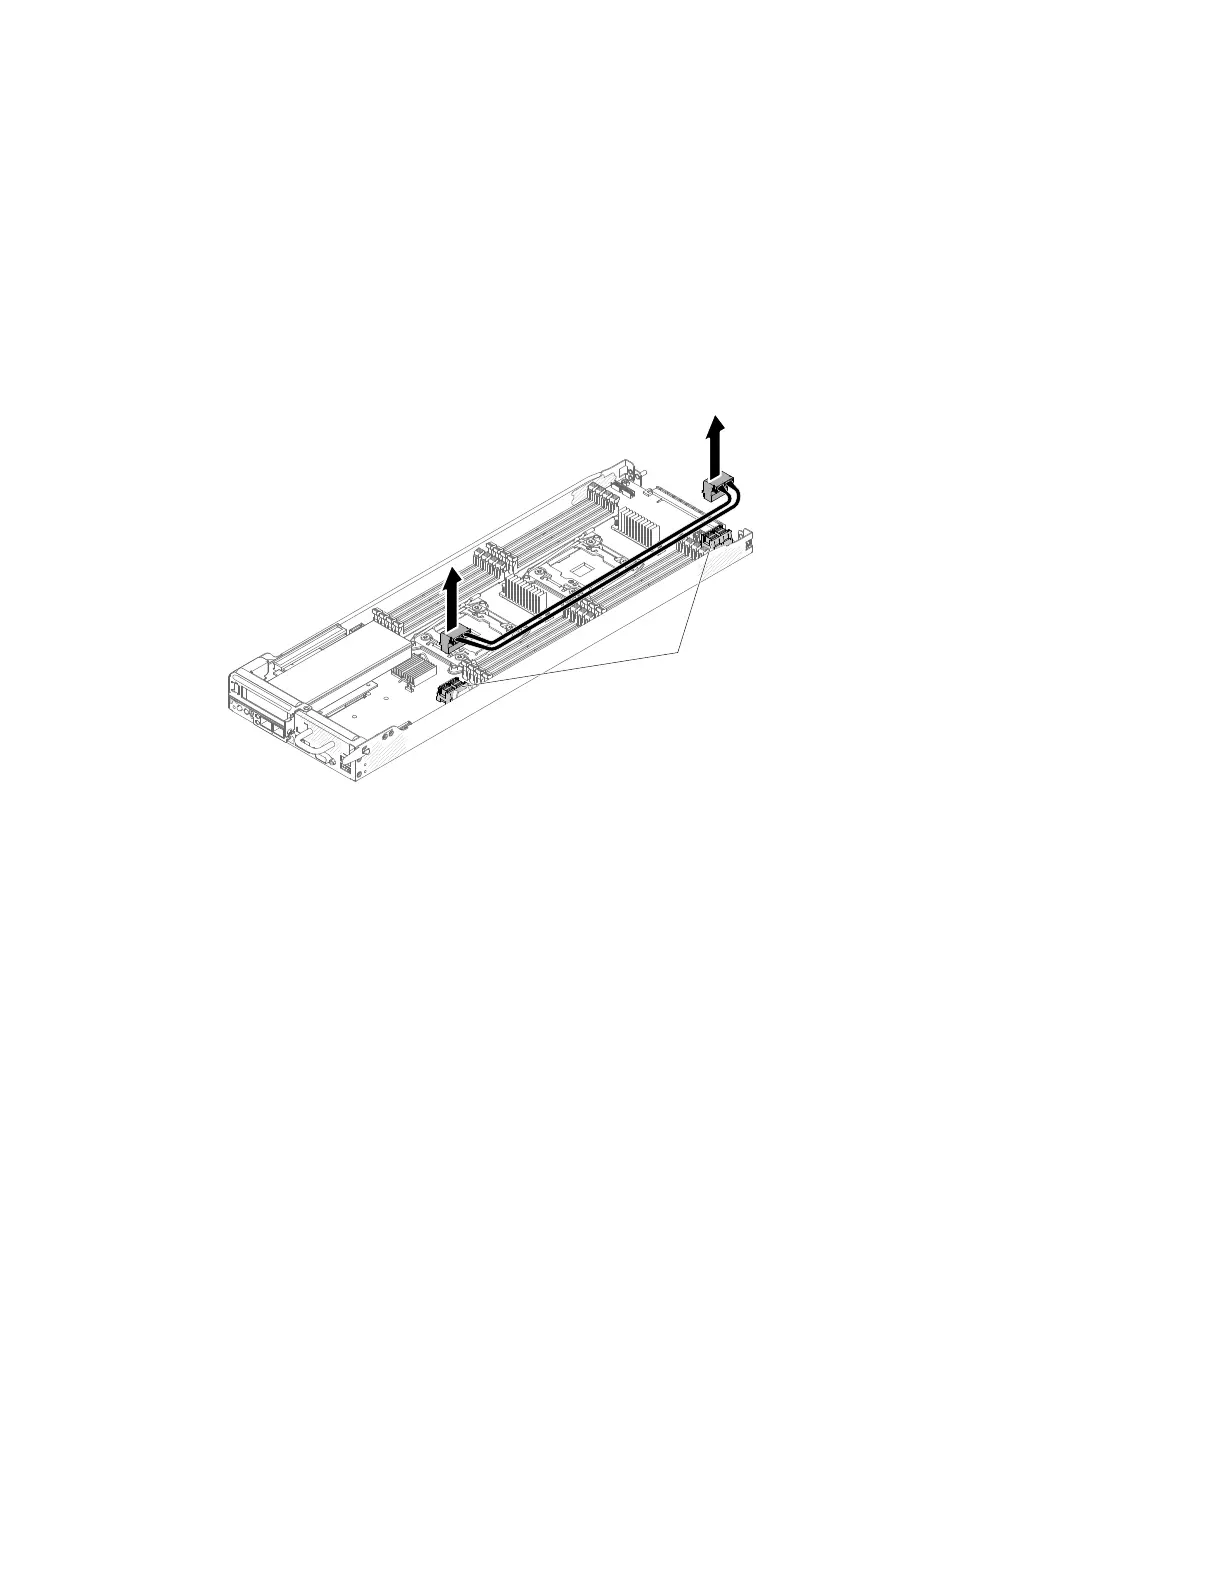
ToremovethenodeSATAcable,completethefollowingsteps.
Step1.Removethecomputenode(see“Removingacomputenodefromachassis”onpage77).
Step2.Removetheairbaffle(see“Removingtheairbaffle”onpage86).
Step3.PlaceyourfingersonbothendsofJPT1andJP18;then,lifttheSATAcableoutoftheserver.
SATA / SAS
connectors
(JPT1/JP18)
Figure98.SATAcableremoval
InstallingthenodeSATAcable
UsethisinformationtoreplacethenodeSATAcable.
Readthesafetyinformationin“Safety”onpagevand“Installationguidelines”onpage75.
Ifyouarereplacingaservercomponentorinstallinganoptionaldeviceintheserver,youneedtotake
outthenodeoutfromtherackenclosure,turnofftheserverandperipheraldevices,anddisconnectall
externalcables.
ToreplacethenodeSATAcable,completethefollowingsteps.
Step1.AlignthenodeSATAcableintheproperlocationsandinstallit.
Chapter5.Removingandreplacingservercomponents149