e.ChecktheharddiskdrivestatusLEDtoverifythattheharddiskdriveisoperatingcorrectly.If
theyellowharddiskdrivestatusLEDofadriveislitcontinuously,thatdriveisfaultyandmust
bereplaced.IfthegreenharddiskdriveactivityLEDisflashing,thedriveisbeingaccessed.
Note:
1.IftheserverisconfiguredforRAIDoperationwithaRAIDadapter,youmayhave
toreconfigurediskarraysafterinstallingharddiskdrives.SeetheRAIDadapter
documentationforadditionalinformationaboutRAIDoperationandcompleteinstructions
forusingtheRAIDadapter.
2.WithonboardRAIDcontroller,only4drivesareavailableforRAIDarrays.
Step4.Ifyouareinstallingadditionalhot-swapharddiskdrives,dosonow.
RemovingaDIMM
Usethisinformationtoremoveamemorymodule.
Readthesafetyinformationin“Safety”onpagevand“Installationguidelines”onpage75.
Ifyouarereplacingaservercomponentorinstallinganoptionaldeviceintheserver,youneedtotake
outthenodeoutfromtherackenclosure,turnofftheserverandperipheraldevices,anddisconnectall
externalcables.
Toremoveadualinlinememorymodule(DIMM),completethefollowingsteps.
Step1.Removethecomputenode(see“Removingacomputenodefromachassis”onpage77).
Step2.Removetheairbaffle(see“Removingtheairbaffle”onpage86).
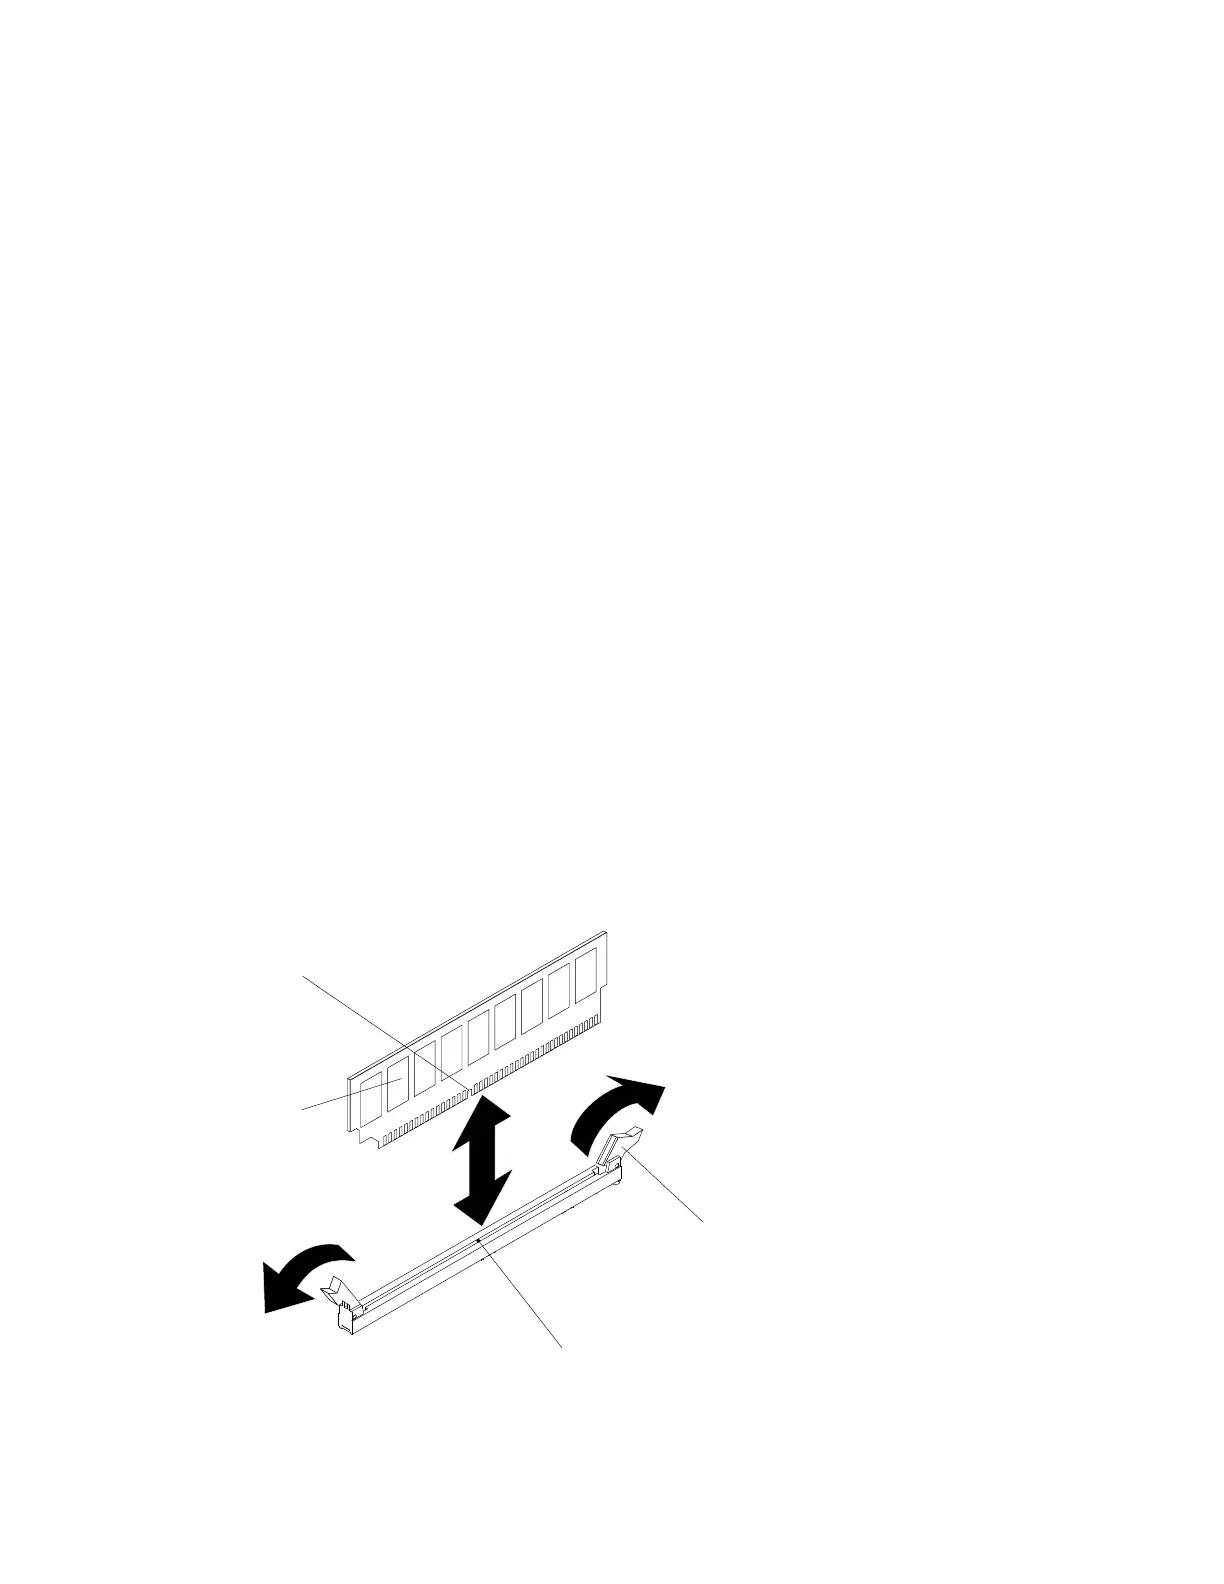
Step3.CarefullyopentheretainingclipsoneachendoftheDIMMconnectorandremovetheDIMM.
Attention:ToavoidbreakingtheretainingclipsordamagingtheDIMMconnectors,handlethe
clipsgently.
DIMM
Retaining
clip
Alignment tab
Alignment
slot
Figure32.DIMMremoval
Chapter5.Removingandreplacingservercomponents93