0000000000000000000000
0000000000000000000000
0000000000000000000000
0000000000000000000000
0000000000000000000000
0000000000000000000000
0000000000000000000000
0000000000000000000000
0000000000000000000000
0000000000000000000000
0000000000000000000000
000000000000000000000
000000000000000000000
000000000000000000000
000000000000000000000
000000000000000000000
000000000000000000000
000000000000000000000
000000000000000000000
000000000000000000000
000000000000000000000
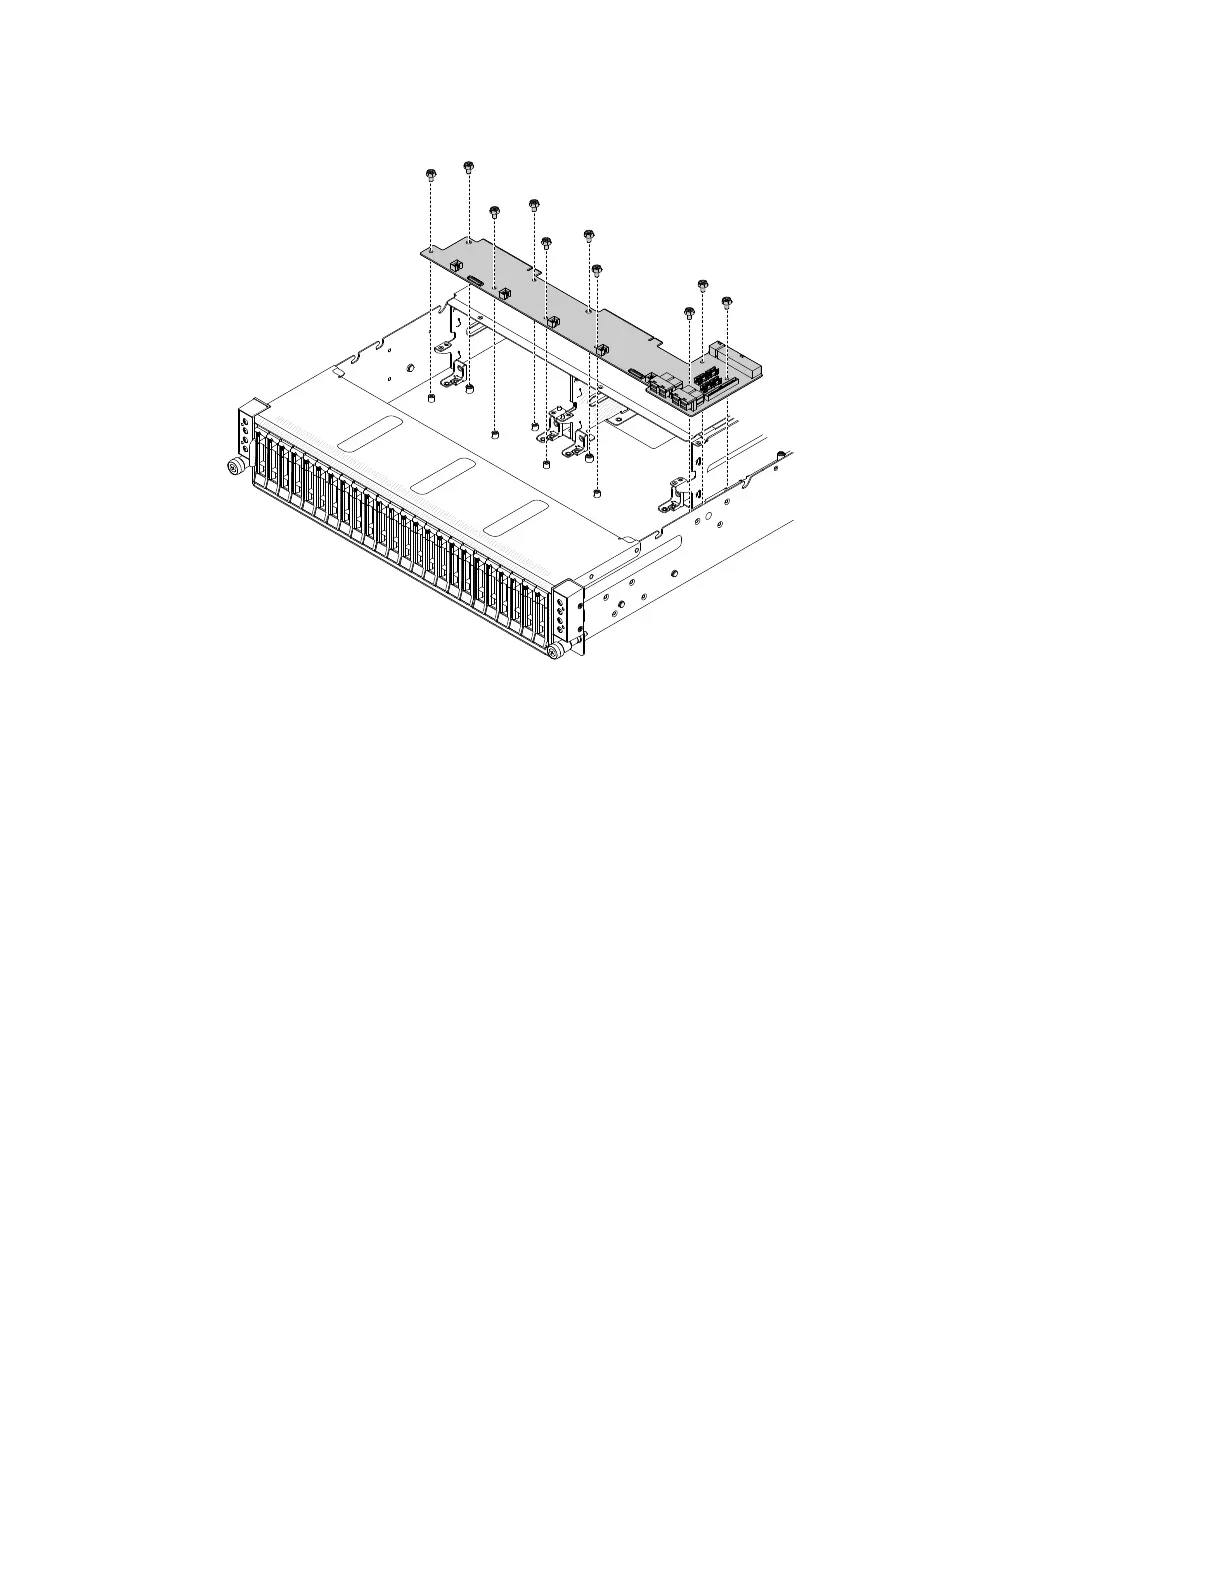
Figure62.Fanboardinstallation
Step3.Tightenthefanboardwith106#32screws.
Step4.Reinstallthecableonthefanboard.
Step5.Reinstallthepowerinterfaceboardbracket(see“Installingthepowerinterfaceboardbracket”on
page141).
Step6.Reinstallthepowerinterfaceboard(see“Installingthepowerinterfaceboard”onpage139).
Step7.Reinstallthecablesonthepowerinterfaceboard.
Step8.Reinstallthefancage(see“Replacingthefancage”onpage105).
Step9.Reinstallthesystemfan(see“Replacingasystemfan”onpage89).
Step10.Reinstallthefancagecover(see“Installingthefancagecover”onpage83).
Step11.Reinstallcomputenode(see“Installingacomputenodeinachassis”onpage77).
1.Installtheserverintotherackenclosureandpushtheserverintotherackuntilitclicksintoplace.
2.Reconnectthepowercordsandanycablesthatyouremoved.
3.Turnontheperipheraldevicesandtheserver.
Removingtheharddiskdrivecageassembly
Usethisinformationtoremovetheharddiskdrivecageassemblyfromtheserver.
Readthesafetyinformationin“Safety”onpagevand“Installationguidelines”onpage75.
Ifyouarereplacingaservercomponentorinstallinganoptionaldeviceintheserver,youneedtoslidethe
serveroutfromtherackenclosure,turnofftheserverandperipheraldevices,anddisconnectthepower
cordsandallexternalcables.
Toremovetheharddiskdrivecage,completethefollowingsteps.
Chapter5.Removingandreplacingservercomponents123