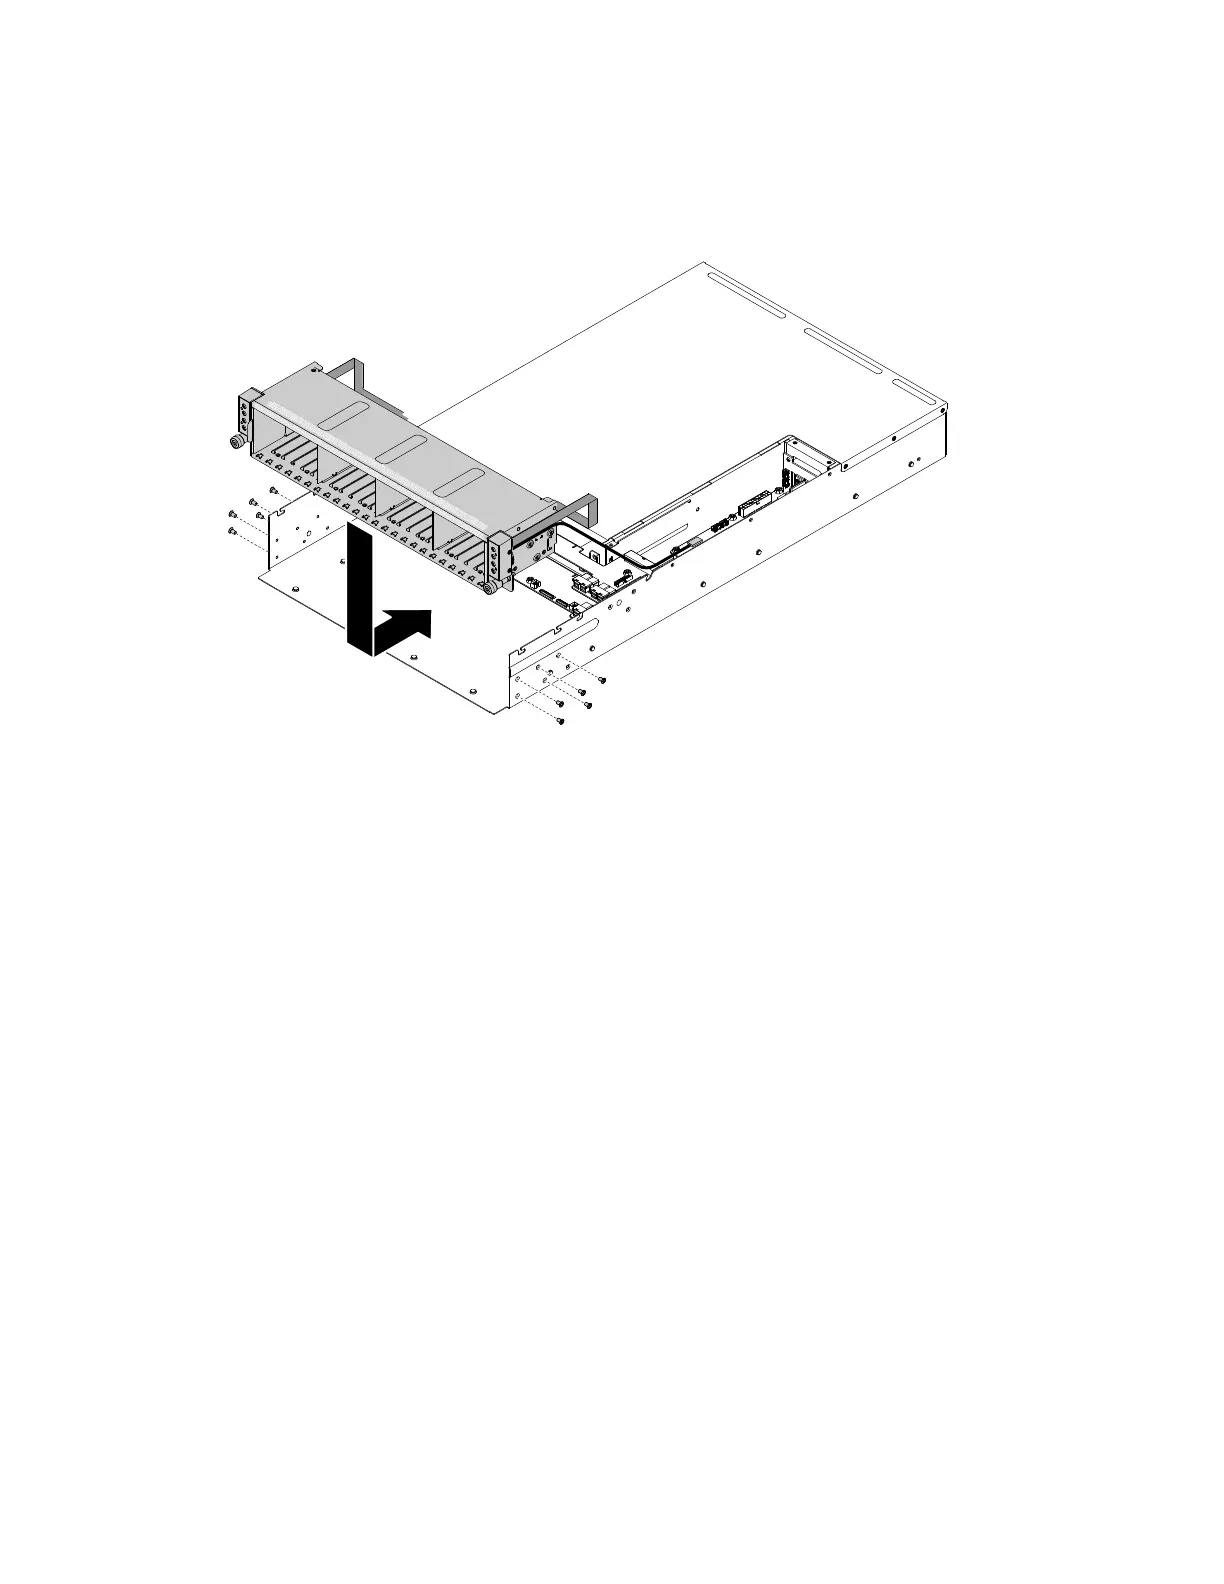
Step3.Aligntheharddiskdrivecageassemblybottomwiththecagepinholesontheserverchassis.
Step4.Lowertheharddiskdrivecageassemblyintotheserver.Presstheharddiskdrivecageassembly
inwarduntilitissecurelyseated.
Figure64.Harddiskdrivecageinstallation
Step5.Tightentheharddiskdrivecagewith10M3screws.
Step6.Reinstalltheharddiskdrivebackplaneandconnectthecables.
Step7.Reinstallthecables,includingharddiskdrivebackplaneconfigurecable(x1),harddiskdrive
backplanepowercable(x2),SAScables(x8),thermalsensorcable(x1)andfrontI/Ocable(x2).
Step8.Reinstallthesystemfan(see“Replacingasystemfan”onpage89).
Step9.Reinstallthesystemmanagementboardcover(see“Installingthesystemmanagementboard
cover”onpage85).
Step10.Reinstallthefancagecover(see“Installingthefancagecover”onpage83).
Step11.Reinstalltheharddiskdrive(see“Installingahot-swapharddiskdrive”onpage91).
1.Installtheserverintotherackenclosureandpushtheserverintotherackuntilitclicksintoplace.
2.Reconnectthepowercordsandanycablesthatyouremoved.
3.Turnontheperipheraldevicesandtheserver.
Removingamicroprocessorandheatsink
Usethisinformationtoremoveamicroprocessorandheatsink.
•Microprocessorsaretoberemovedonlybytrainedtechnicians.
Important:Alwaysusethemicroprocessorinstallationtooltoremoveamicroprocessor.Failingtouse
themicroprocessorinstallationtoolmaydamagethemicroprocessorsocketsonthesystemboard.Any
damagetothemicroprocessorsocketsmayrequirereplacingthesystemboard.
Chapter5.Removingandreplacingservercomponents125