Step1.InstalltheadapterinthePCIriser-cardassembly(see“Replacinganadapter”onpage109).
Step2.ReconnectanyadaptercablesthatyoudisconnectedwhenyouremovedthePCIriser-card
assembly.
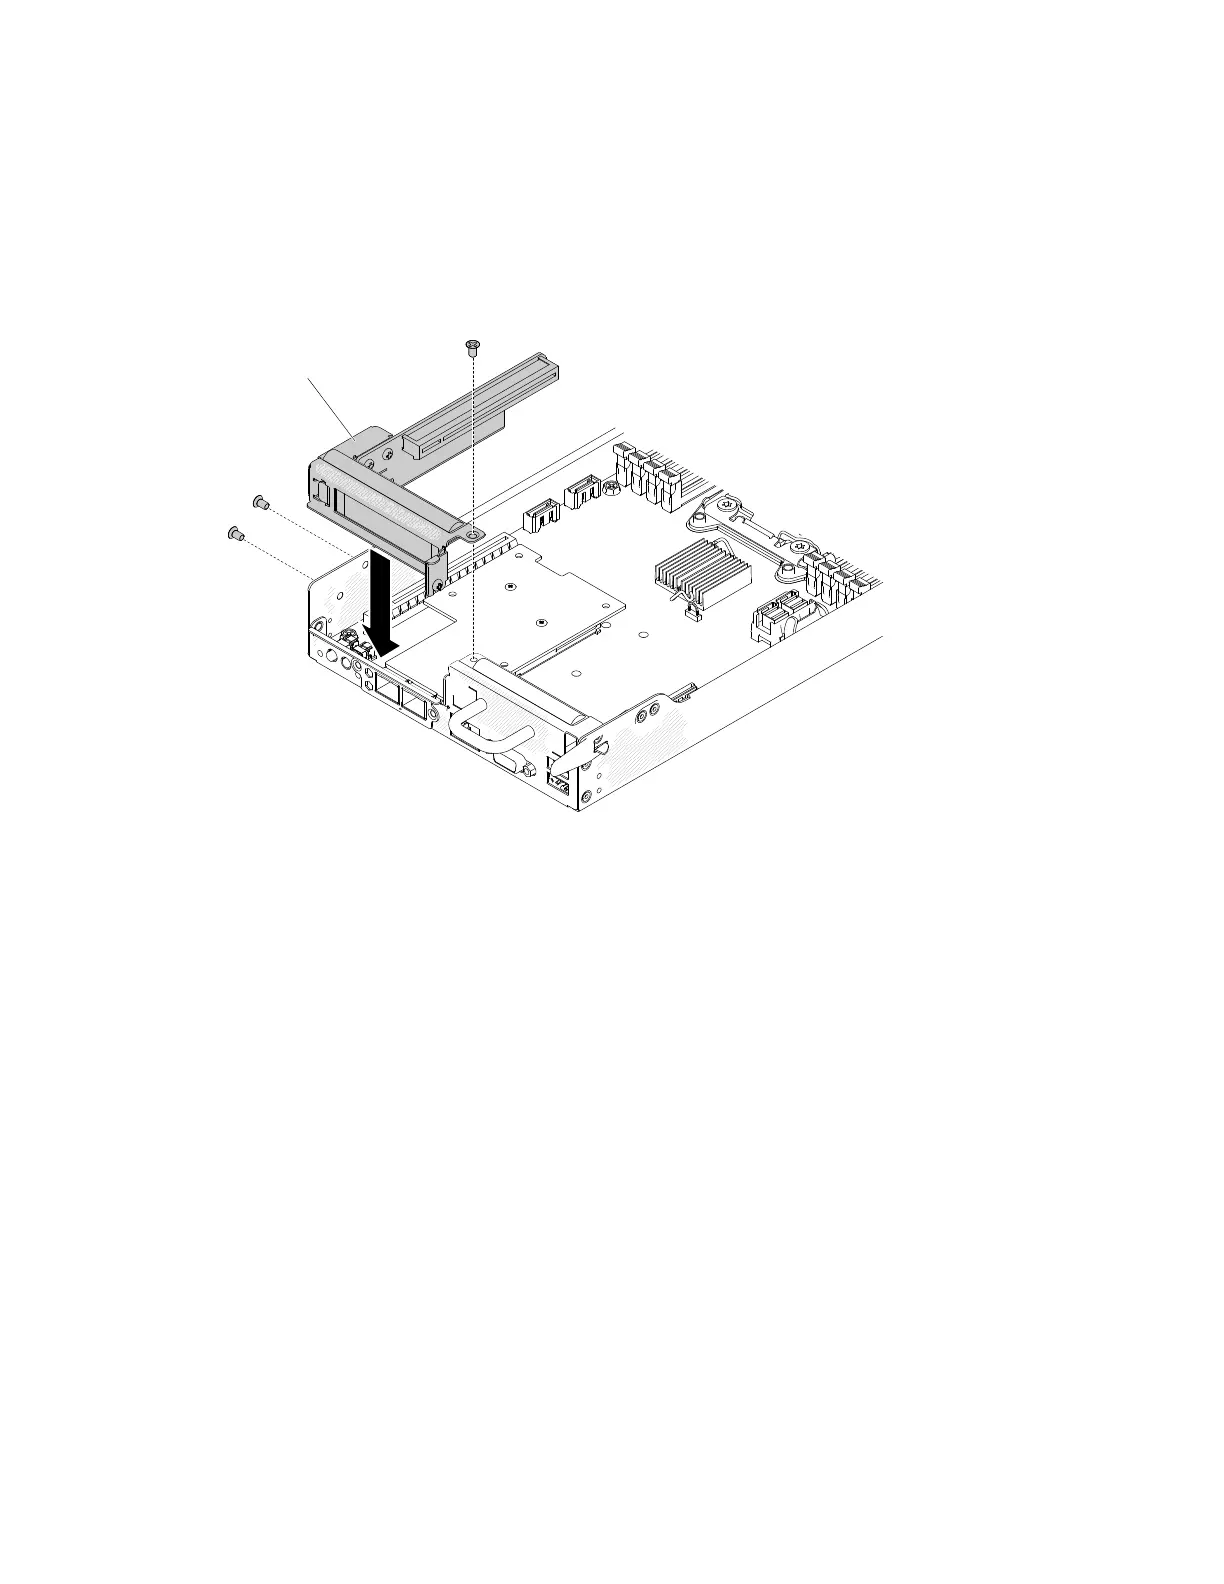
Step3.CarefullyalignthePCIriser-cardassemblywiththeguidesontherearoftheserverandwiththe
PCIriser-cardconnectoronthesystemboard;then,pressdownonthePCIriser-cardassembly.
Makesurethattheriser-cardassemblyisfullyseatedintheconnectoronthesystemboard.
Figure58.PCIriser-cardassemblyinstallation
Step4.TightenthePCIriser-cardassemblywith3M3screws.
Step5.Reinstallcomputenode(see“Installingacomputenodeinachassis”onpage77).
1.Installtheserverintotherackenclosureandpushtheserverintotherackuntilitclicksintoplace.
2.Reconnectanycablesthatyouremoved.
3.Turnontheperipheraldevicesandtheserver.
RemovingaSATADOM
UsethisinformationtoremoveaSATADOM.
Readthesafetyinformationin“Safety”onpagevand“Installationguidelines”onpage75.
Ifyouarereplacingaservercomponentorinstallinganoptionaldeviceintheserver,youneedtotake
outthenodeoutfromtherackenclosure,turnofftheserverandperipheraldevices,anddisconnectall
externalcables.
ToremoveaSATADOM,completethefollowingsteps.
Step1.Disconnecttheexternalcablesfromthecomputenode.
Step2.Removethecomputenode(see“Removingacomputenodefromachassis”onpage77).
Step3.PressthelatchoftheSATADOM.
Chapter5.Removingandreplacingservercomponents119