Heat sink for cpu 1
Heat sink for cpu 2
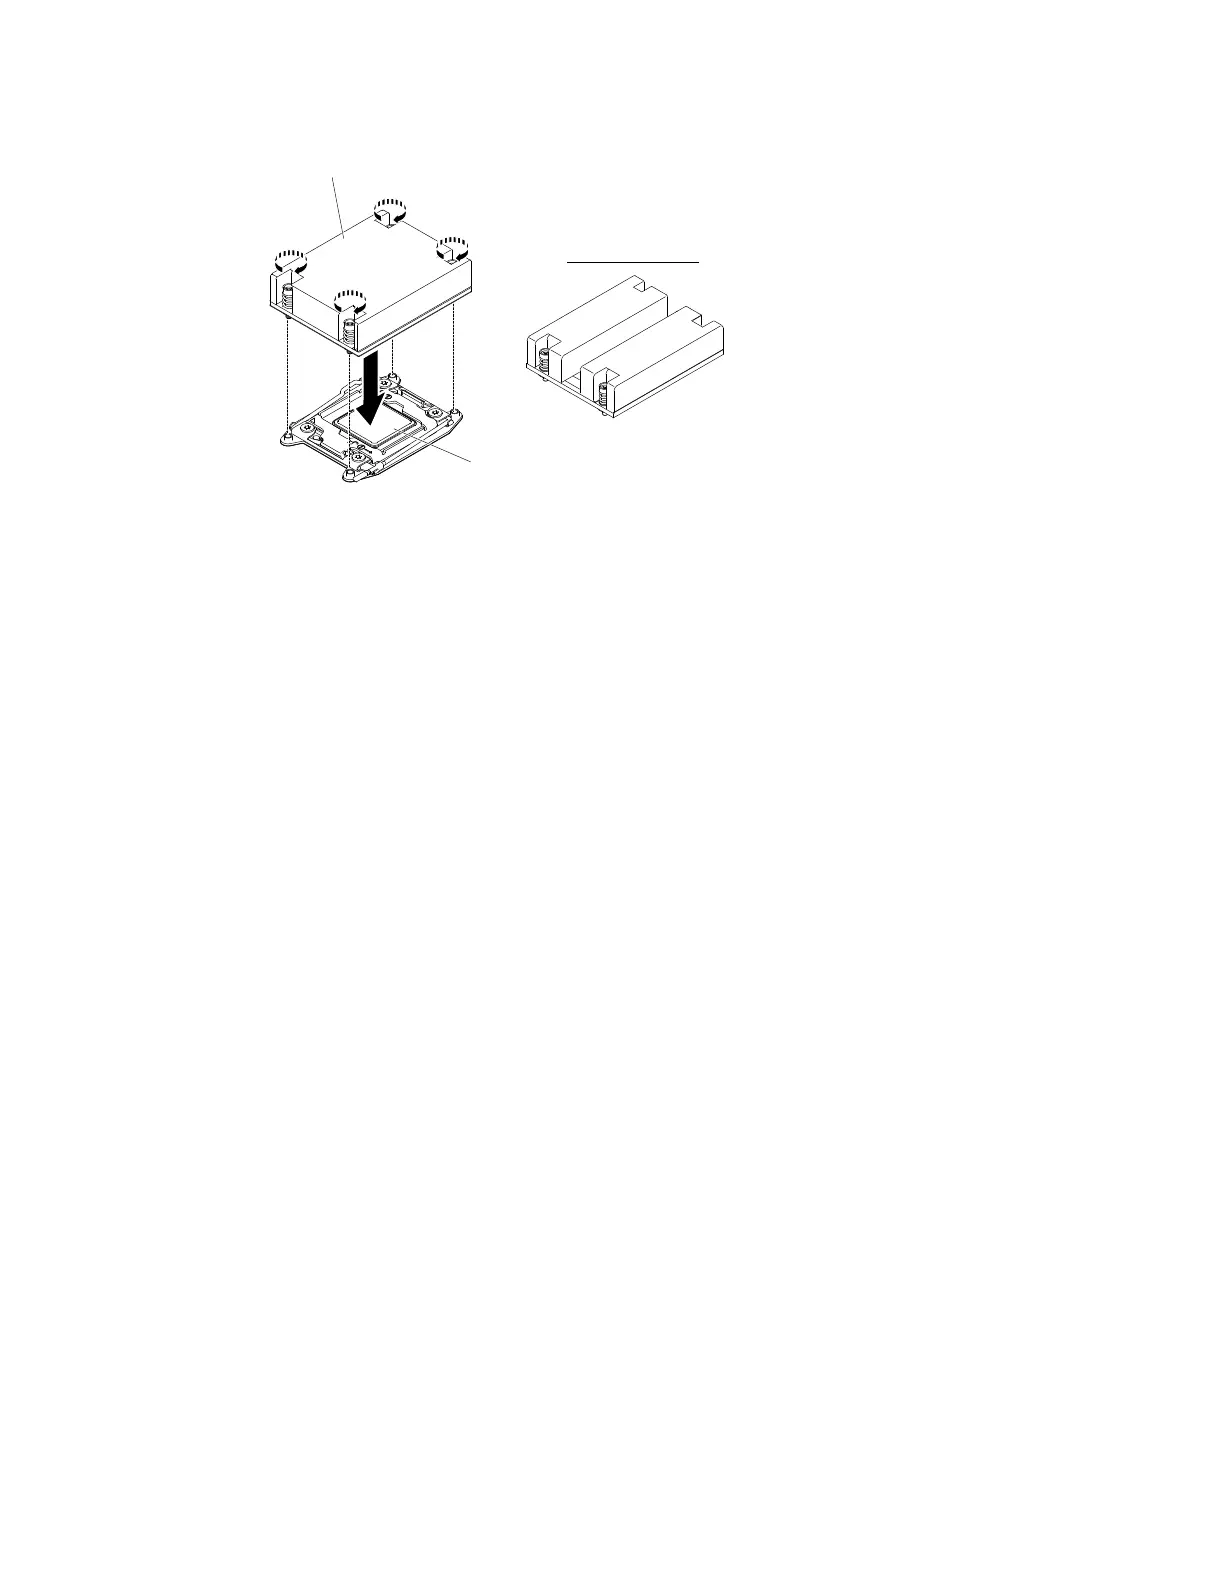
Microprocessor
Figure82.Heatsinkinstallation
c.Alignandplacetheheatsinkontopofthemicroprocessorintheretentionbracket,thermal
materialsidedown.
d.Pressfirmlyontheheatsink.
e.Pressdownonthecenteroftheheatsink;then,pressfirmlyonthecaptivescrewsandtighten
them,alternatingbetweenthescrewsinafigure-8patternasillustratedontheheatsinklabel
untiltheyaretightened.Youcancausedamagetothemicroprocessorifyoutightenthe
screwsononesidefirst,ratherthanrotating.Rotateeachscrewonefullrotationatatime.
Repeatthisprocessuntilthescrewsaretightened.
Step10.Reinstalltheairbaffle(see“Installingtheairbaffle”onpage87).
Step11.Reinstallcomputenode(see“Installingacomputenodeinachassis”onpage77).
Step12.Slidetheserverintotherack.
Step13.Reconnectanycablethatyouremoved.
Step14.Turnontheperipheraldevicesandtheserver.
Thermalgrease
Thethermalgreasemustbereplacedwhenevertheheatsinkhasbeenremovedfromthetopofthe
microprocessorandisgoingtobereusedorwhendebrisisfoundinthegrease.
Whenyouareinstallingtheheatsinkonthesamemicroprocessorthatitwasremovedfrom,makesure
thatthefollowingrequirementsaremet:
•Thethermalgreaseontheheatsinkandmicroprocessorisnotcontaminated.
•Additionalthermalgreaseisnotaddedtotheexistingthermalgreaseontheheatsinkandmicroprocessor.
Notes:
•Readthesafetyinformationthatbeginson“Safety”onpagev.
•Readthe“Installationguidelines”onpage75.
•Read“Handlingstatic-sensitivedevices”onpage76.
Toreplacedamagedorcontaminatedthermalgreaseonthemicroprocessorandheatsink,completethe
followingsteps:
Step1.Placetheheatsinkonacleanworksurface.
Chapter5.Removingandreplacingservercomponents137