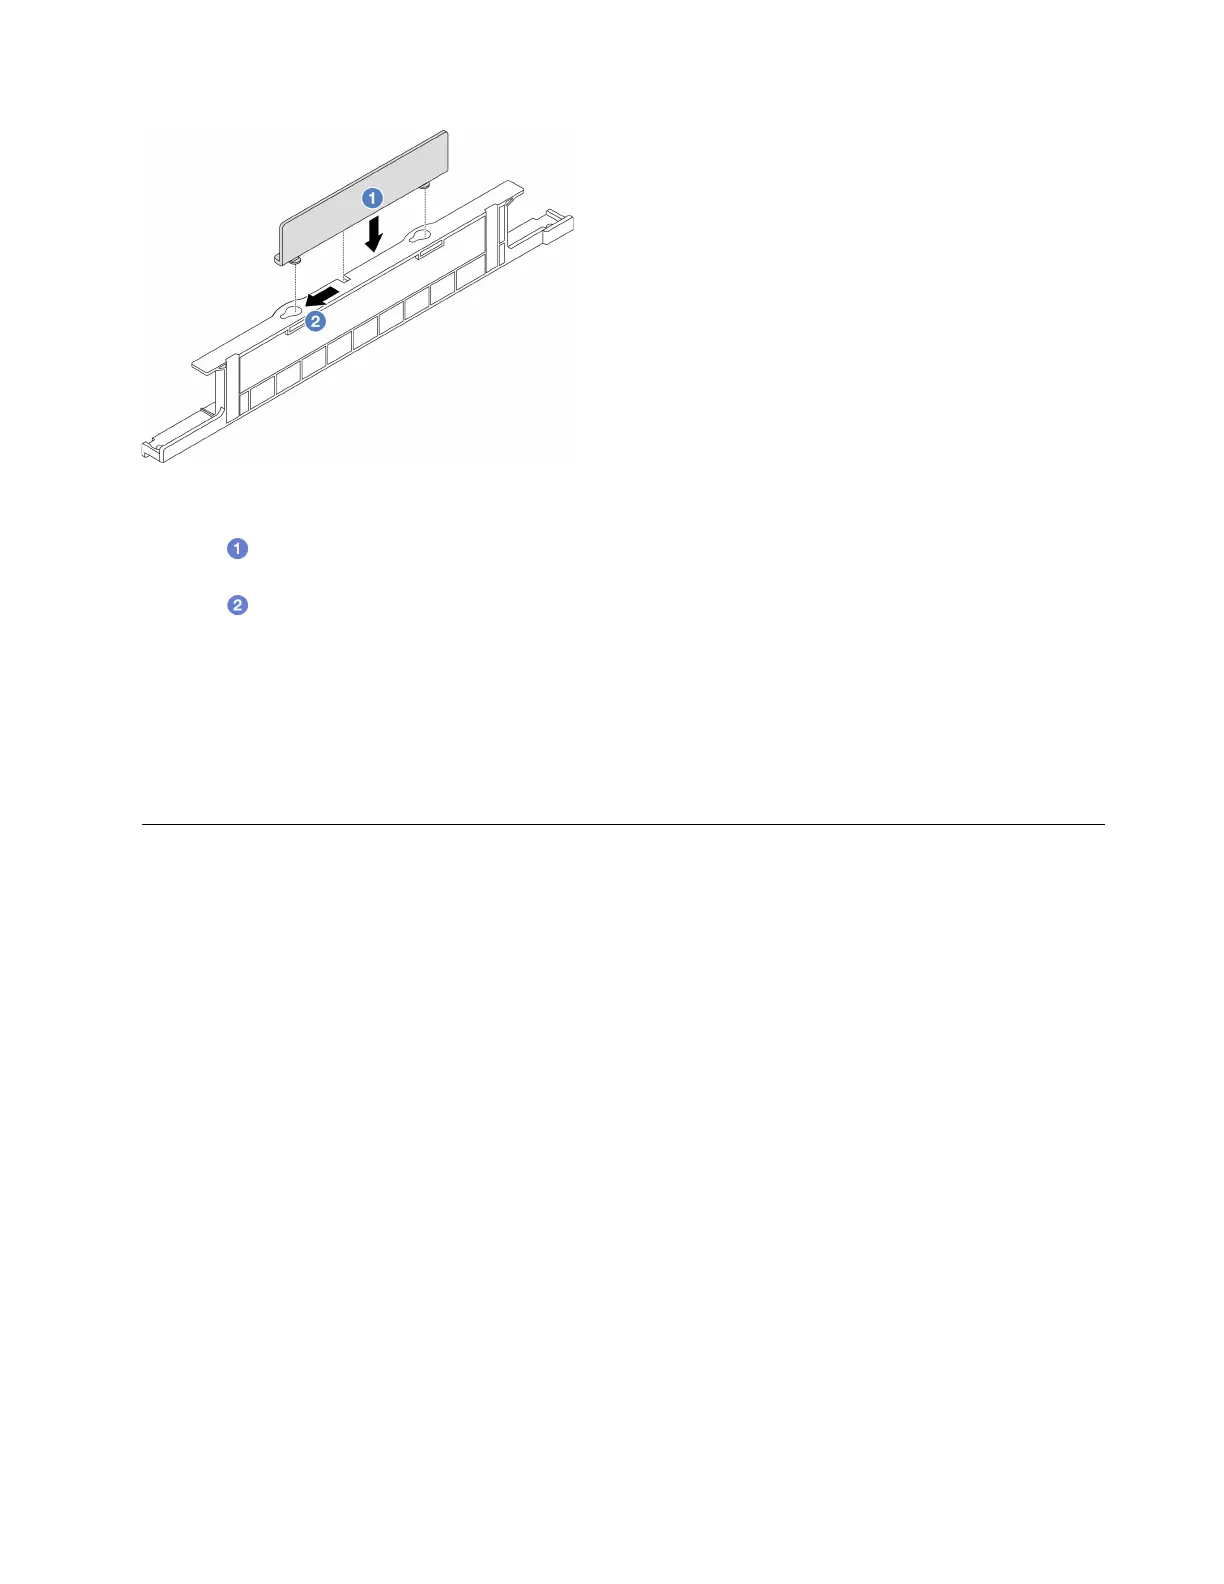
Figure 34. Installing the 2U cable wall bracket
Step 1.
Align the 2U cable wall bracket with the two keyholes on the 1U cable wall bracket, and lower
the 2U cable wall bracket onto the 1U cable wall bracket.
Step 2.
Slide the 2U cable wall bracket towards the small openings of the keyholes until it is seated in
place.
After you finish
1. Install any parts you have removed. See
Chapter 5 “Hardware replacement procedures” on page 47.
2. Connect any cables. See
Chapter 6 “Internal cable routing” on page 281.
3. Complete the parts replacement. See
“Complete the parts replacement” on page 279.
CMOS battery (CR2032) replacement
Follow instructions in this section to remove and install the CMOS battery.
• “Remove the CMOS battery” on page 77
• “Install the CMOS battery” on page 79
Remove the CMOS battery
Follow instructions in this section to remove the CMOS battery.
About this task
The following tips describe information that you must consider when removing the CMOS battery.
• Lenovo has designed this product with your safety in mind. The lithium CMOS battery must be handled
correctly to avoid possible danger. If you replace the CMOS battery, you must adhere to local ordinances
or regulations for battery disposal.
• If you replace the original lithium battery with a heavy-metal battery or a battery with heavy-metal
components, be aware of the following environmental consideration. Batteries and accumulators that
contain heavy metals must not be disposed of with normal domestic waste. They will be taken back free
of charge by the manufacturer, distributor, or representative, to be recycled or disposed of in a proper
manner.
Chapter 5. Hardware replacement procedures 77

 Loading...


