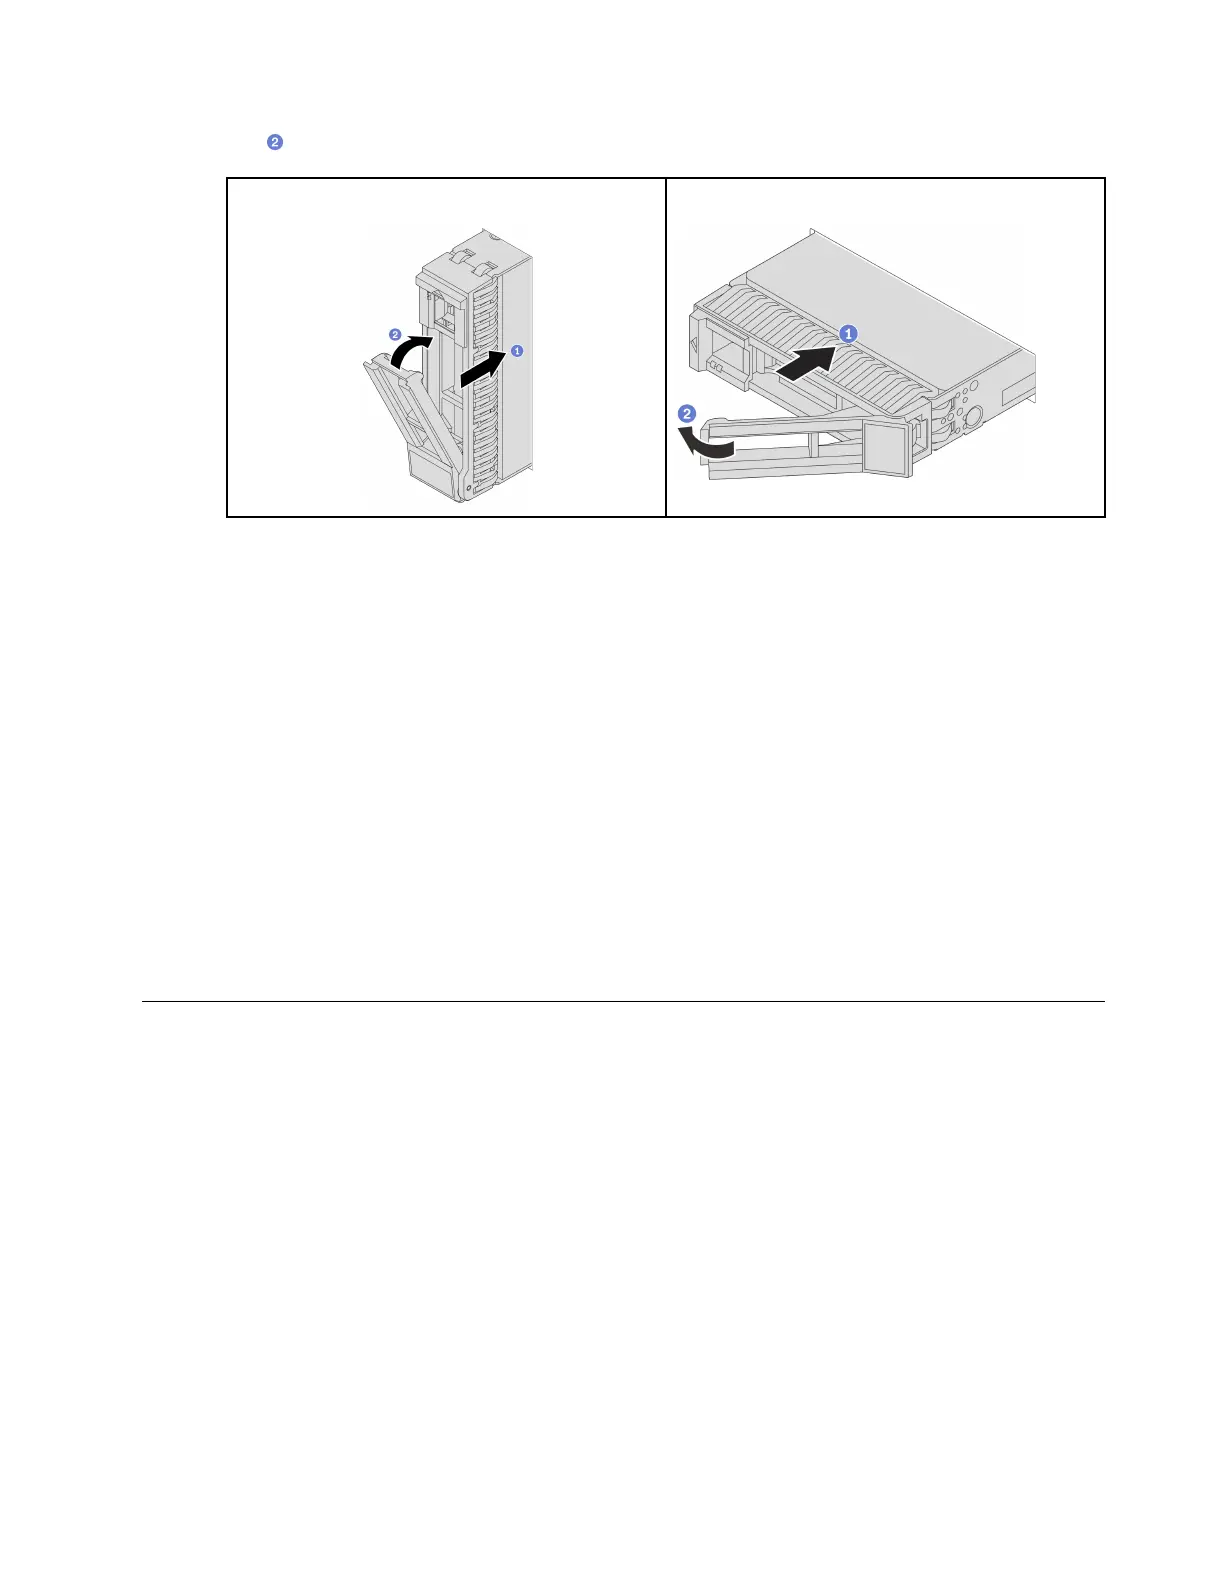
b. Close the drive tray handle to lock the drive in place.
2.5-inch hot-swap drive 3.5-inch hot-swap drive
Step 3. Check the drive status LED to verify that the drive is operating correctly.
• If the yellow drive status LED is lit continuously, that drive is faulty and must be replaced.
• If the green drive activity LED is flashing, the drive is being accessed
Step 4. Continue to install additional hot-swap drives if necessary.
After you finish
1. Reinstall the security bezel if you have removed it. See
“Install the security bezel” on page 246.
2. Use the Lenovo XClarity Provisioning Manager to configure the RAID if necessary. See
https://
pubs.lenovo.com/lxpm-overview/
.
3. If you have installed U.3 NVMe drives on a 2.5-inch AnyBay 8-bay backplane for Tri-mode, enable U.3
x1 mode for the selected drive slots on the backplane through the XCC Web GUI. See
“U.3 NVMe drive
can be detected in NVMe connection, but cannot be detected in Tri-mode” on page 514
.
Demo video
Watch the procedure on YouTube
Internal RAID/HBA/expander adapter replacement
Follow instructions in this section to remove and install an internal customer form factor (CFF) RAID adapter,
internal CFF HBA adapter, or internal CFF RAID expander adapter.
The server supports RAID/HBA adapters in two form factors:
• Customer form factor (CFF): RAID/HBA adapters in this form factor are supported only when two
processors are installed. CFF RAID/HBA adapters are installed between the front backplane and fan cage.
• Standard form factor (SFF): RAID/HBA adapters in this form factor are installed in the PCIe expansion
slots, see
“Rear PCIe adapter and riser assembly replacement” on page 231.
Remove an internal RAID/HBA/expander adapter
Follow instructions in this section to remove an internal CFF RAID adapter, internal CFF HBA adapter, or
internal CFF RAID expander adapter.
About this task
Chapter 5. Hardware replacement procedures 135

 Loading...


