Page 12 of 88 TP1A072–3 English
Aug 2017
Linx 10 Operating Manual —
Create, edit, and manage messages
Linx 10
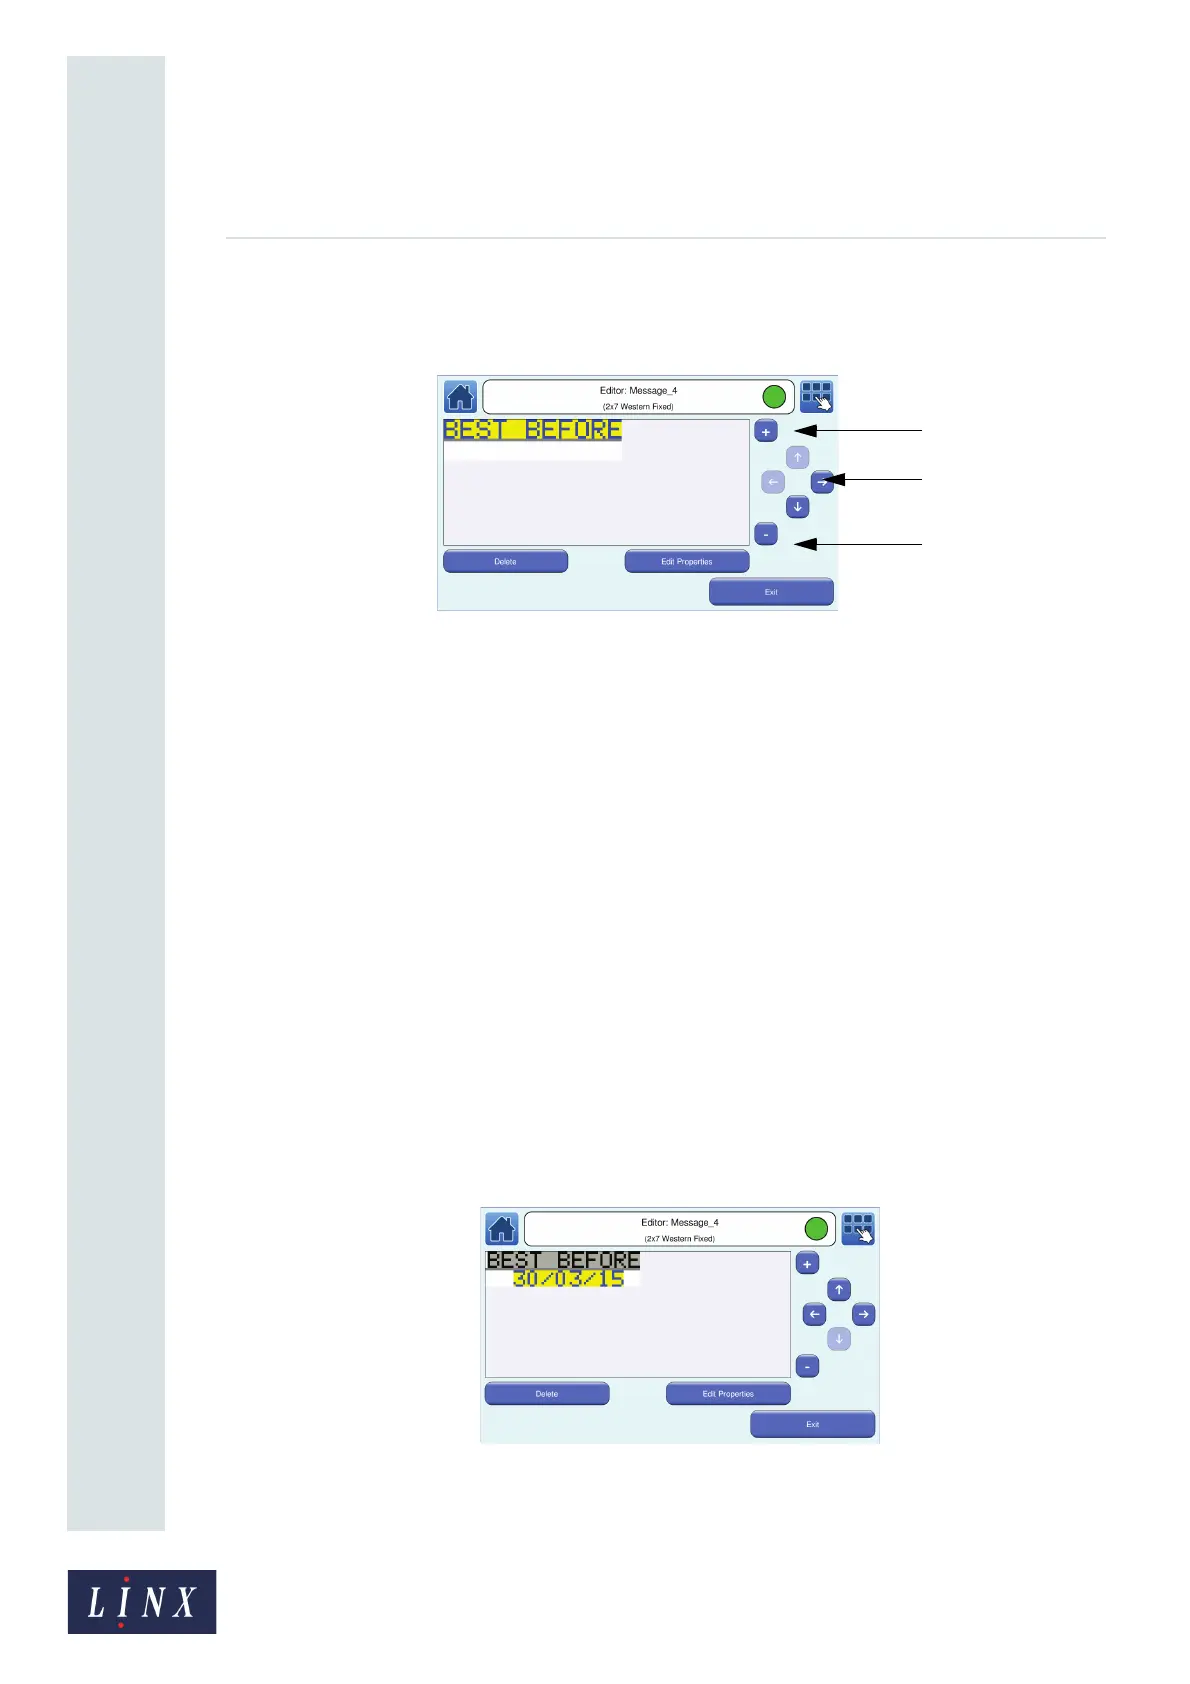
3 When the text is complete, touch the Enter button to display the Editor screen with the
entered Text field. The start of the field is inserted in the message at the point where you
touched the screen. The selected field is highlighted in yellow.
Figure 8. Editor screen: field selected
NOTE: If you use a Fixed message style, you cannot move fields across line boundaries. If
you use a Flexible message style, you can place fields anywhere within the message
area.
To add another field to your message, touch within the message boundary. See ‘Edit a
message’ on page 17 for more information about how to edit a message.
Touch the Delete button to delete a highlighted text field. Touch the Edit Properties button to
display the Text Field Properties screen to change the properties of the Text field (for
example, Font Size).
3.1.2 Add a Date field
1 Touch the screen at the required insertion point. Make sure that the field does not overlap
any existing field. The printer displays the Select Field Type screen (see Figure 2 on page 11).
2 On the Select Field Type screen, touch the Date button to display the Select Date Format
screen with a list of available date formats.
3 Use the scroll bar to scroll through the list and find the required date format, or touch the
Find button to search for a date format.
4 Touch the name of the required date format (for example, dd/MM/yy). The printer displays
the Editor screen and shows the content of your message with the field highlighted in yellow.
Figure 9. Message with Date field
89060
Move field
Zoom button
Zoom button
buttons
89062