Page 60 of 88 TP1A072–3 English
Aug 2017
Linx 10 Operating Manual —
Add other fields
Linx 10
Example 1: Daily shift code
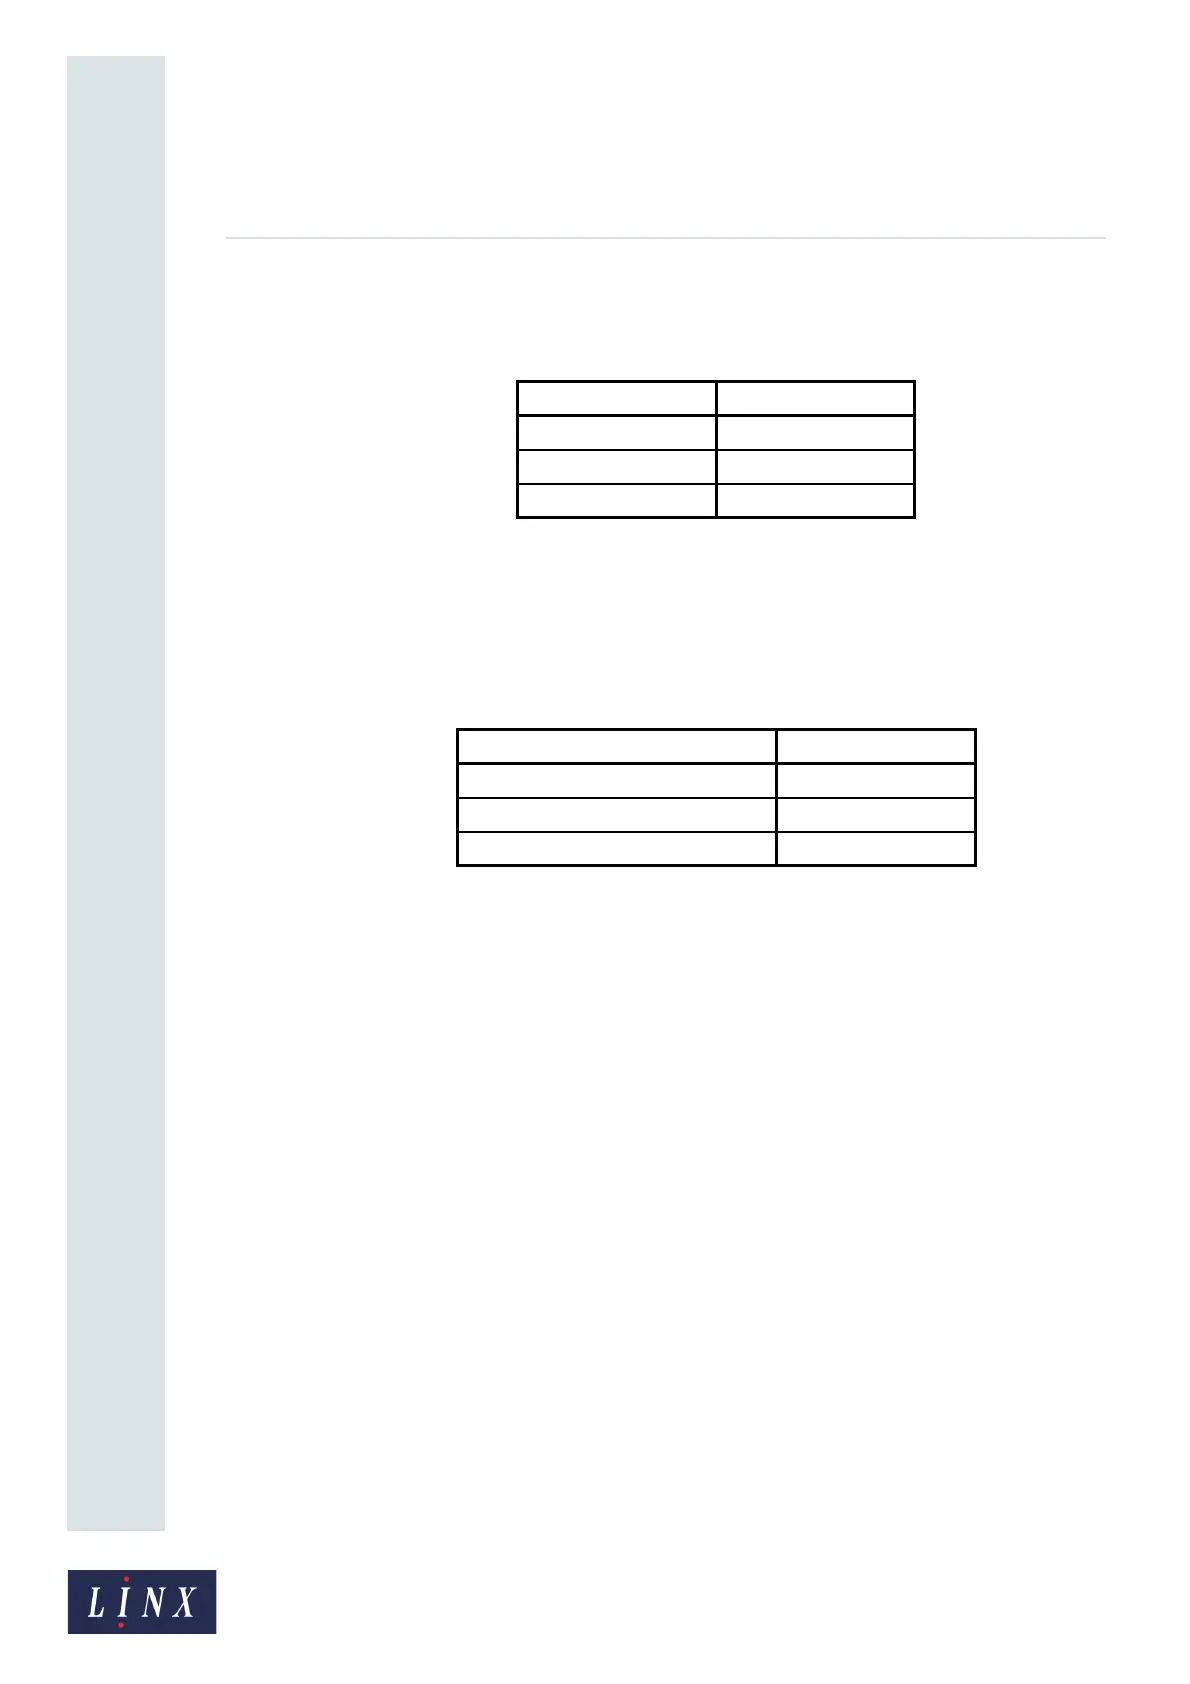
This type of shift code is repeated each day and indicates the time during which a message was
printed. Table 6-2 shows an example.
The start time of each period defines the end of the previous period.
Example 2: Weekly shift code
This type of shift code is repeated each week and indicates the day on which a message was printed.
Table 6-3 shows an example.
When you create a Weekly shift code, you can set the time at which the code changes on each day. The
start day and time of each period defines the end of the previous period.
6.3.2 Create a shift code field
To add a shift code field to a message:
1 Create and select a message, or find and select an existing message, as described in ‘Create,
edit, and manage messages’ on page 10.
2 Touch the Edit this Message button.
3 Touch the screen at the required insertion point. Make sure that the field does not overlap
any existing field. The printer displays the Select Field Type screen.
Time Shift code
06:00 to 14:00 “AAA”
14:00 to 22:00 “BBB”
22:00 to 06:00 “CCC”
Table 6-2. Daily shift codes
Day and time Shift code
Monday 00:00 to Friday 23:59 “AAA”
Saturday 00:00 to Saturday 23:59 “BBB”
Sunday 00:00 to Sunday 23:59 “CCC”
Table 6-3. Weekly shift code