Page 15 of 88 TP1A072–3 English
Aug 2017
Linx 10 Operating Manual —
Create, edit, and manage messages
Linx 10
Enter the first letter of the message name (for example, the letter “C”). The printer displays the first
message name that starts with the letter entered, together with the letters entered and the number of
messages in the store in the printer status bar. Use the up and down arrow buttons to move through
the message list or continue to enter letters (for example, “H”) until the required message name
(“CHEESE 150GM”) is highlighted. You can use the Backspace button to delete entered characters.
You can touch the Cancel button to return to the Select Message screen, or the Home button to return
to the Home screen.
3.4 Print your message
3.4.1 Print trigger
You can use a product sensor or other device to trigger a print, or you can set the printer to print
continuously. The Print Trigger option on the Advanced Line Settings screen controls the print
actions of the printer (see ‘Print Trigger’ on page 43). In its default configuration the printer waits for
a trigger signal before each message is printed.
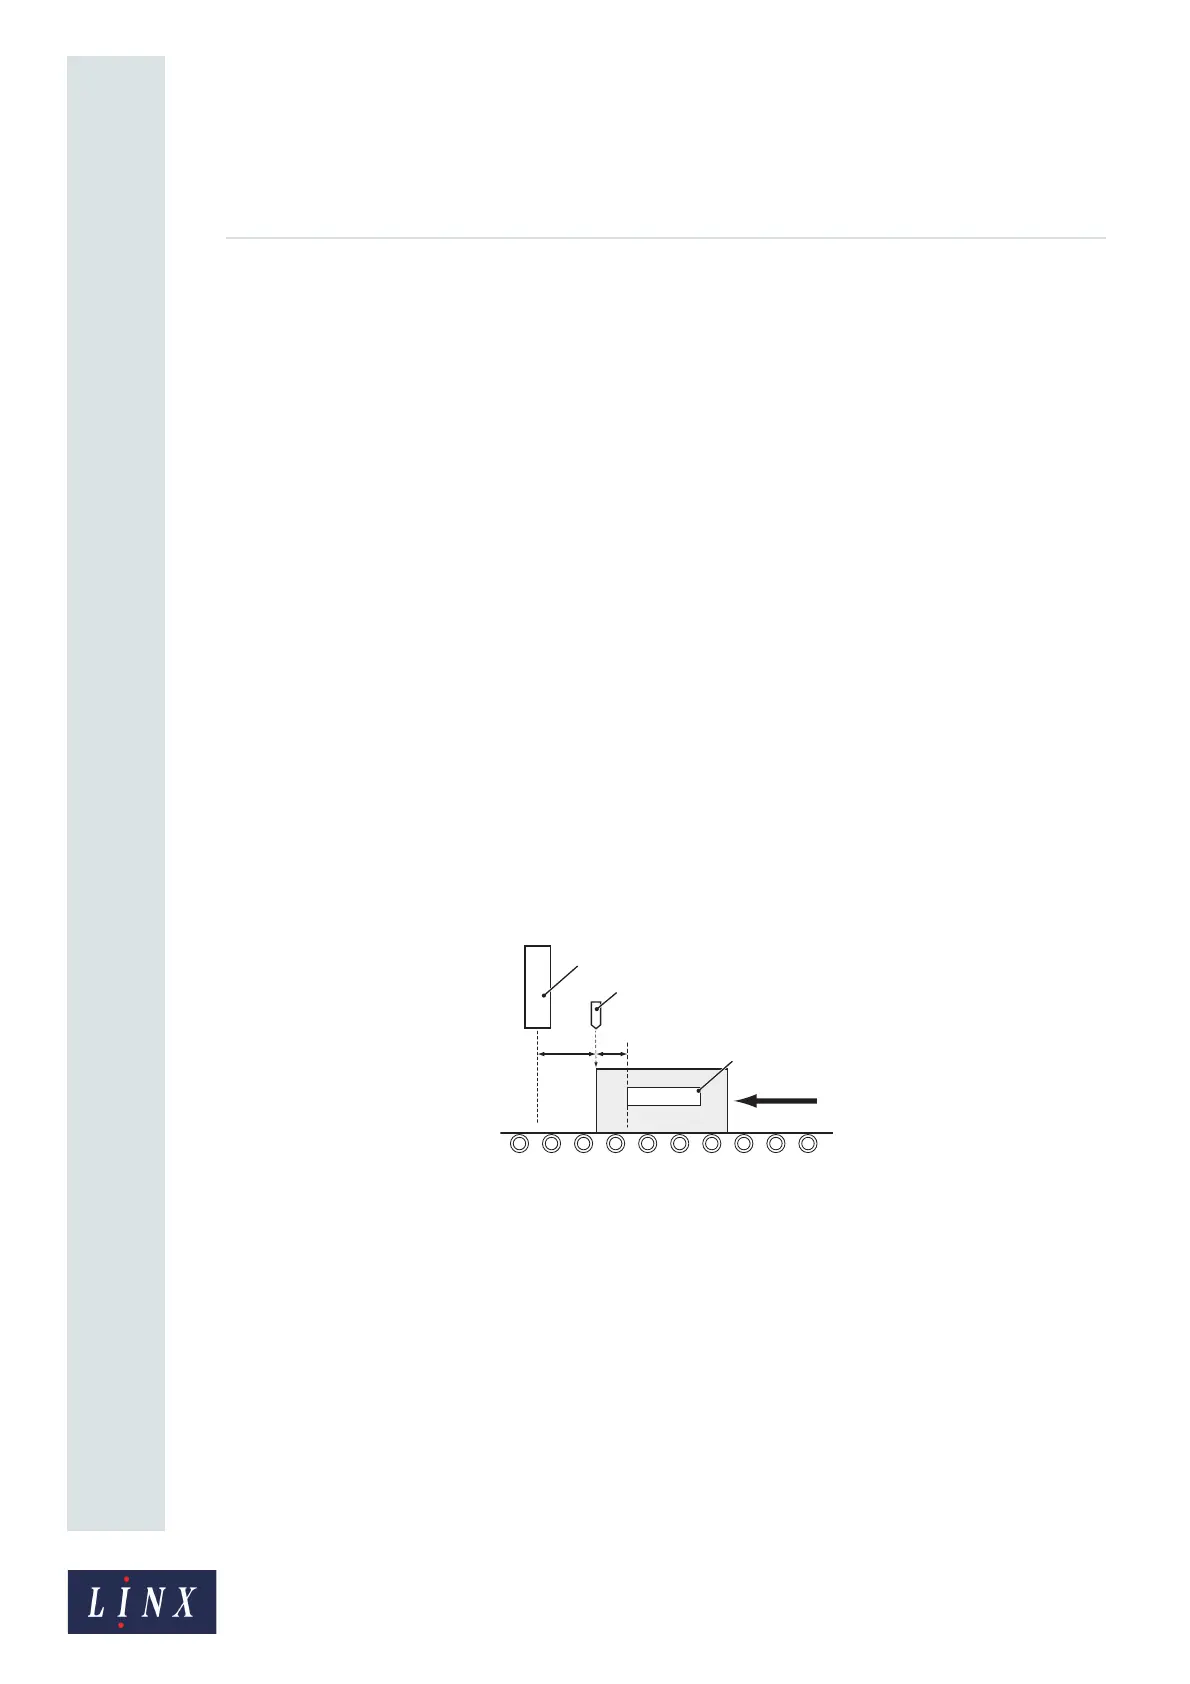
3.4.2 Adjust the print position
This section shows you how to make sure that the printed message appears in the correct position on
the product. Figure 12 helps you understand the print position. The large arrow shows the direction
of the movement of the product. In this example, there is a fixed distance (C) between the printhead
(A) and the sensor (B) that detects the edge of the product. This distance is the ‘Trigger to Printhead
Distance’. The distance is zero for some installations. The Trigger to Printhead Distance is a setting
associated with a production line. The value is set during printer installation, but if necessary you can
adjust the value on the Line Settings screen (see ‘Trigger to Printhead Distance’ on page 40)
Figure 12. Print position
The trigger signal from the sensor occurs at the edge of the product, but the label (E) is not at the edge
of the product. The distance between the sensor position (B) and the print position (E) is the Print
Delay (D). The Print Delay is a setting associated with an individual message. You can adjust the
value for each message to make sure that the printed message appears in the right position on the
product.
XYZ123
69038
B
E
D
C
A