Page 53 of 88 TP1A072–3 English
Aug 2017
Linx 10 Operating Manual —
Line and message settings
Linx 10
Change Message Orientation
To change the message orientation, touch the Message Orientation button you require. The selected
button is highlighted.
Figure 49. Message Orientation with Horizontal Flip selected
5.5.2 Print Delay
The Print Delay is the horizontal distance (in inches or millimetres) between the printhead and the
start of the message on the product, measured when the print triggers. You can change the Print
Delay to make sure that the printed message appears in the correct position on the product.
Change the Print Delay
Touch the Print Delay button to display the Enter Print Delay screen. To change the Print Delay:
• Use the keypad to enter a new Print Delay value.
• Use the plus and minus buttons to increase or decrease the Print Delay value.
Touch the Save button to save the selected value and return to the Message Settings screen. Touch
the Cancel button to discard any changes and return to the Message Settings screen.
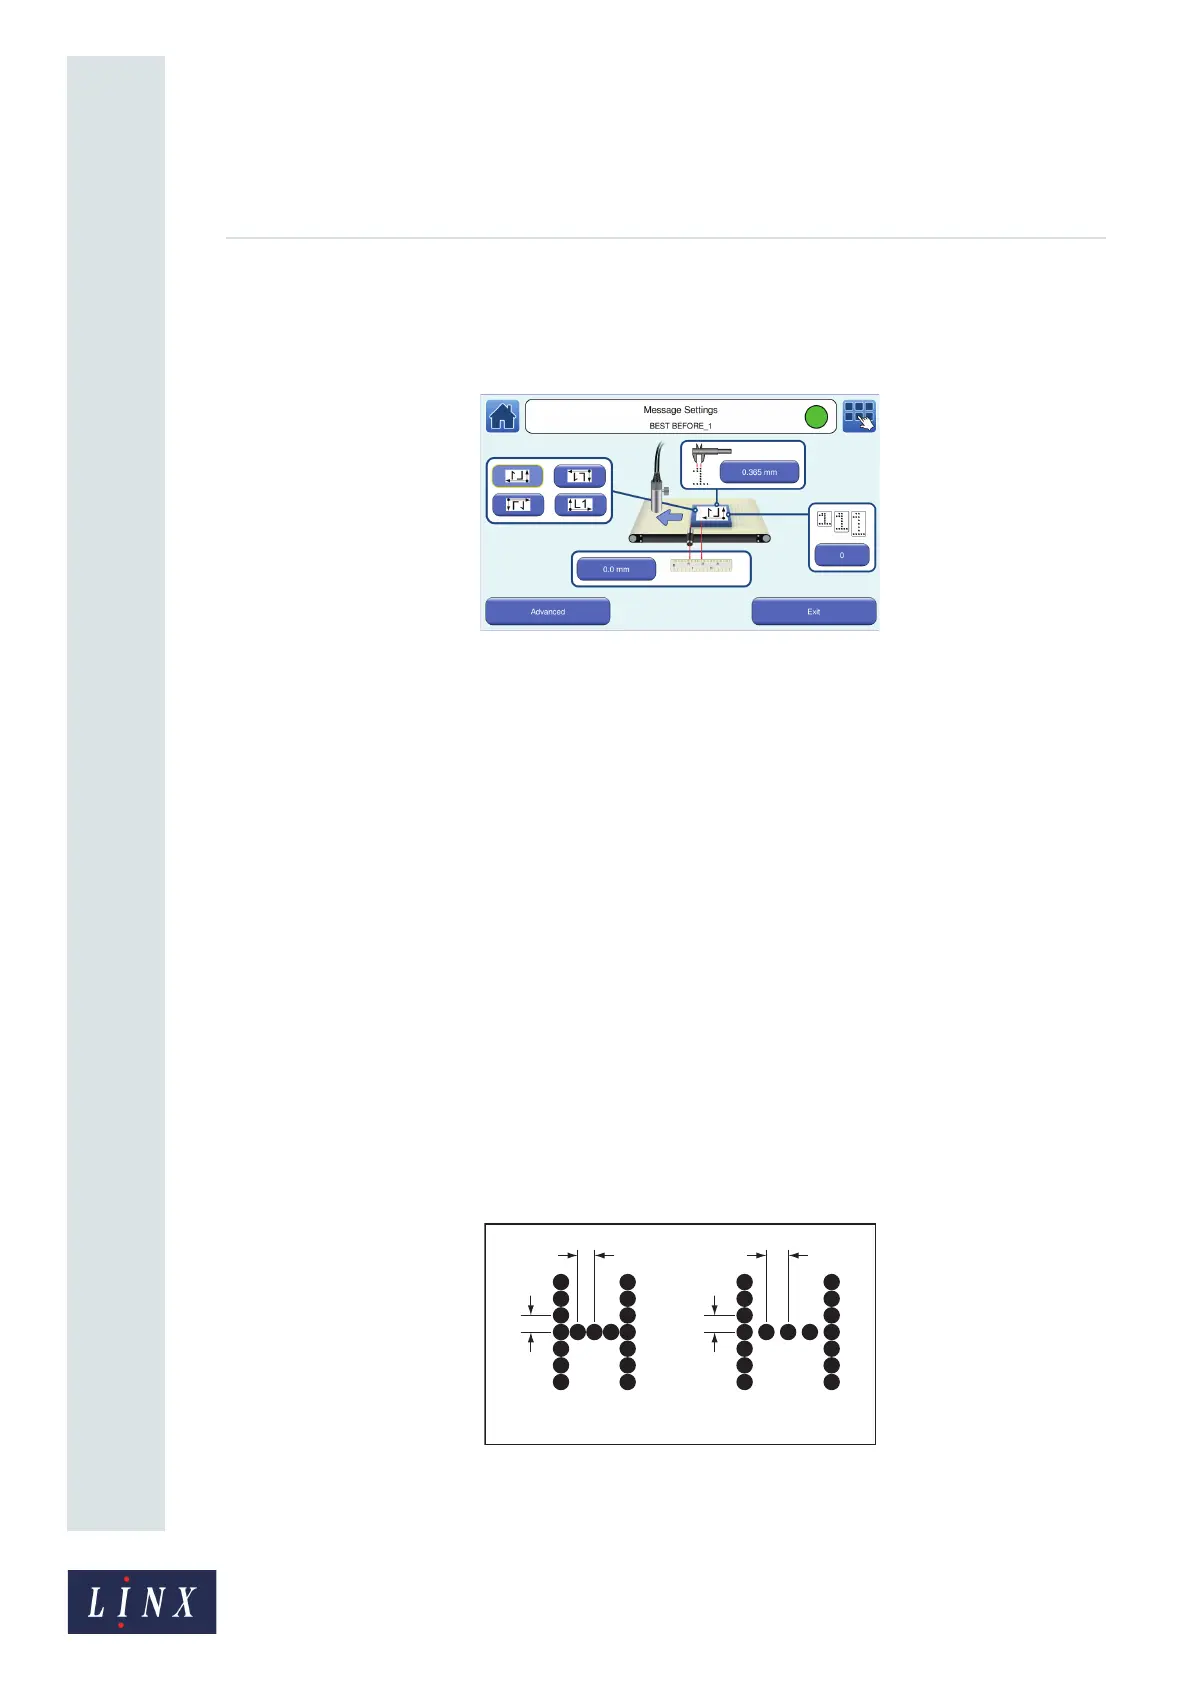
5.5.3 Print Width
The Print Width setting is the horizontal distance between the drops in the message characters. To
maintain good print quality, the vertical distance between drops in the message must be equal to the
horizontal distance between drops. You can use the Print Width option to adjust the horizontal
distance between drops in the message characters.
Figure 50. Distance between drops in a message