Page 20 of 88 TP1A072–3 English
Aug 2017
Linx 10 Operating Manual —
Create, edit, and manage messages
Linx 10
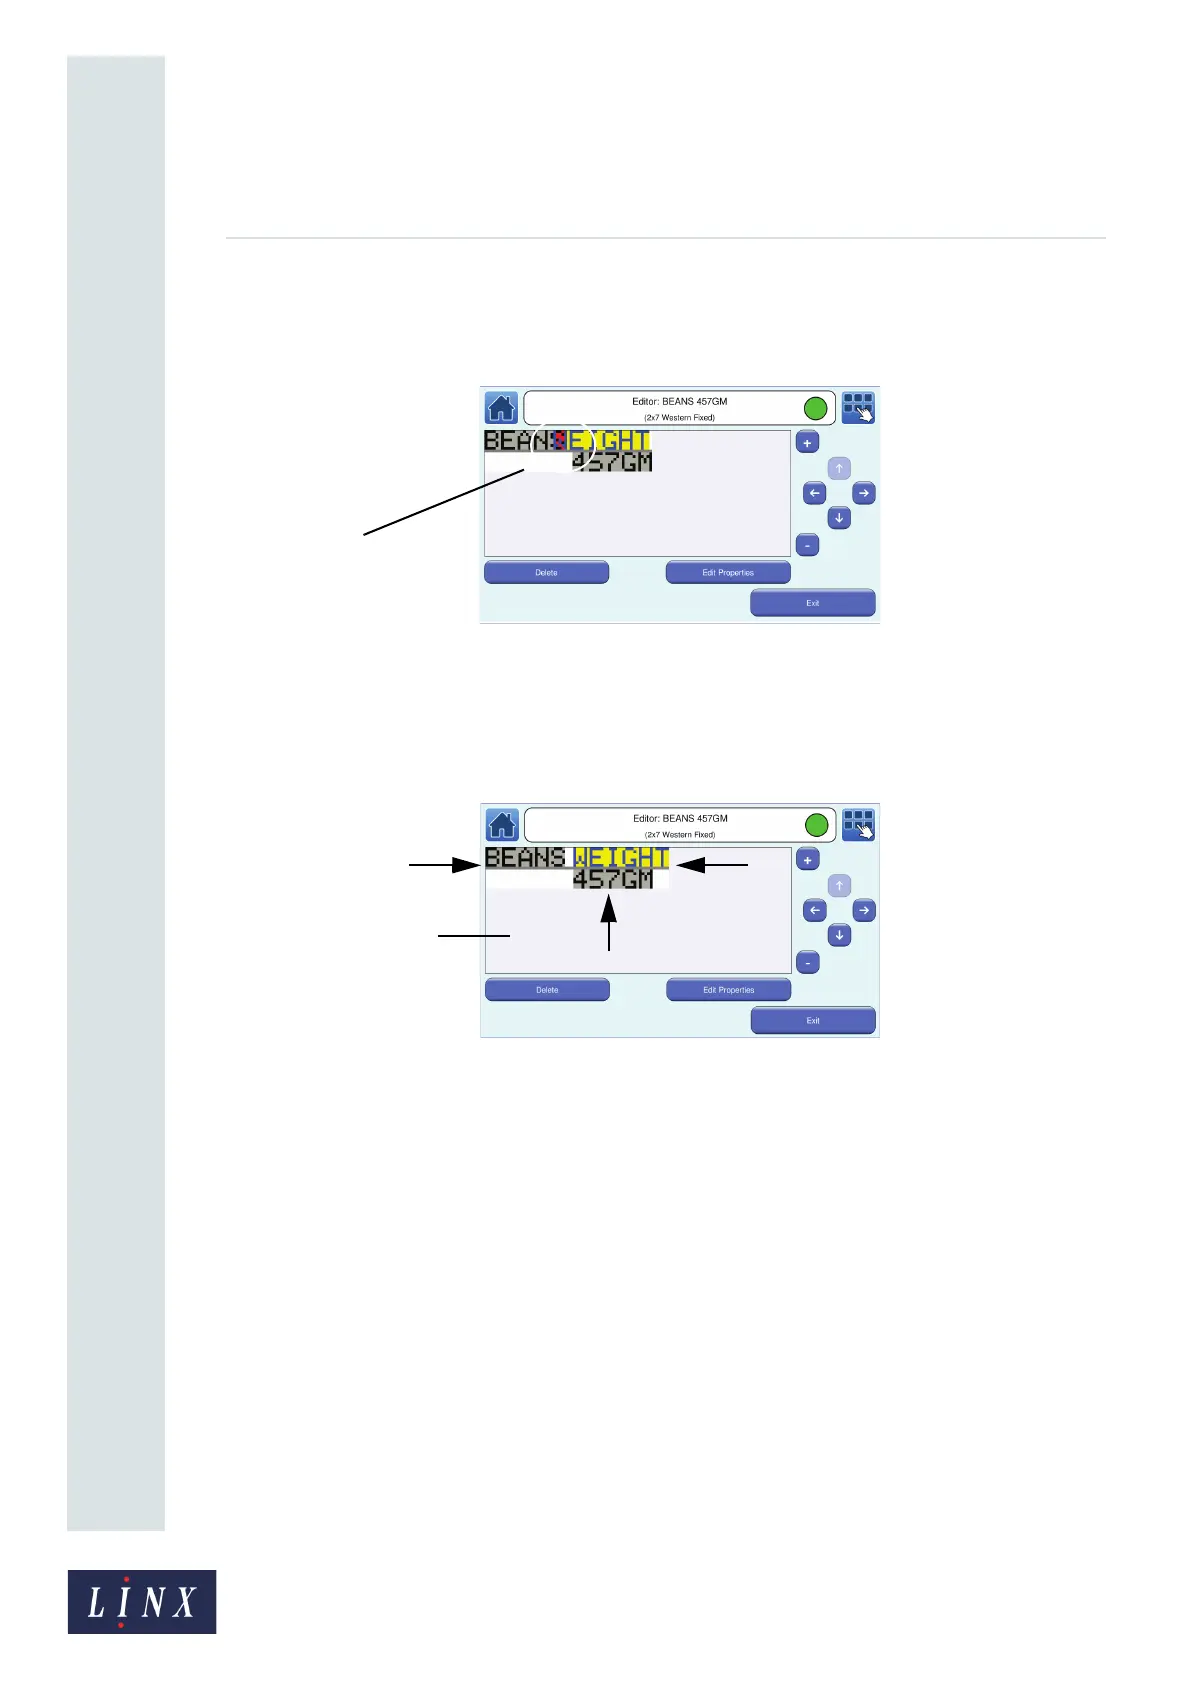
Overlapping fields
If the new field touches an existing field, the printer highlights the overlap (item ‘A’ in Figure 18) in
red.
Figure 18. Field overlap
To correct the problem, you must move the new field (see ‘Move a field’ on page 23), or delete the
field (see ‘Delete a field’ on page 23). If you move a field, make sure that the field is within the
message boundary. In Figure 19, the arrows indicate the edge of the message boundary (the message
area is in white). The grey area (‘A’) is outside the boundary:
Figure 19. Message boundary
If a part of the field is outside the message boundary, that part of the field is not printed.
3.6.3 Edit a Text field
1 On the Home screen, touch the Message Store button. Find and select the required message.
2 Touch the Edit button to display the Editor screen, which shows the content of your message.
89078