88
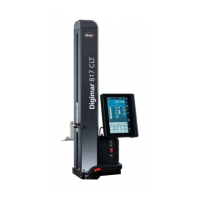
Mahr GmbH • Digimar 817 CLM
6.11 Quick-Mode
The sensitivity can be set.
The types of automatic recognition are as follows:
• With a flat (standard setting) must be switched
between flat and bore with the shift key on the base
of the measuring instrument, as previously
described. The symbol in the status window shows
the actual mode being used. When the flat symbol is
being show then only flat surfaces can be
measured, with the bore symbol only bores can be
measured.
• With a flat / bore the system automatically
recognizes in the „flat mode“ whether a flat or an
extreme point (maximum or minimum) of a bore is
to be measured.
Conduct the contacting of a flat as described, wait
until the acoustic signal (beep) has been emitted,
indicating that the measured value has been
accepted.
When measuring the maximum or minimum point of
a bore proceed as described, once the probe
makes contact within the bore, radically move the
workpiece until the system has automatically found
the maximum or minimum point of the bore and
acknowledged this through emitting an acoustic
signal (beep).
In the „bore mode“ as in the standard settings only
complete bores can be measured.
6.12 Perpendicularity error
The perpendicularity error of a workpiece can be
determined with the following:
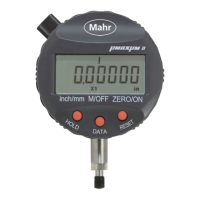
– Incremental probe P1514H
– Digital indicator with an OPTO-RS232 connector
(e.g. MarCator 1081, 1086, 1087)
Also see point 4.4.2 Measuring perpendicularity
error
The column of the height measuring instrument is not
aligned after assembly. It may therefore exhibit a
perpendicularity error of 20 µm over its total length of
600 mm. If the perpendicularity error of a workpiece is
determined by means of an electronic measuring
system, the measuring results are corrected.
1. <-_______
2. Standstill-time
3. Contacting speed
4. Resolution
5. mm/inch
6. Language
7. Date and time
8. LCD settings
9. Beep ON/OFF
10. Auto – off time (min)
11. Quick-Mode
12. Perpendicularity
13. Data and printer
14. Advanced settings
1. <-_______
2. Standstill-time
3. Contacting speed
4. Resolution
5. mm/inch
6. Language
7. Date and time
8. LCD settings
9. Beep ON/OFF
10. Auto – off time (min)
11. Quick-Mode
12. Perpendicularity
13. Data and printer
14. Advanced settings
1. Input 1 OPTO-RS232
2. Input 2 Incremental
• With flat / bore / shaft the system automatically
recognizes in the „flat mode“ whether a flat or an
extreme point (maximum or minimum) of a bore or a
shaft should be measured.
Conduct the contacting of a flat as described, wait
until the acoustic signal (beep) has been emitted,
indicating that the measured value has been
accepted.
When measuring the maximum or minimum point of
a bore or a shaft, proceed as described, once the
probe makes contact within the bore or shaft,
radically move the workpiece until the system has
automatically found the maximum or minimum point
of the bore or shaft and thus acknowledged through
the acoustic signal (beep).
In the „bore mode“ as in the standard settings only
complete bores can be measured.
Standard settings fine / flat
Fine = move slow
Normal = move normally
Rough = move fast
Quick settings
1. Fine - move slow
2. Normal
3. Rough - move fast
Quick settings
1. Q: Flat
2. Q: Flat, Bore
3. Q: Flat, Bore, Shaft

 Loading...