26
Mahr GmbH • Digimar 817 CLM
2.3 Setting the reference point
The measuring carriage moves automatically to the reference point
(reference point height ca. 50 mm) and sets the zero point on the base
plate.
Note: Once the zero point has been accepted, confirmation is given by
a twofold optical (LED) and acoustic signal (beep).
After the reference point has been confirmed, any zero point can be
selected.
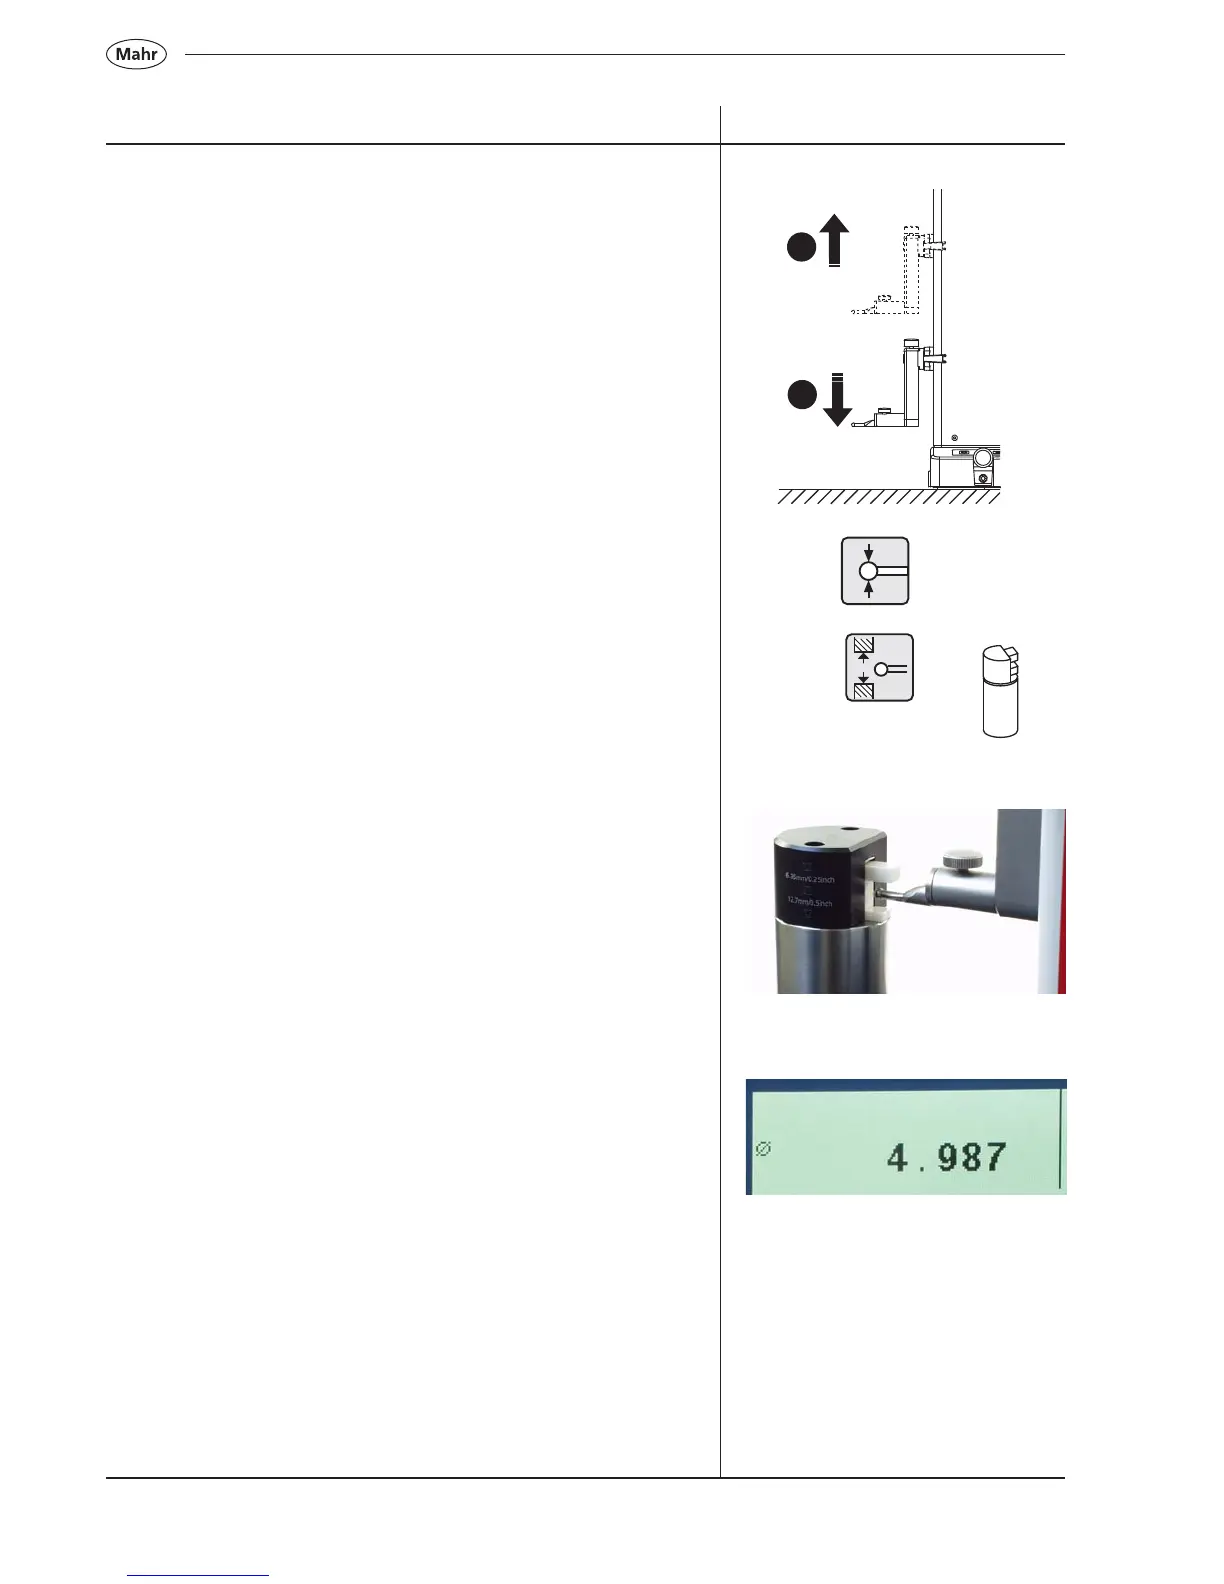
2.4 Calibrating a probe
a) Press the calibrate probe key
b) Press the function key „Calibrate in a groove“, the probe moves
automatically to the center of the groove of the setting standard.
c) Slide the setting standard, so that the probe is within the groove.
The groove will be automatically measured for a second time.
d) The determined probe constant will be displayed.
Description / Sequence Symbols / Pictures
Note:
The determined probe constant is always slightly smaller than the
actual diameter of the probe (please refer to 4.1).
a)
b)
c)
d)

 Loading...