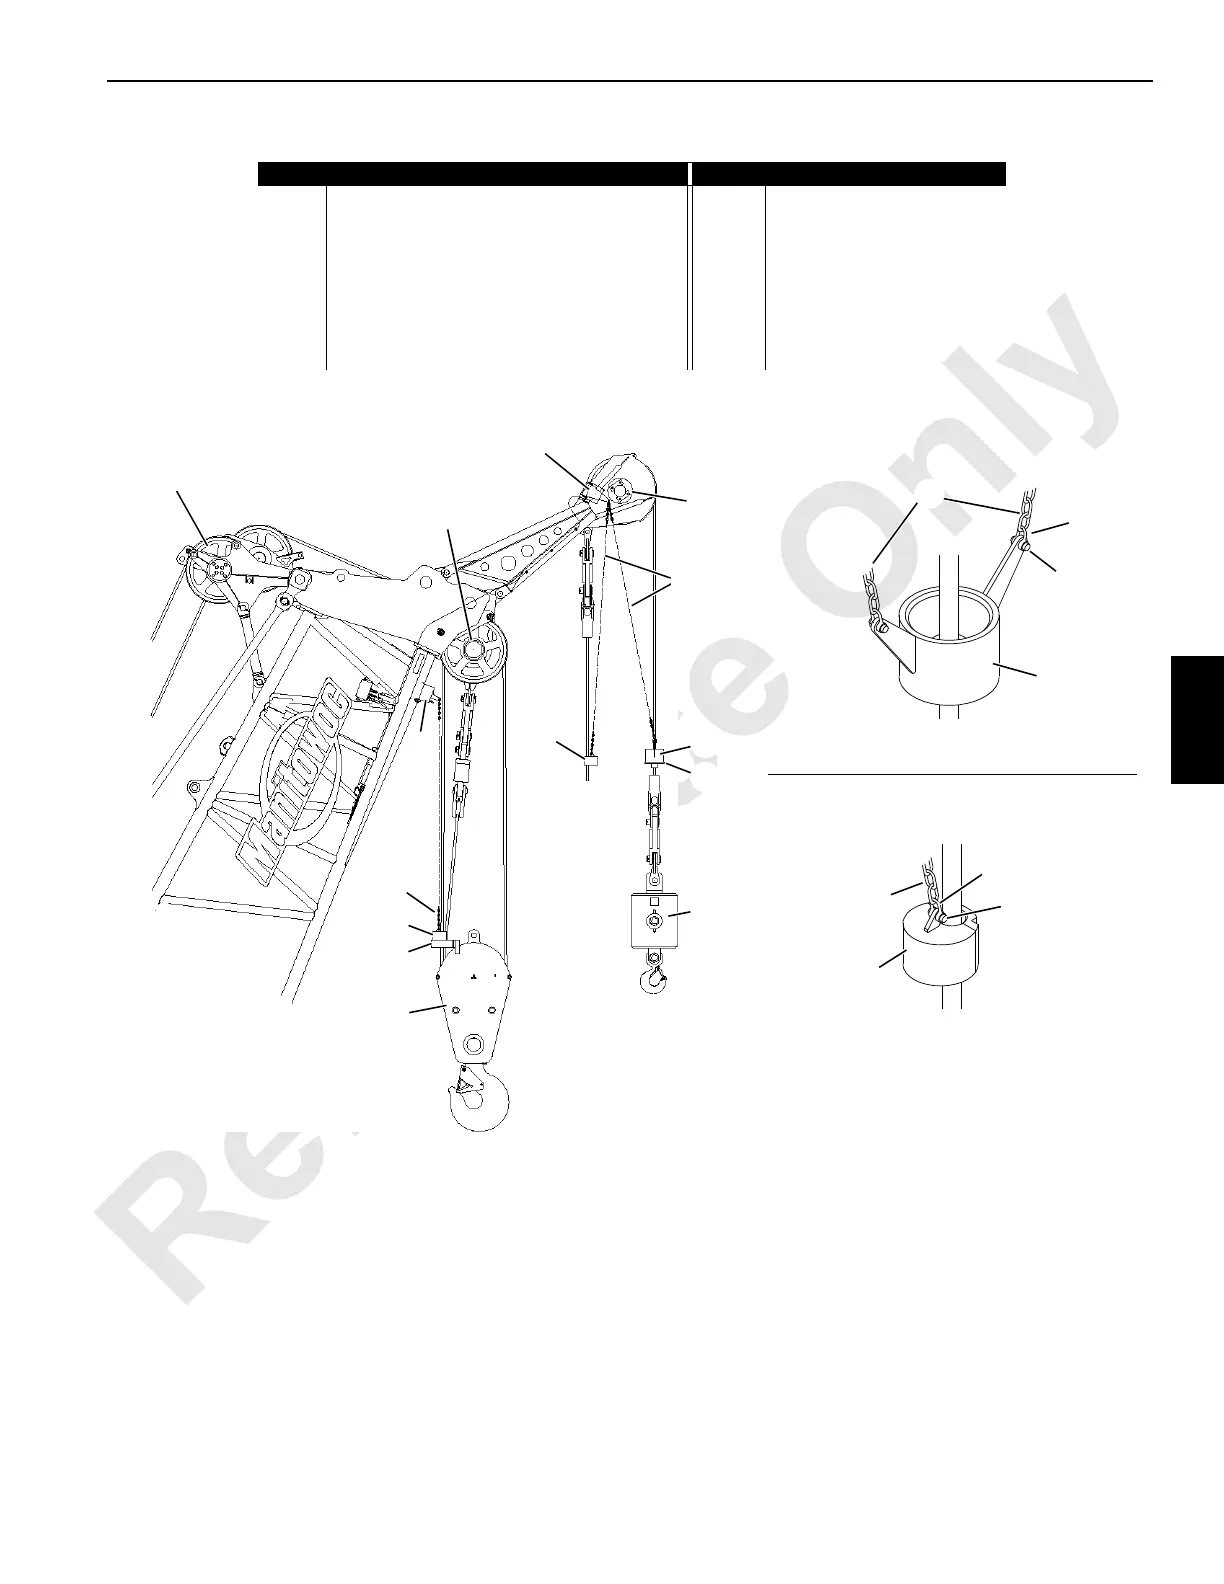
FIGURE 5-4
A1284
Item Description Item Description
1 Wire Rope Guide 5a Shackle
2a Lower Boom Point 5b Pin
2b Extended Upper Boom Point (lower sheaves) 6 Weight
3a Standard Upper Boom Point 7 Lift Plate
3b Extended Upper Boom Point (upper sheave) 8 Load Block
4a Block-Up Limit Switch (left hand) 9 Weight
4b Block-Up Limit Switch (right hand) 10 Lift Block
5 Chain 11 Weight Ball
Location of Components at Boom Top Shown
Location of Components at Jib Tops is Similar
See Load Block Reeving Diagrams for
Suggested Location of Weight with
Multiple Part Reeving
1
3a
Single Part
Reeving
8
5
6
7
4b
5
4a
Multiple Part Reeving
Dead Ended at Boom
11
10
9
6
2a
Lower Boom Point (multiple part)
Upper Boom Point (2-part)
Dead-End Load Line or
Slowest Live Line
5
6
5a
5a
Upper Boom Point (1-part)
5
9
5b
5b
 Loading...


