Manitowoc Published 05-03-17, Control # 228-03 2-13
16000 SERVICE/MAINTENANCE MANUAL HYDRAULIC SYSTEM
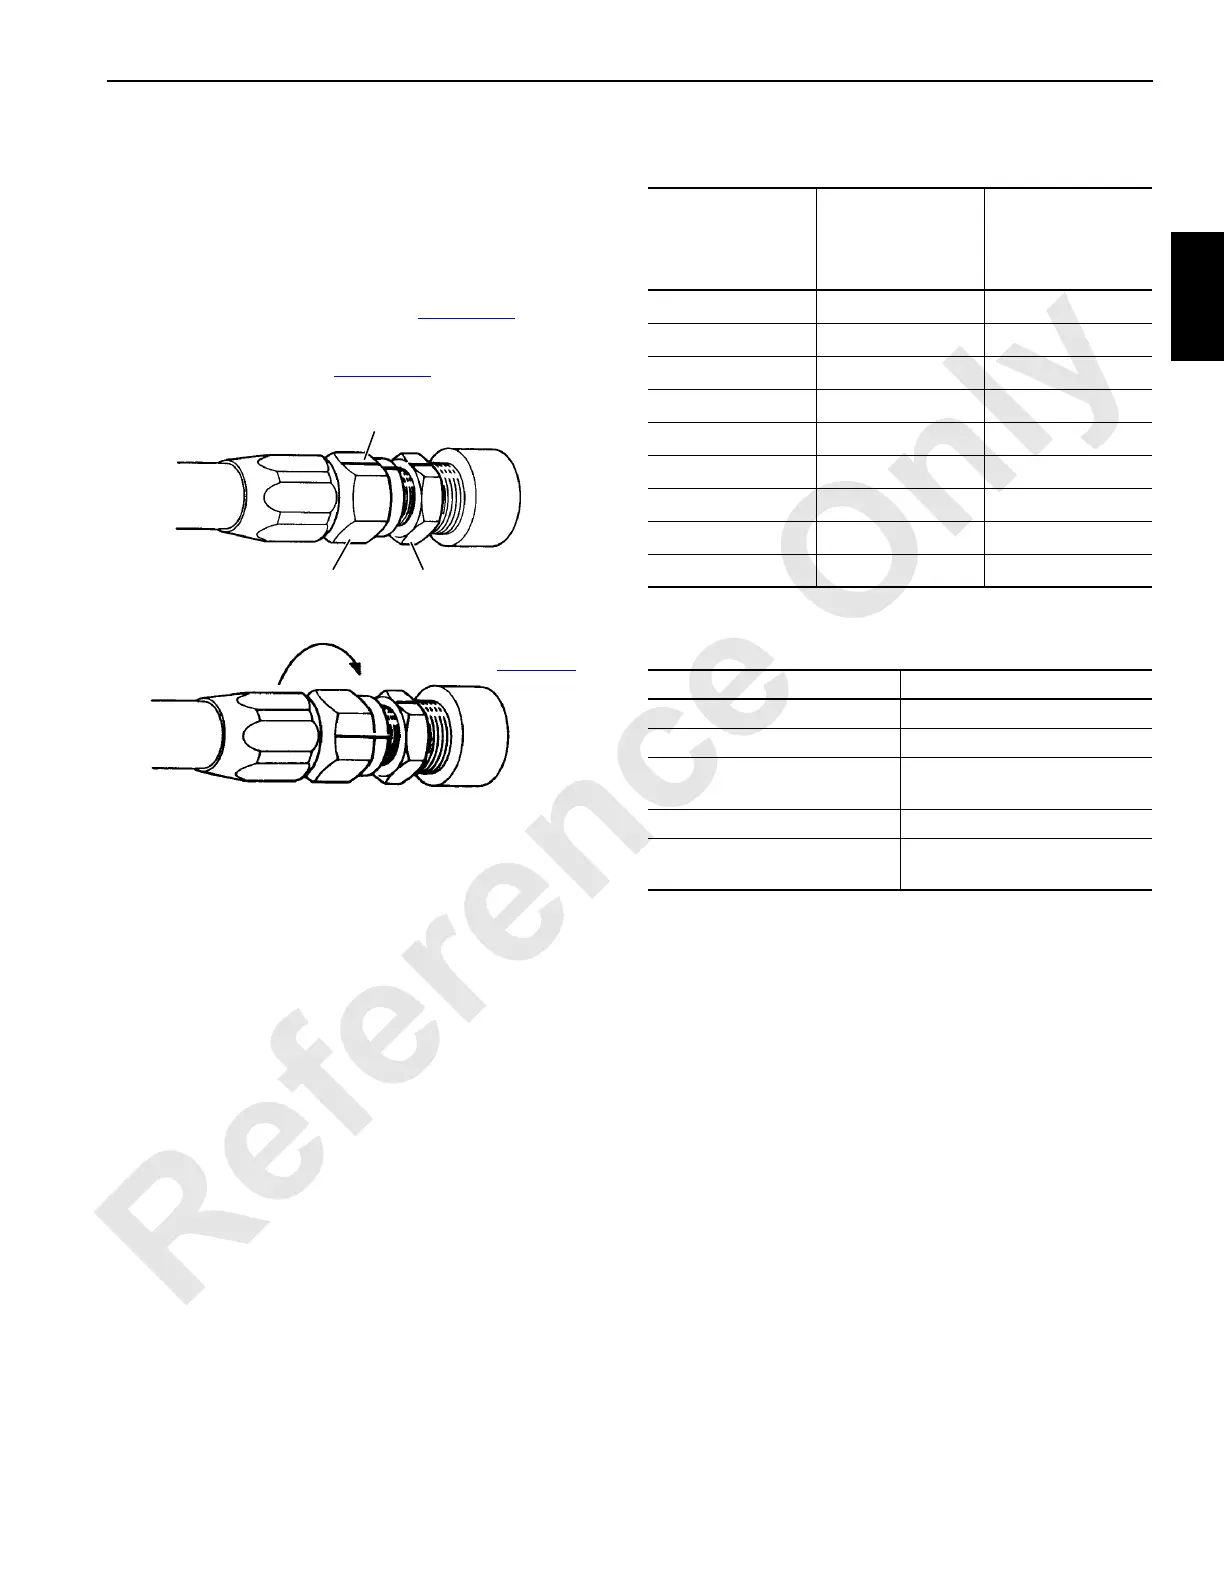
SAE Flare Connection
To maintain an SAE flare connection, use the following
procedure:
1. Tighten the nut finger tight until the sealing surfaces
touch.
2. Mark a line (use felt pen or marker) on the adapter and
extend it onto the connector nut (Figure 2-11
, View A).
3. Using wrenches, tighten connector nut the number of
flats shown in Table 7 (Figure 2-11
, View B).
4. Misalignment of marks will show that the fitting has been
tightened and the number of flats past the marks.
Table 2-8
SAE 37°Flare Tightening
Table 2-9
SAE 37° Flare Connection Troubleshooting
FIGURE 2-11
S108
Adapter
Line
Connector
Nut
View A
Turn connector nut required
number of flats (
Table 2-8)
View B
Connector Nut
Size
in (mm) across
flats
Fitting Size
Adapter Flats
to Rotate
9/16 (14,3) -04 2-1/2
5/8 (15,9) -05 2-1/2
11/16 (17,4) -06 2
7/8 (22,2) -08 2
1 (25,4) -10 1-1/2 – 2
1-1/4 (31,8) -12 1
1-1/2 (38,1) -16 3/4 – 1
2 (50,8) -20 3/4 – 1
2-1/4 (57,2) -24 1/2 – 3/4
Causes Cures
Joint loose. Tighten properly.
Sealing surfaces dirty. Clean.
Sealing surfaces not smooth,
scratched or gouged.
Replace faulty parts.
Sealing surfaces cracked. Replace faulty parts.
SAE 45° parts used with
SAE 37° parts.
Use only SAE 37° parts.
 Loading...


