AUTOMATIC TRANSAXLE
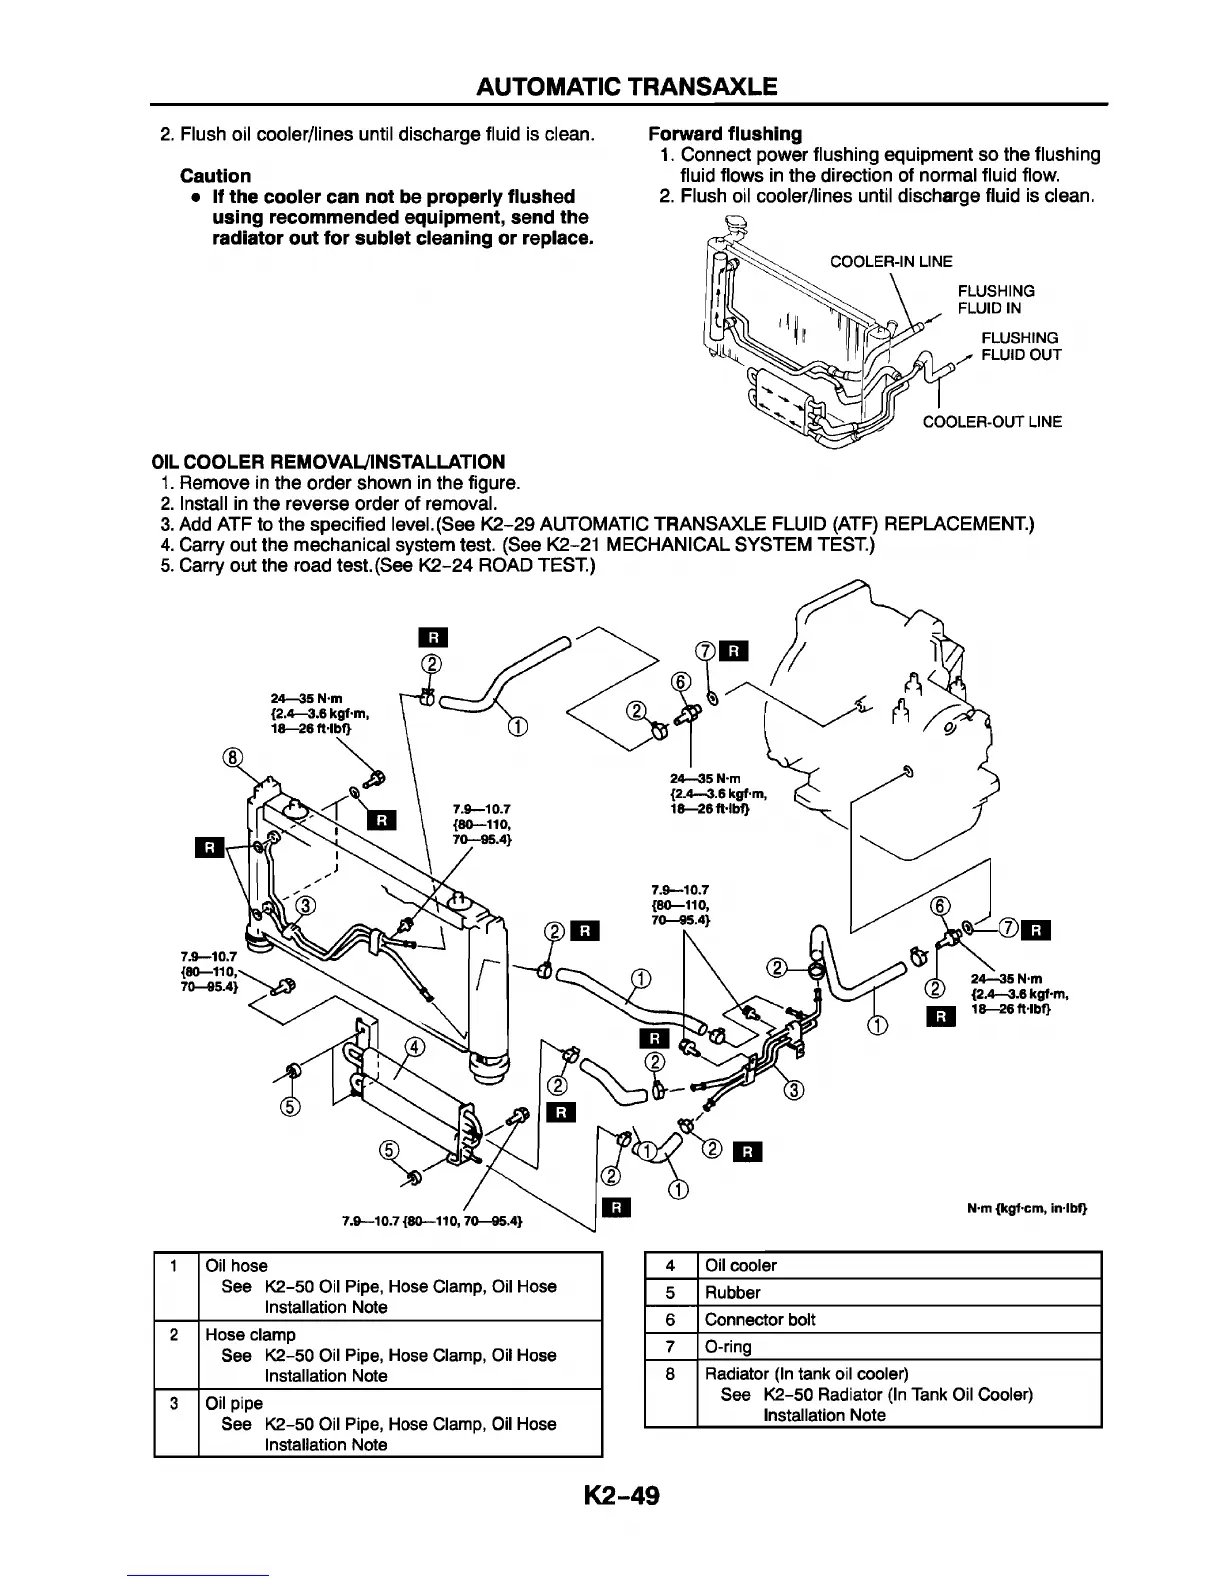
2. Flush oil cooler/lines until discharge fluid is clean.
Caution
• If the cooler can not be properly flushed
using recommended equipment, send the
radiator out for sublet cleaning or replace.
Forward flushing
1. Connect power flushing equipment so the flushing
fluid flows in the direction of normal fluid flow.
2. Flush oil cooler/lines until discharge fluid is clean.
OIL COOLER REMOVAMNSTALLATION
1. Remove in the order shown in the figure.
2. Install in the reverse order of removal.
3. Add ATF to the specified level.(See K2-29 AUTOMATIC TRANSAXLE FLUID (ATF) REPLACEMENT.)
4. Carry out the mechanical system test. (See K2-21 MECHANICAL SYSTEM TEST.)
5. Carry out the road test. (See K2-24 ROAD TEST.)
1
Oil hose
See K2-50 Oil Pipe, Hose Clamp, Oil Hose
Installation Note
2 Hose clamp
See K2-50 Oil Pipe, Hose Clamp, Oil Hose
Installation Note
3
Oil pipe
See K2-50 Oil Pipe, Hose Clamp, Oil Hose
Installation Note
4 Oil cooler
5
Rubber
6
Connector bolt
7 O-ring
8
Radiator (In tank oil cooler)
See K2-50 Radiator (In Tank Oil Cooler)
Installation Note
K2-49


 To Next Page