EXTERIOR LIGHTING SYSTEM
Terminal Signal Connected to
Test condition
Voltage (V)
/Continuity
Action
2F
Flash-to-
pass on/off
Headlight switch
(dimmer switch)
Headlight switch (light) at OFF or
TNS position
B+
• Headlight switch
• Inspect related harness
Headlight switch (light) at
headlight position
Below 1.0
Flash-to-pass on Below 1.0
2G
TNS relay
on/off
TNS relay
Headlight switch (light) at TNS or
headlight position
Below 1.0
• Headlight switch
• Inspect TNS relay
• Inspect related harness
Headlight switch (light) at OFF
position
B+
2H
—
—
— —
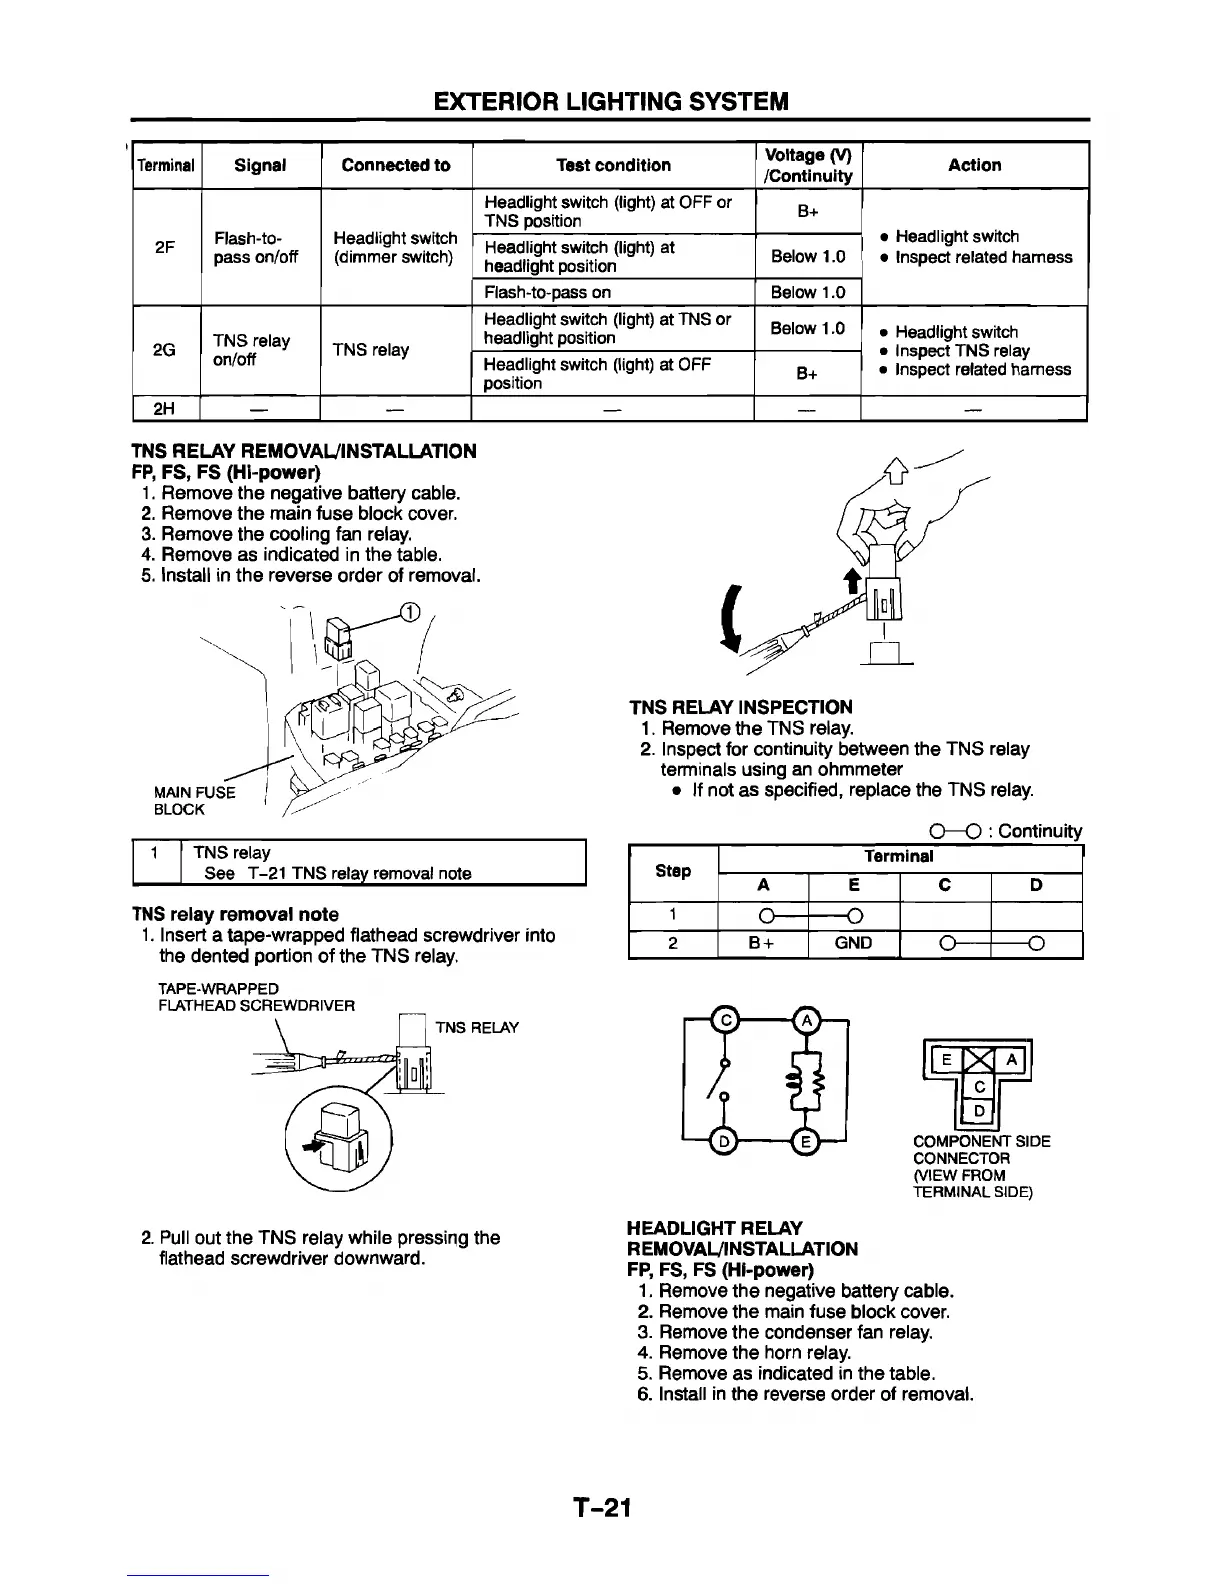
TNS RELAY REMOVAL/INSTALLATION
FP, FS, FS (Hi-power)
1. Remove the negative battery cable.
2. Remove the main fuse block cover.
3. Remove the cooling fan relay.
4. Remove as indicated in the table.
5. Install in the reverse order of removal.
TNS RELAY INSPECTION
1. Remove the TNS relay.
2. Inspect for continuity between the TNS relay
terminals using an ohmmeter
• If not as specified, replace the TNS relay.
Q—Q : Continuity
TNS relay removal note
1. Insert a tape-wrapped flathead screwdriver into
the dented portion of the TNS relay.
Step
Terminal
A
E
C
D
1
O
-----
— o
2
B + GND
o —
— o
TAPE-WRAPPED
FLATHEAD SCREWDRIVER
E
X
A
C
D
COMPONENT SIDE
CONNECTOR
(VIEW FROM
TERMINAL SIDE)
2. Pull out the TNS relay while pressing the
flathead screwdriver downward.
HEADLIGHT RELAY
REMOVAL/INSTALLATION
FP, FS, FS (Hl-power)
1. Remove the negative battery cable.
2. Remove the main fuse block cover.
3. Remove the condenser fan relay.
4. Remove the horn relay.
5. Remove as indicated in the table.
6. Install in the reverse order of removal.
T-21