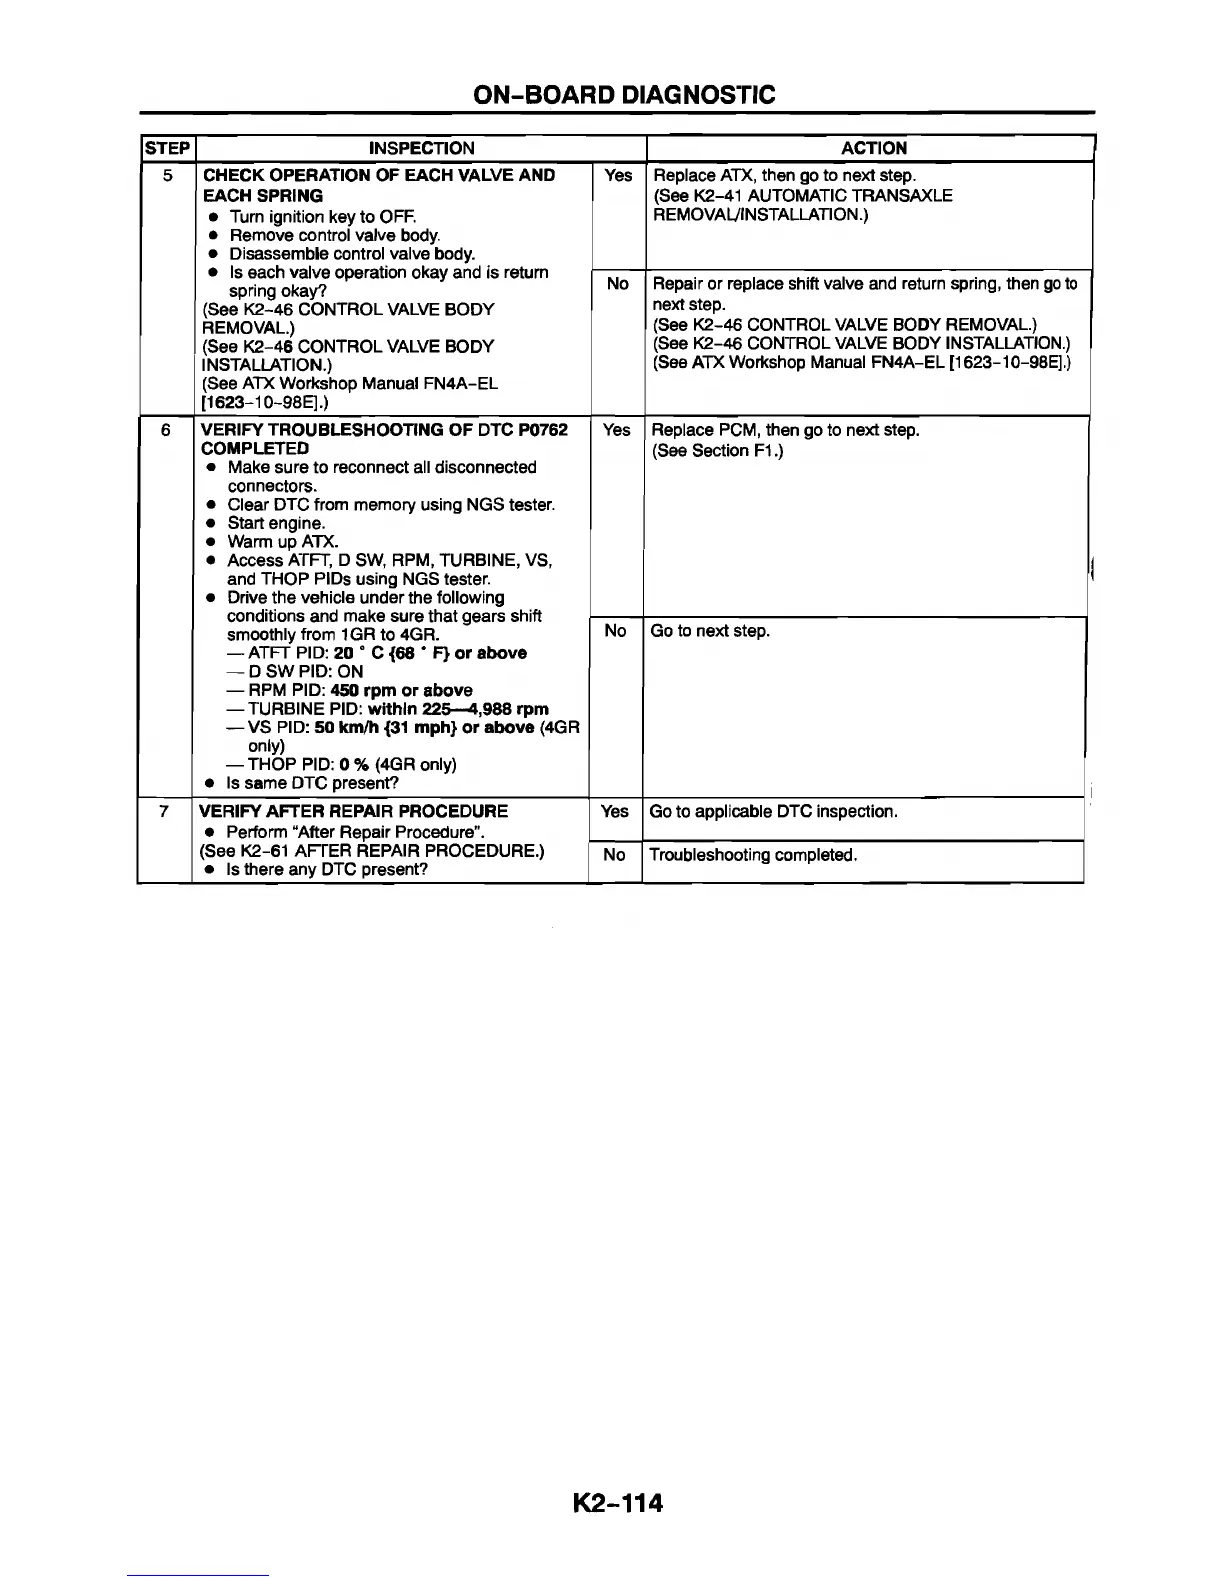
ON-BOARD DIAGNOSTIC
STEP INSPECTION ACTION
5
CHECK OPERATION OF EACH VALVE AND
EACH SPRING
• Turn ignition key to OFF.
• Remove control valve body.
• Disassemble control valve body.
• Is each valve operation okay and is return
spring okay?
(See K2-46 CONTROL VALVE BODY
REMOVAL.)
(See K2-46 CONTROL VALVE BODY
INSTALLATION.)
(See ATX Workshop Manual FN4A-EL
[1623-10-98E].)
Yes
Replace ATX, then go to next step.
(See K2-41 AUTOMATIC TRANSAXLE
REMOVAL/INSTALLATION.)
No Repair or replace shift valve and return spring, then go to
next step.
(See K2-46 CONTROL VALVE BODY REMOVAL.)
(See K2-46 CONTROL VALVE BODY INSTALLATION.)
(See ATX Workshop Manual FN4A-EL [1623-10-98E].)
6
VERIFY TROUBLESHOOTING OF DTC P0762
COMPLETED
• Make sure to reconnect all disconnected
connectors.
• Clear DTC from memory using NGS tester.
• Start engine.
• Warm up ATX.
• Access ATFT, D SW, RPM, TURBINE, VS,
and THOP PIDs using NGS tester.
• Drive the vehicle under the following
conditions and make sure that gears shift
smoothly from 1GR to 4GR.
— ATFT PID: 20 ° C {68 * F} or above
— D SW PID: ON
— RPM PID: 450 rpm or above
— TURBINE PID: within 225—4,988 rpm
— VS PID: 50 km/h {31 mph} or above (4GR
only)
— THOP PID: 0 % (4GR only)
• Is same DTC present?
Yes Replace PCM, then go to next step.
(See Section F1.)
I
No Go to next step.
7
VERIFY AFTER REPAIR PROCEDURE
• Perform “After Repair Procedure”.
(See K2-61 AFrER REPAIR PROCEDURE.)
• Is there any DTC present?
Yes
Go to applicable DTC inspection.
No Troubleshooting completed.
K2-114