ON-BOARD DIAGNOSTIC
D iag n o stic p ro c ed u re
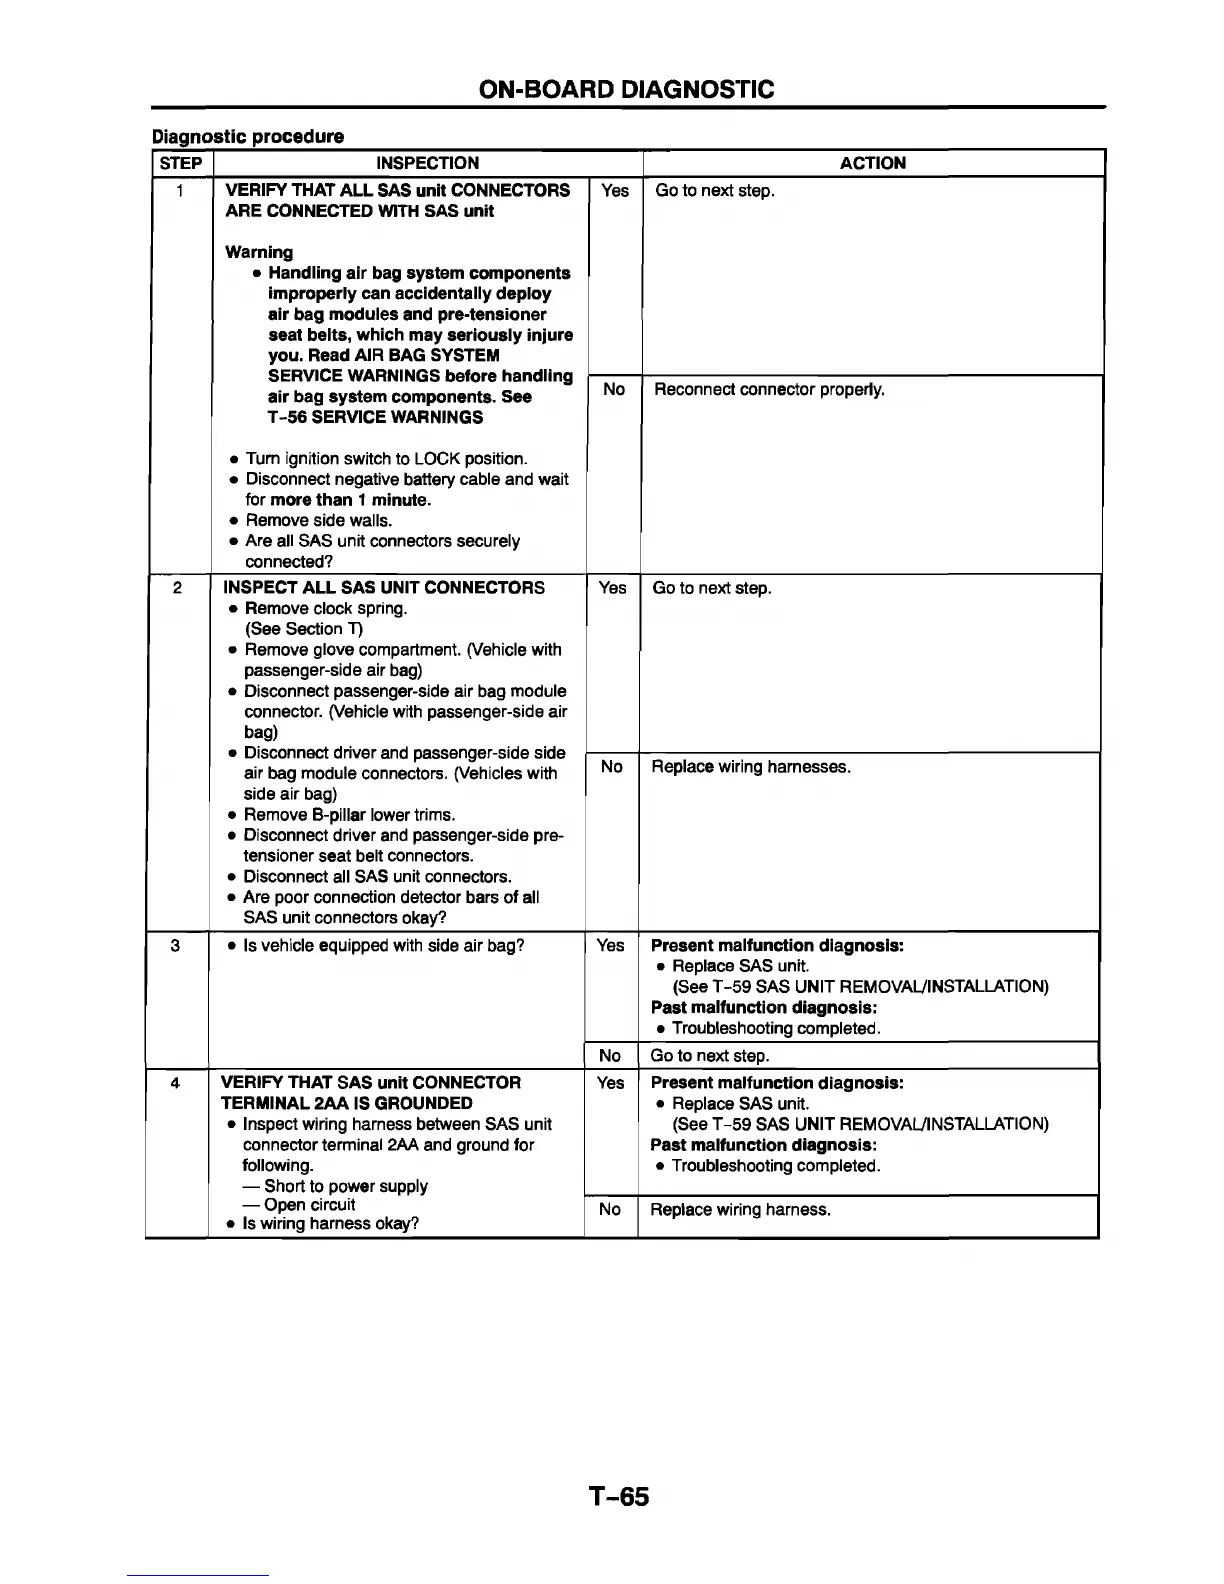
STEP INSPECTION ACTION
1 VERIFY THAT AL L SAS unit CONNECTORS
ARE CONNECTED WITH SAS unit
W arning
• Handling air bag system com ponents
im properly can accidentally deploy
air bag m odules and pre-tensioner
seat belts, which may seriously injure
you. Read AIR BAG SYSTEM
SERVICE WARNINGS before handling
air bag system com ponents. See
T-5 6 SERVICE WARNINGS
• Turn ignition switch to LOCK position.
• Disconnect negative battery cable and wait
for more than 1 m inute.
• Remove side walls.
• Are all SAS unit connectors securely
connected?
Yes
Go to next step.
No Reconnect connector properly.
2
INSPECT A LL SAS UNIT CONNECTORS
• Remove clock spring.
(See Section T)
• Remove glove compartment. (Vehicle with
passenger-side air bag)
• Disconnect passenger-side air bag module
connector. (Vehicle with passenger-side air
bag)
• Disconnect driver and passenger-side side
air bag module connectors. (Vehicles with
side air bag)
• Remove B-pillar lower trims.
• Disconnect driver and passenger-side pre-
tensioner seat belt connectors.
• Disconnect all SAS unit connectors.
• Are poor connection detector bars of all
SAS unit connectors okay?
Yes
Go to next step.
No Replace wiring harnesses.
3 • Is vehicle equipped with side air bag?
Yes Present m alfunction diagnosis:
• Replace SAS unit.
(See T-59 SAS UNIT REMOVAL/INSTALLATION)
Past m alfunction diagnosis:
• Troubleshooting completed.
No
Go to next step.
4 VERIFY THAT SAS unit CONNECTOR
TERMINAL 2A A IS GROUNDED
• Inspect wiring harness between SAS unit
connector terminal 2AA and ground for
following.
— Short to power supply
— Open circuit
• Is wiring harness okay?
Yes
Present m alfunction diagnosis:
• Replace SAS unit.
(See T-59 SAS UNIT REMOVAL/INSTALLATION)
Past m alfunction diagnosis:
• Troubleshooting completed.
No Replace wiring harness.
T-65
 Loading...


