– 5.10 –
3. FINE Y Si. (FINE Y Re., FINE Y Bi.)
1. Input the value with key, and set it with
ENTER
key.
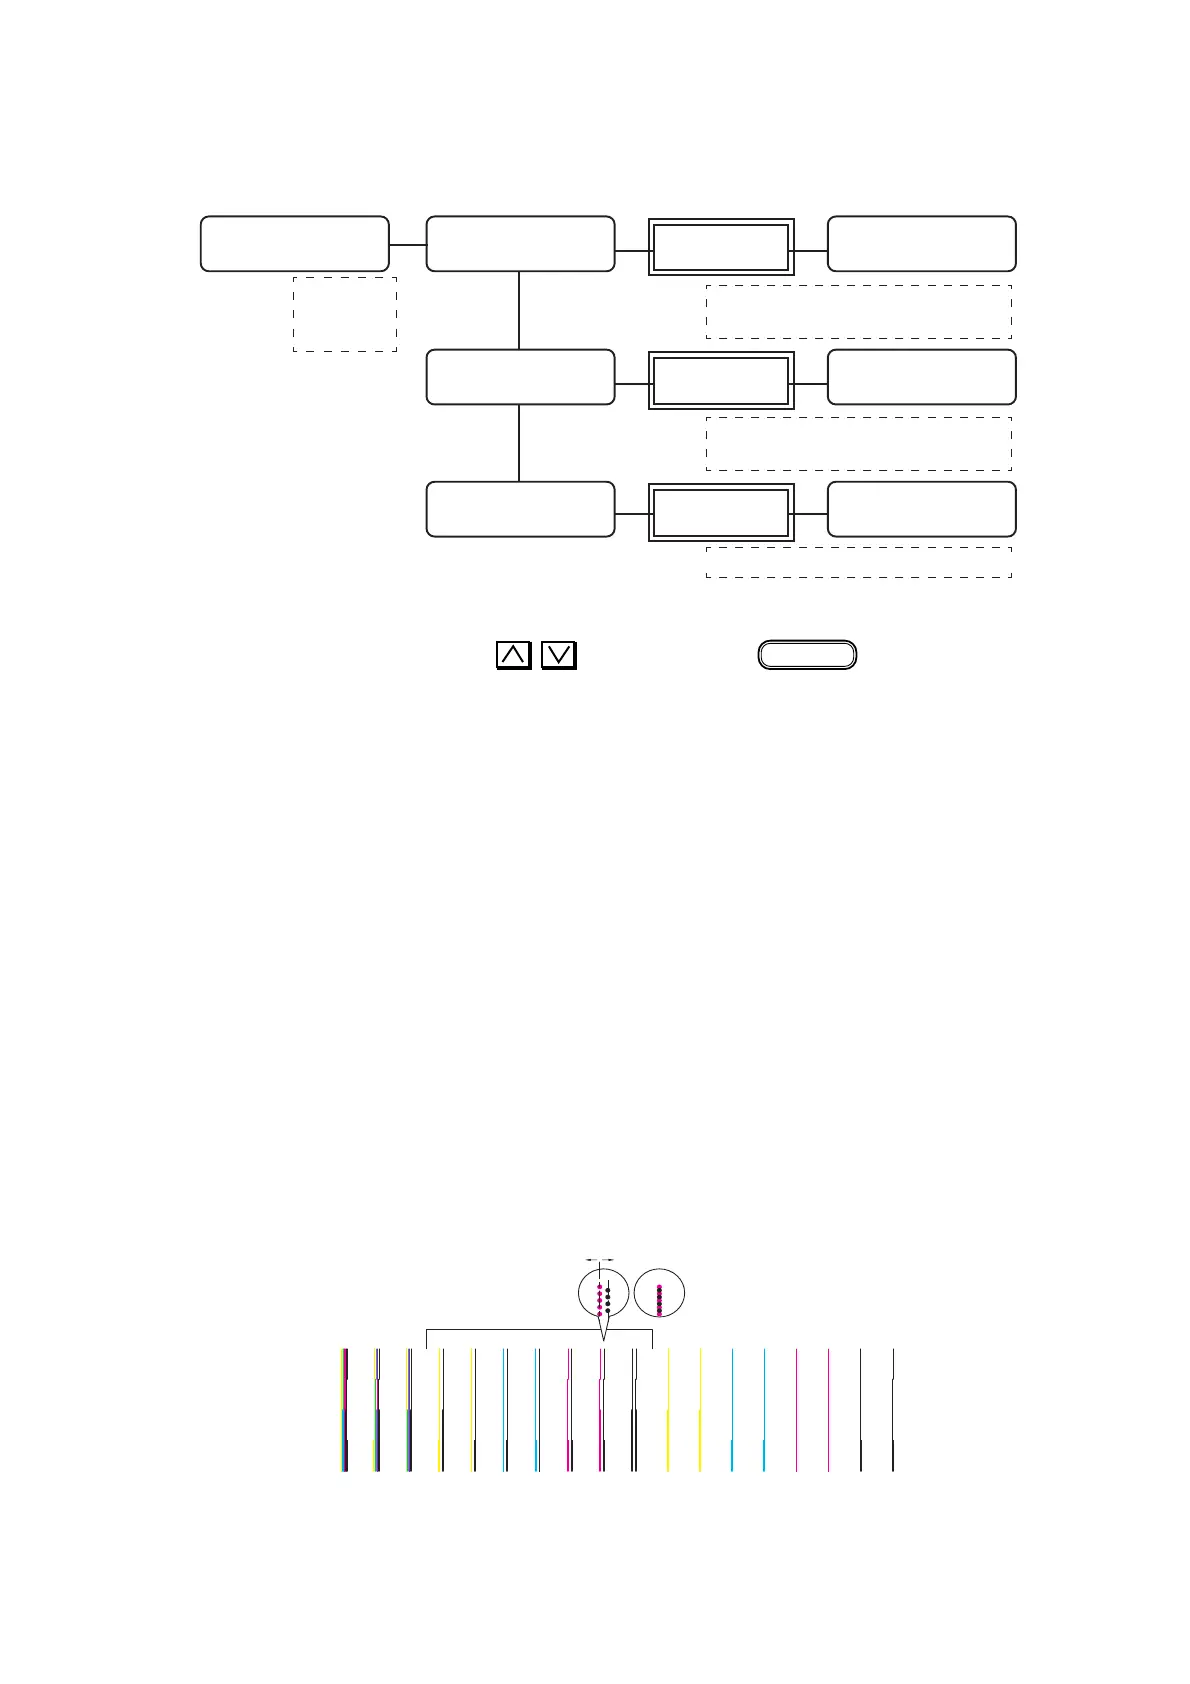
All colors (not including black) are adjusted to overlap straight on Head No.1
(Black) as standard.
Set all adjustment value from between 1-2 and 1-8.
2. Print adjustment pattern again, and confirm each colors are overlapped straight on
black as standard.
In case not overlapped, return to step1, and implement adjust again.
3. Set adjustment value same as above-mentioned for "FINE Y Re." and "FINE Y
Bi.". (Adjust only black for "FINE Y Bi.".)
4. Adjust at all each printing mode V1, V2, N1, N2.
* In case "BASIS SET" is used, [PRINT ADJUST2] will not be completed
perfectly.
* No need for adjusting N1 and N2 on a device that uses the Raster Link Pro.
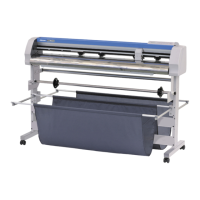
Print sample (4 color set)
Adjustment
Pattern Print
Adjustment
Pattern Print
Adjustment
Pattern Print
#PRN.adjust2 LHV1
Adjust : FINE Y Si.
#PRN.adjust2 LHV1
Adjust : FINE Y Re.
#PRN.adjust2 LHV1
Adjust : FINE Y Bi.
Input value : -50 to 50 (1 dot unit)
C1-2, C1-3, C1-4, C1-5, C1-6, (C1-7), (C1-8)
Input value : -50 to 50 (0.1 dot unit)
C1-2, C1-3, C1-4, C1-5, C1-6, (C1-7), (C1-8)
Input value : -50 to 50 (0.1 dot unit)
#PRN.adjust2 LHV1
Y Si C1-2 : 0.0
#PRN.adjust2 LHV1
Y Re C1-2 : 0.0
#PRN.adjust2 LHV1
Y Bi C1-1 : 0.0
1-21-31-41-51-61-71-8
Check point
NG OK
+-
KMCYK-MK-CK-CKMCYKMCY KMCYK-KK-MK-YK-Y
Variable-2
Normal-1
Normal-2
#PRN.adjust2 LH
SEL : Variable-1

 Loading...