12 - 36 Operator’s Manual
12 Probes and Biopsy
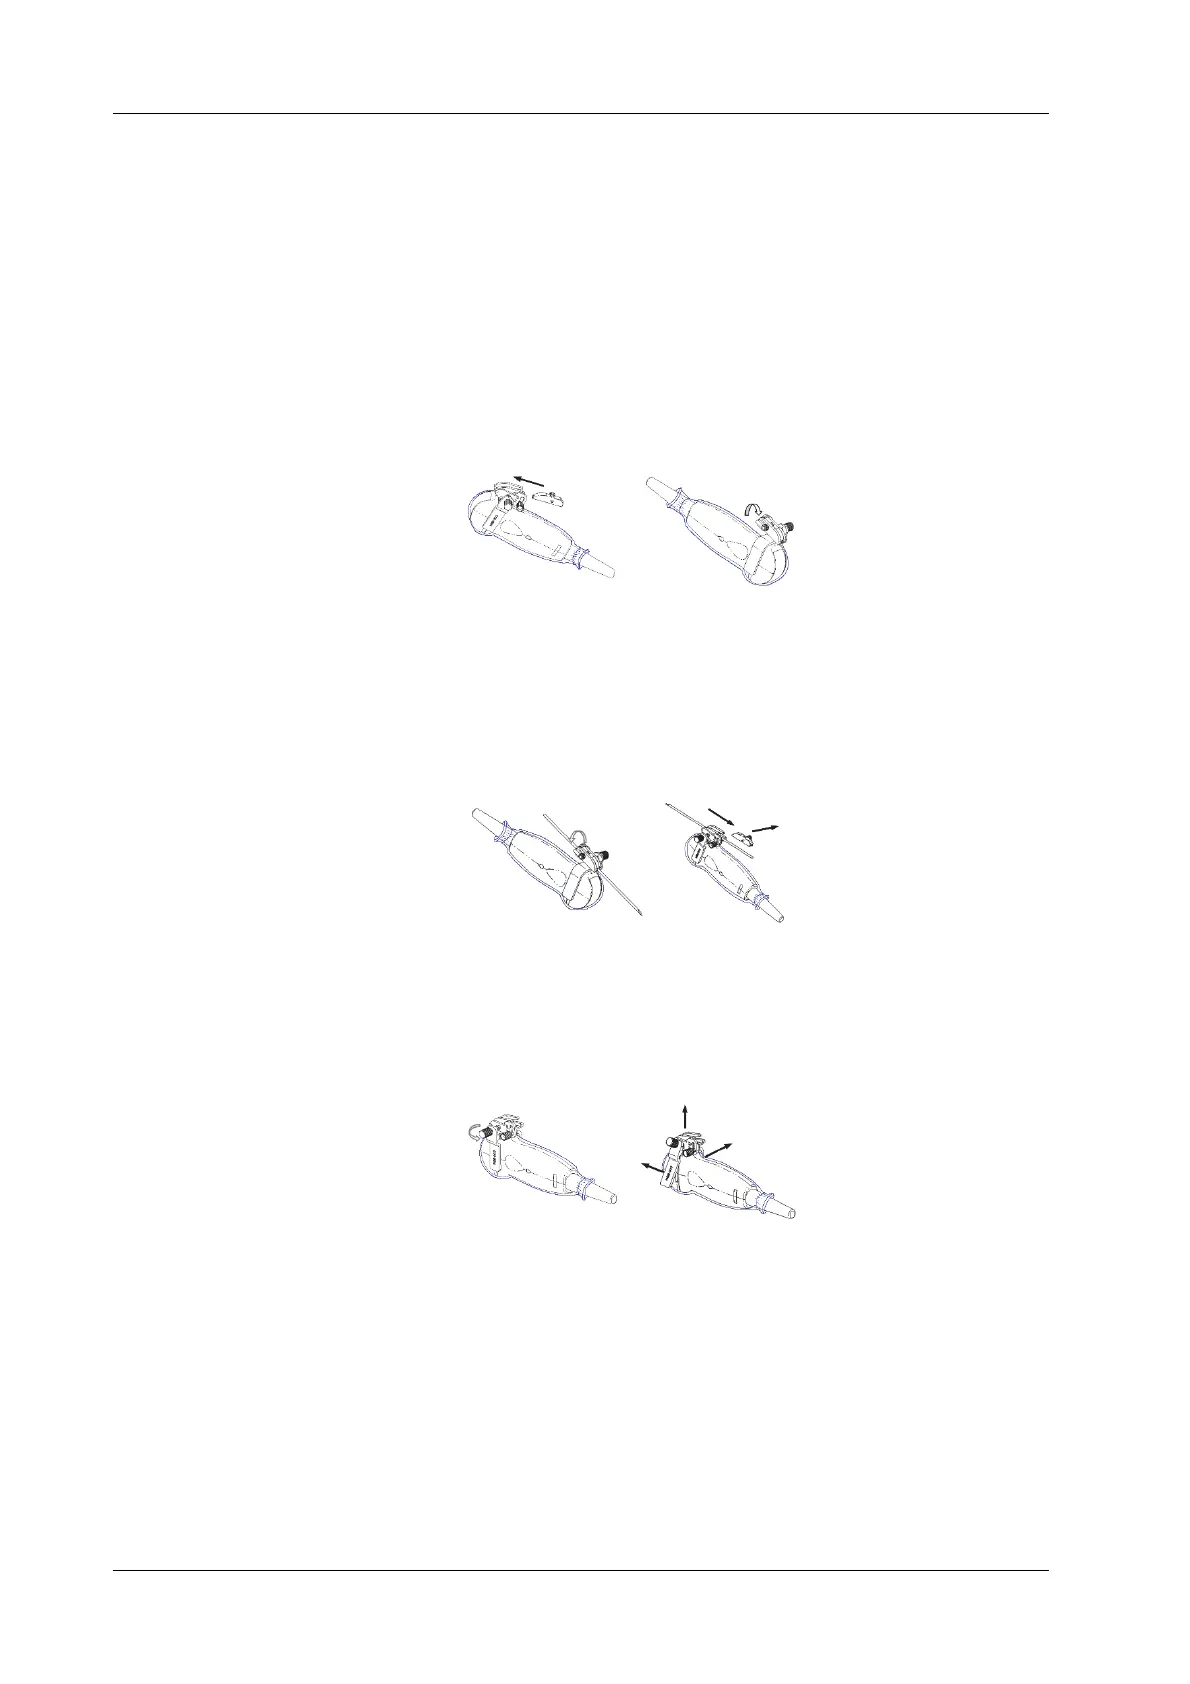
a. Put on the sterile probe sheath.
b. Select a suitable needle-guided bracket and match the groove to the tab of the probe.
Mount the bracket onto the probe.
c. Screw the pinch nut of the needle-guided bracket to ensure that the needle-guided bracket
is properly installed on the probe.
2. Adjust the needle angle to the proper shift as required:
a. Loosen the angle pinch nut.
b. Adjust the angle block to the desired level.
c. Tighten the angle pinch nut.
3. Install the guiding block:
a. Select a suitable guiding block and push it into the groove above the angle block
b. Screw the block's nut to secure the block.
c. Insert a biopsy needle with the same specification as that of the guiding block into the
guiding block hole.
4. Release the needle from the bracket:
a. Loosen the guiding block's nut and slightly move the guiding block in the direction of the
needle’s tail.
b. Separate the residual part of the needle-guide bracket and the probe from the needle.
5. Remove the needle-guided bracket:
a. Screw the pinch nut to release the needle-guided bracket
b. Separate the bracket and the probe.