9 - 40 WiNG 5.5 Access Point System Reference Guide
11. Select the + Add Row button to add a table entry for a new client’s IP address, mask and shared secret. To delete a client
entry, select the Delete icon on the right-hand side of the table entry.
12. Specify the IP Address and mask of the RADIUS client authenticating with the RADIUS server.
13. Specify a Shared Secret for authenticating the RADIUS client.
14. Shared secrets verify RADIUS messages with a RADIUS enabled device configured with the same shared secret. Select the
Show check box to expose the shared secret’s actual character string. Leave the option unselected to display the shared
secret as a string of asterisks (*).
15. Select OK to save the server policy’s client configuration. Select the Reset button to revert to the last saved configuration.
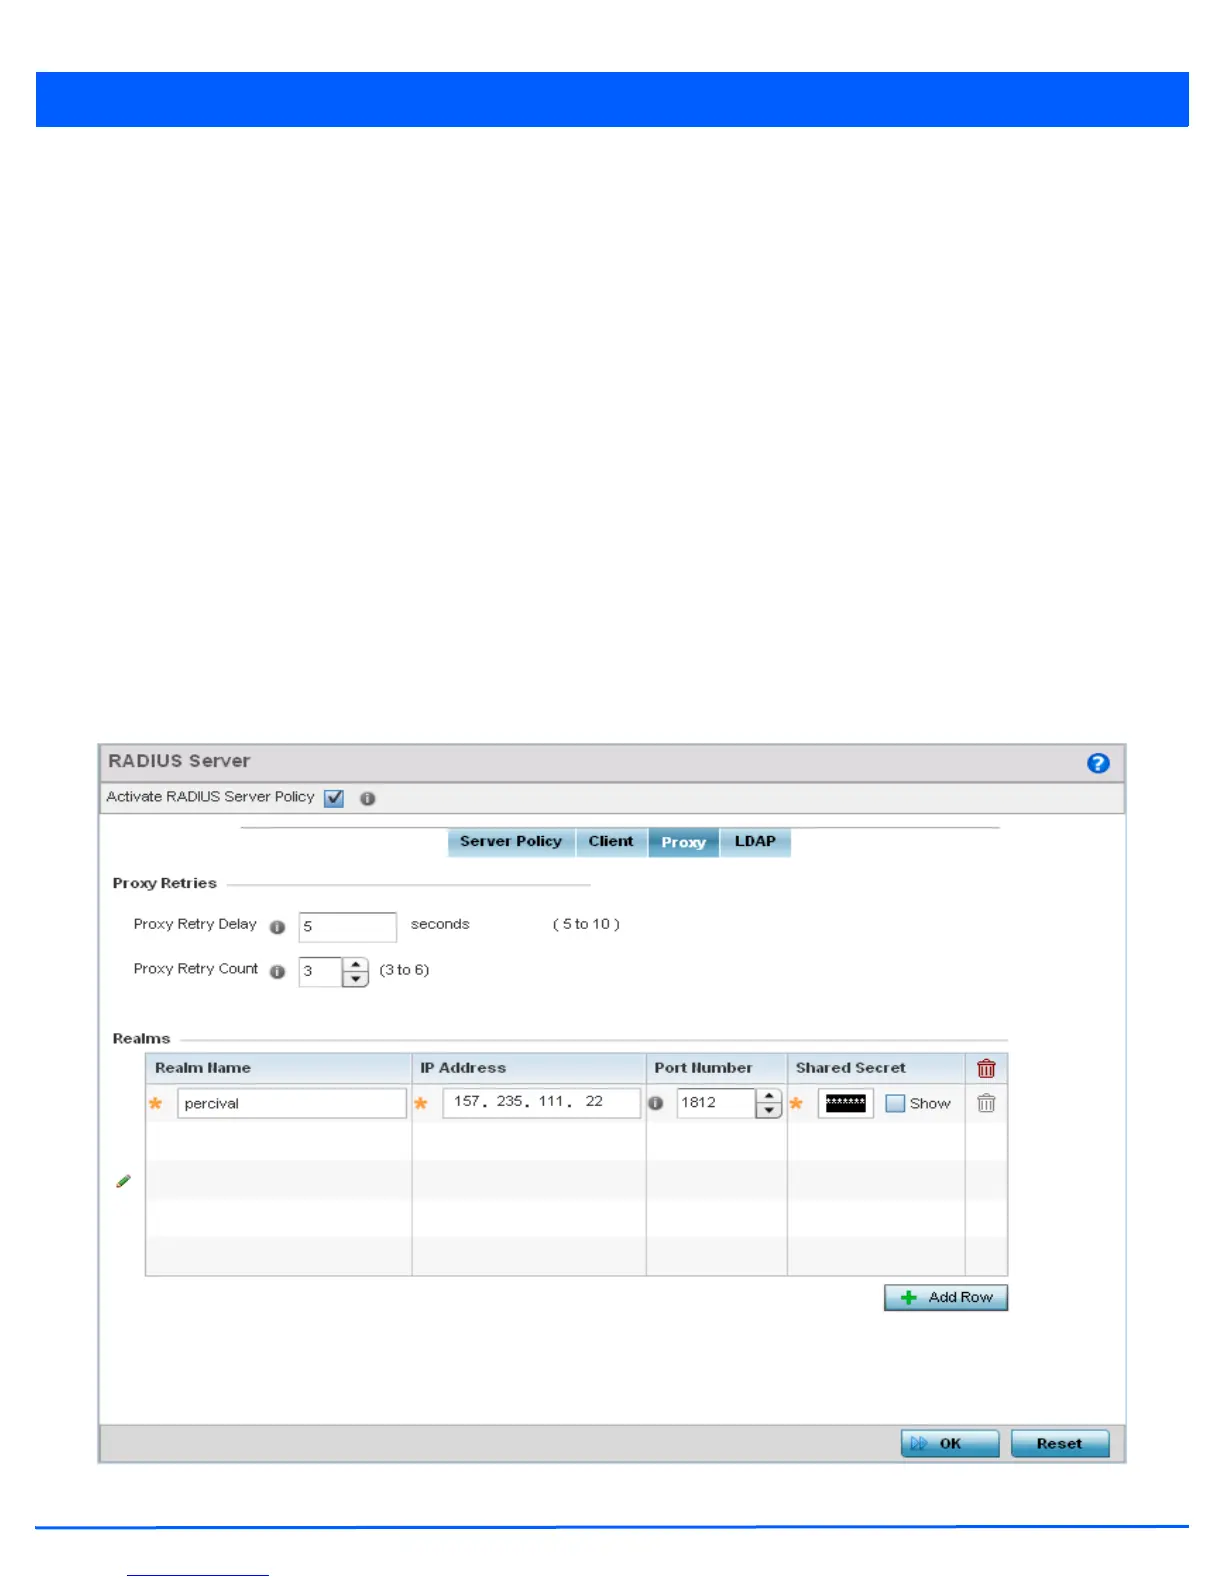
16. Select the Proxy tab and ensure the Activate RADIUS Server Policy button remains selected.
A user’s access request is sent to a proxy server if it cannot be authenticated by local RADIUS resources. The proxy server
checks the information in the user access request, and either accepts or rejects the request. If the proxy server accepts the
request, it returns configuration information specifying the type of connection service required to authenticate the user.
The RADIUS proxy appears to act as a RADIUS server to the NAS, whereas the proxy appears to act as a RADIUS client to
the RADIUS server.
When the access point’s RADIUS server receives a request for a user name containing a realm, the server references a table
of configured realms. If the realm is known, the server proxies the request to the RADIUS server. The behavior of the
proxying server is configuration-dependent on most servers. In addition, the proxying server can be configured to add,
remove or rewrite requests when they are proxied.
Figure 9-23 RADIUS Server Policy screen - Proxy tab
 Loading...