5 Mounting
Maschinenfabrik Reinhausen 2014 313550953/00 EN TAPCON® 230 pro
Preparing for mounting
Before commencing mounting, the two mounting brackets back on the rear
of the device must be removed and the cable gland plate taken off. To do so,
proceed as follows:
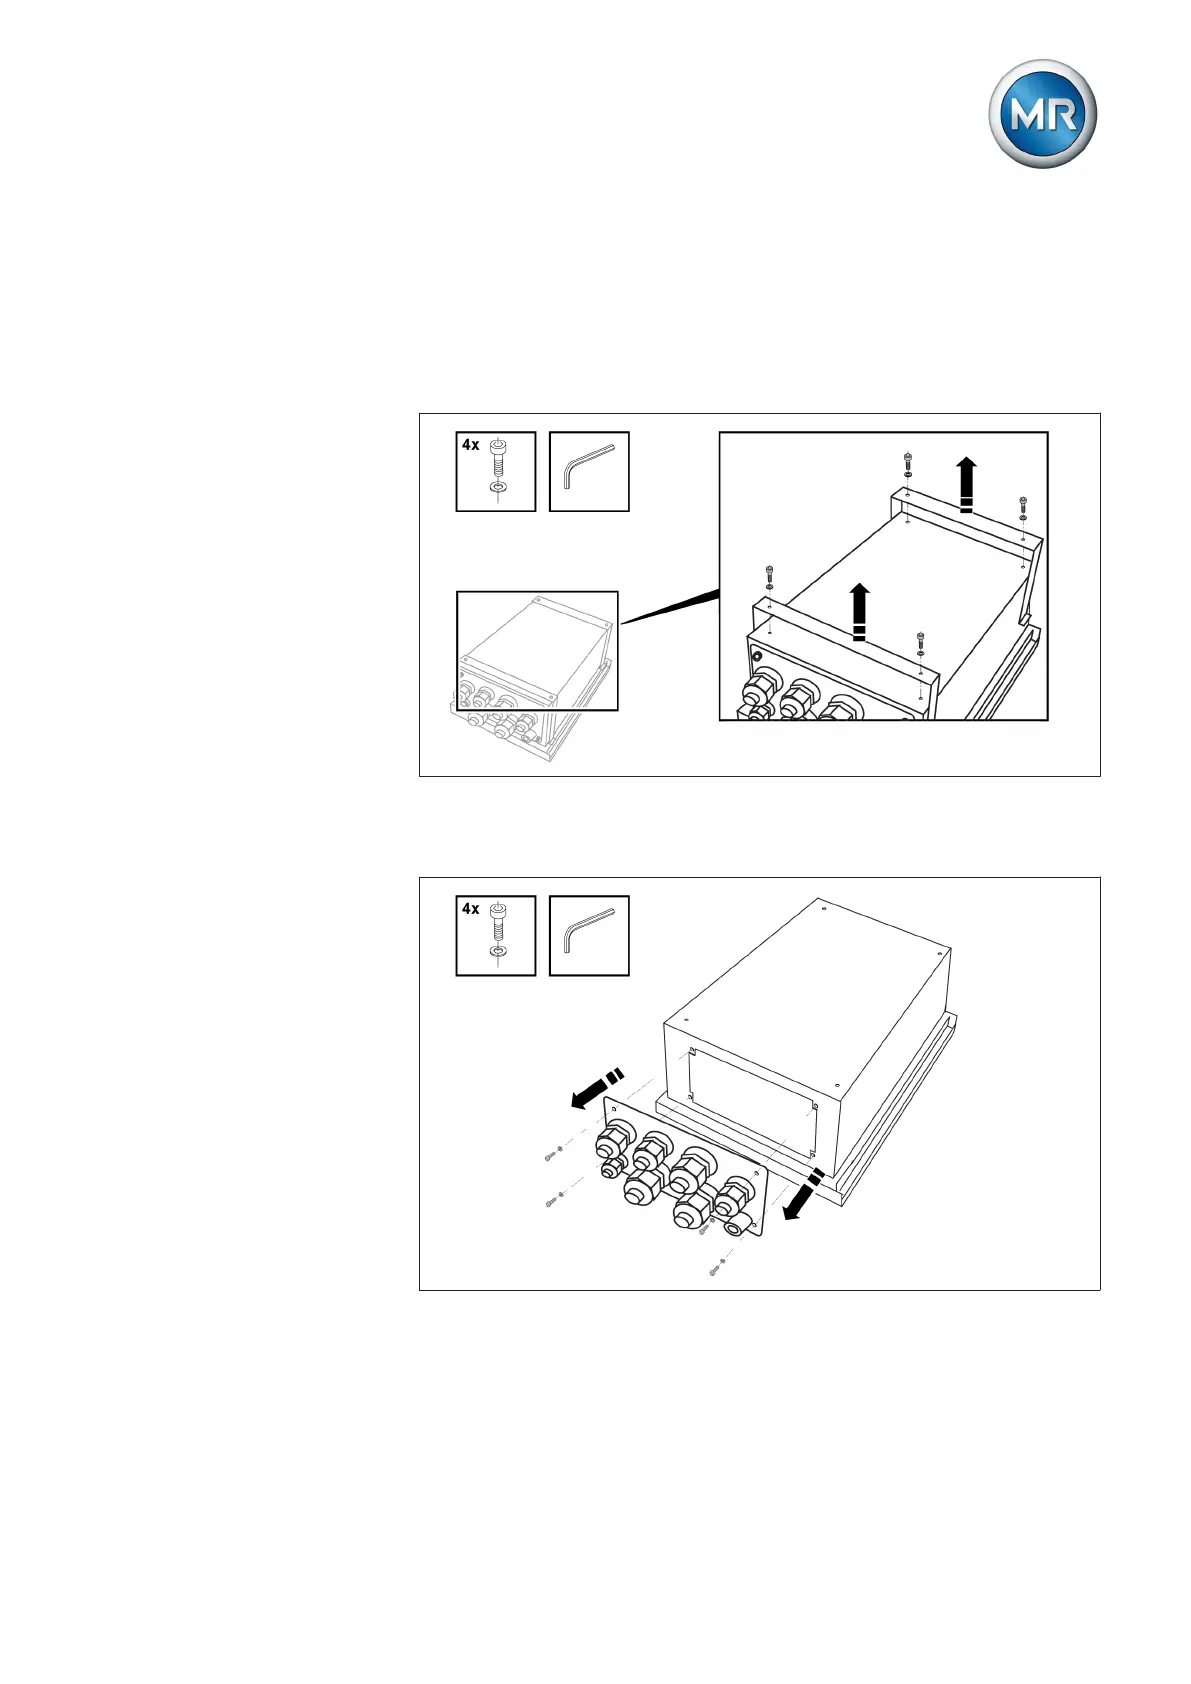
1. Loosen the 4 Allen screws with attached Allen key to remove the mount-
ing brackets.
Figure 14: Loosen mounting bracket
2. Loosen the 4 Allen screws with attached Allen key to remove the cable
gland plate.
Figure 15: Loosen cable gland plate
ð The mounting brackets and the cable gland plate are removed.
The relevant installation versions are described in the following sections.
 Loading...


