User’s Guide – Ultima cutting plotter
26 AP-75032, Rev 2.2, 20/04/07
Step 3 : Insert the media into the cutter. It is best to position the media so that half of it hangs in front and
half of it hangs at the back of the cutter.
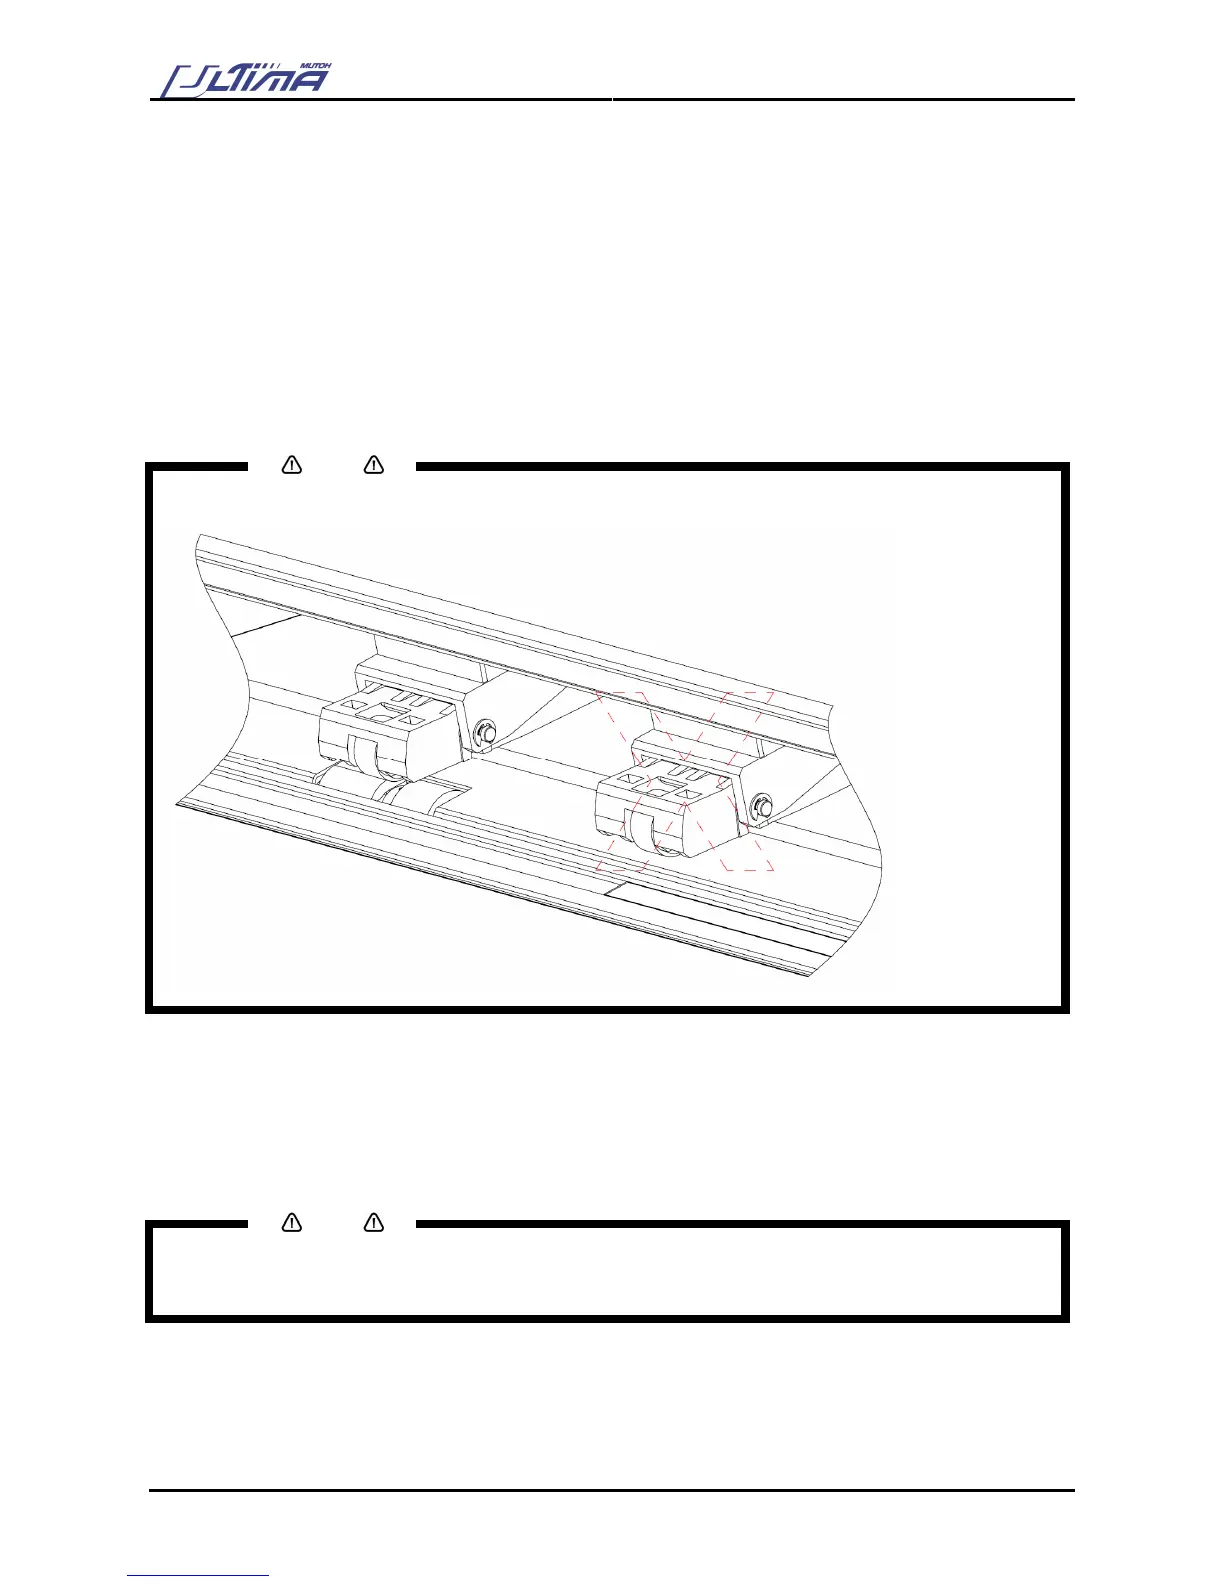
Step 4 : Adjust the position of the pressure rollers so that they align well with the drive rollers. Doing this
you are helped by the tactile and audible click system for the left pressure roller. The right
pressure roller’s movement is limited so that it can never be malpositioned.
Always make sure that the pressure rollers are completely inside the sheet of the media you want
to load. Especially when you use a cut-sheet of which the corners are not perfectly square, it is
best to put the pressure rollers well inside the vinyl as the width of the sheet may vary.
In case you are using a SC-1400D, you have the opportunity to use either two or three pressure
rollers, depending on the width of the vinyl you are using. When not using the left pressure roller
(i.e. when loading vinyl of a small width), the left pressure roller should be placed at the extreme
left of the cutter (that is, not on top of a grid roller).
Notes
Please note that the middle pressure roller should always be placed on top of a grid roller.
Step 5 : Put the hold lever in the DOWN position.
This action will initialize the media loading sequence, during which the cutter will measure the
loaded sheet. The sheet will be shuffled back and forth, enabling the cutter to determine the
media size and enabling you to verify the media transport.
Step 6 : After finishing the media loading sequence, the tool head will be parked at the origin position and
the cutter will be in ON-LINE mode, ready to receive data from the host computer.
Notes
Do not try to move the pressure rollers when the media hold lever is in the down position as this may cause
damage to the system.