User’s Guide – Ultima cutting plotter
46 AP-75032, Rev 2.2, 20/04/07
3.4. SQUARE DETAILS
Notes
Please note that the creation of an image should be done in a graphics application software (e.g.
CorelDraw, Adobe Illustrator, Adobe Photoshop or Macromedia Freehand) or in origin software with design
functionalities (EasySIGN Power Pack Pro Mutoh Edition or Scanvec Amiable PhotoPRINT DX Mutoh
Edition)
Notes
Do not forget to create the cutting line around your image. The default cutting line is a “magenta hairline” or
“spotcolor” with <CutContour> swatch name (in the CMYK pallet).
→ Thickness line = hairline (or 0.25)
→ Colour = 100% magenta
For more details, please refer to the Application Guide.
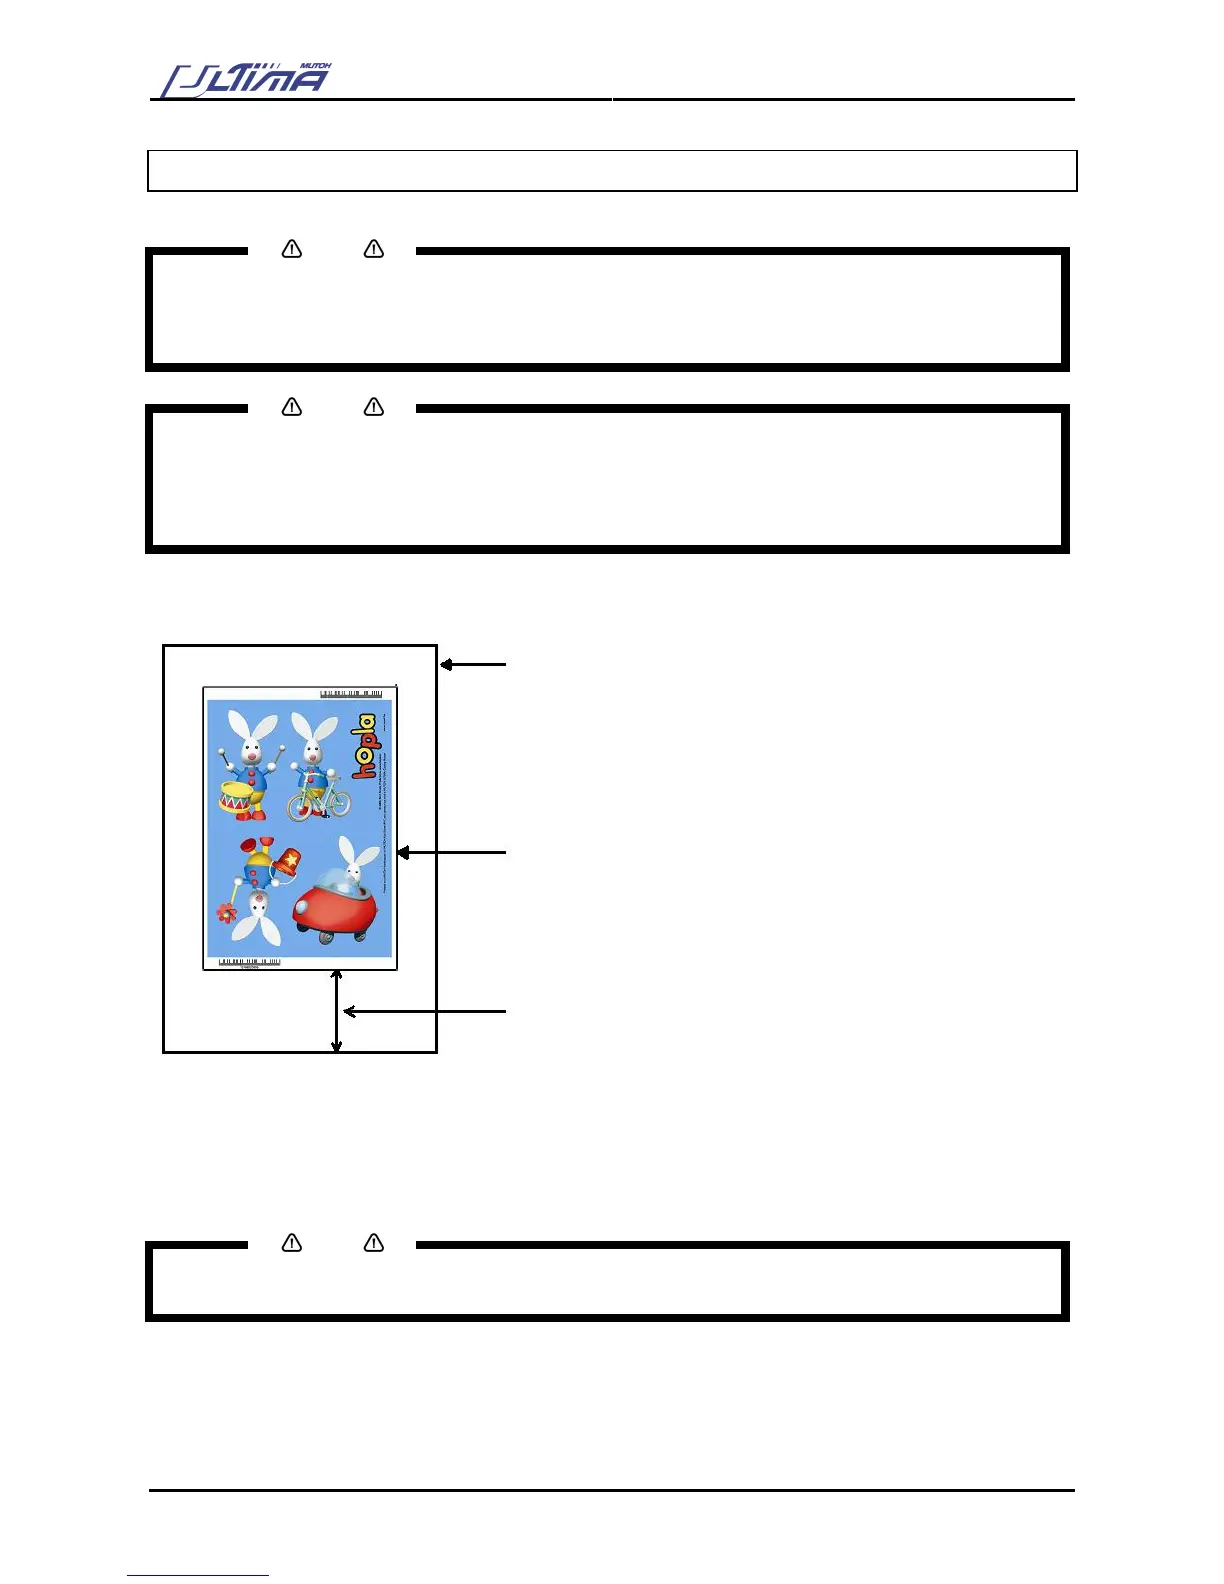
To use the automatic alignment procedure, the pre-printed sheet contains a Bounding Box (*) around the
design to be cut. Details can be found below.
VINYL
Bounding Box. This Bounding Box should have a minimum
thickness of 3 mm; default value of this square is 5 mm thick.
Please leave a white edge of 20 mm in front. The sensor firstly
detects the white space.
(*) Please note that the Bounding Box around your design(s) will be printed. Before contour-cutting the E-
pos technology will search for the Bounding Box and measure the position of the design(s).
The Bounding Box should be at least an A4 format (Portrait). There must be 5 mm white space between the
image and the Bounding Box. Make sure that the Bounding Box is colored black. (→ Contrast) Make sure
that the Bounding Box fits within the margins of the maximum cutting width of your cutting plotter.
Notes
Please note that the position of the design with the Bounding Box compared to the page edges is defined in
the print-software.