User’s Guide ValueJet 1608 HS
Preparations before printing
82 AP-75810 - Revision 2.0
Step 9: Press Enter.
The printer prints the Initial adjustment pattern.
When the initial adjustment printing is complete, the printer enters Normal.
Step 10: After the initial adjustment printing, cut the media.
Refer to Cutting media on page95
Step 11: Measure the distance between the two pluses in the initial adjustment print using a
ruler.
Step 12: Press the + or – to select “PF2: Initial Change”.
Step 13: Press Enter.
The operation panel displays “Init.: 250.0/250 mm”.
Step 14: Press the + or – and enter the measured value in step 3.
Step 15: Press Enter.
The initial adjustment value is saved.
The operation panel displays “PF2: Initial Change”.
Step 16: Press the + or – to select “PF3: Confirm Print”.
Step 17: Press Enter.
The operation panel displays “Feed Length: 250 mm”.
The feeding length for confirmation adjustment printing is normally set at 250
mm.
If you increase the feeding length, the accuracy of the Media feed compensation
improves.
To change the feeding length, press + or – and change the value.
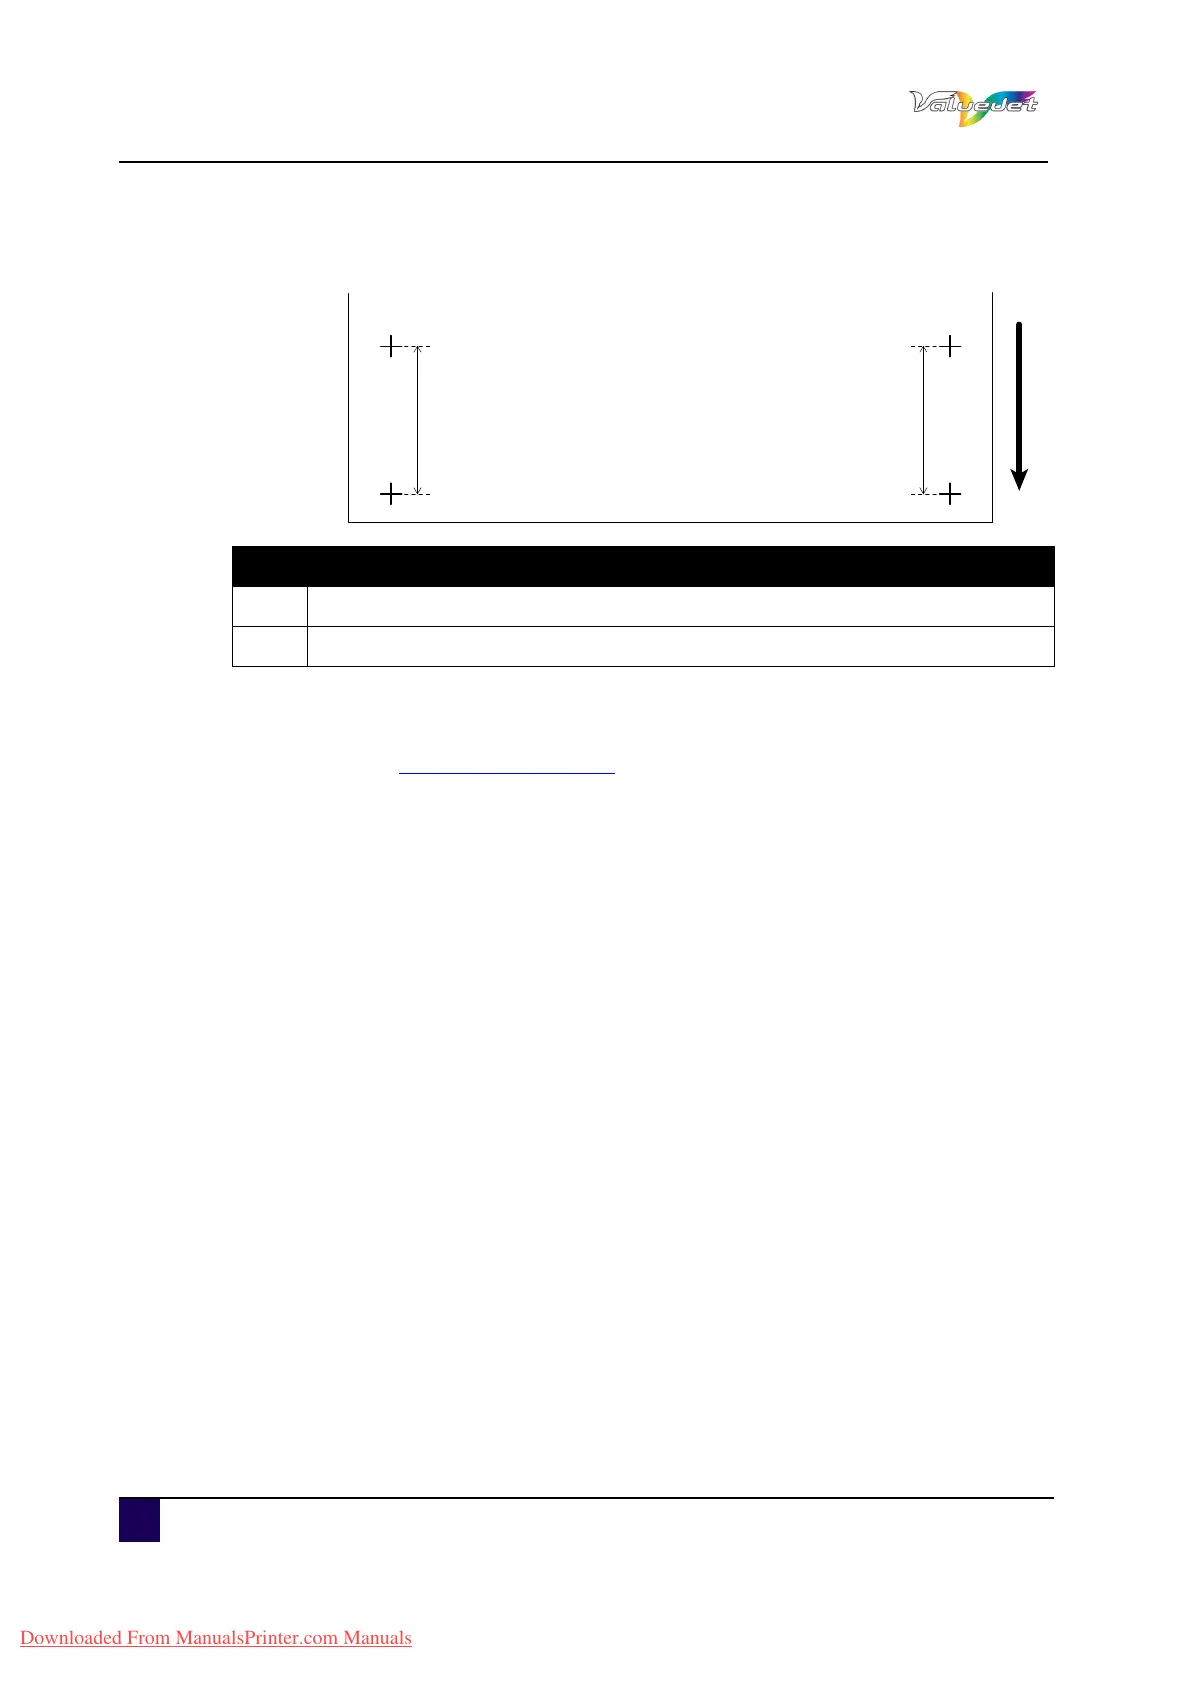
N° Description
1
Media length
2 Media feed direction
Downloaded From ManualsPrinter.com Manuals