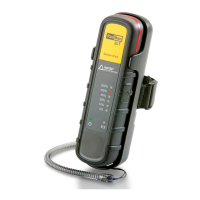
EFA-200/-300 10 Maintenance and repairs
10-5
10.2.1 Installing the software “EFA-200/-300 Tools”
Included with the EFA is a diskette containing the software “EFA-200/-300
Tools”. The software has three components:
Note: You should be certain to always use the latest version of the
software. It is available free of charge from your local dealer or via
the Internet. Older versions of this software should not be used any
longer.
✓ Disc 1 “EFA-200/ -300 Tools” should be in the computer’s disk drive.
1. Run the file “SETUP.EXE” on diskette 1.
This will open the installation program.
The screen “EFA-200 Tools Installation” will appear.
The default installation directory is “C:\EFA_TOOL”.
2. Press the CHANGE key to modify the installation directory.
3. Do not change the installation directory for the “LabWindows/CVI Run-
Time Engine”. The default is “C:\CVI”.
4. Complete the installation by pressing the FINISH key.
Once complete, you will see the message “EFA-200 Tools installed
successfully” on the screen.
– or –
Halt the installation process by pressing the CANCEL key.
datalog.exe • Exports the measurement data from the Basic Unit or the E-field
Unit to a PC for further evaluation.
Exporting data: see page 7-16
stnds.exe • Transfers the selectable STANDARDS to the Basic Unit or the E-
Field Unit.
Transferring STANDARDS parameters: see page 10-8
conf.exe • Loads the current firmware into the Basic Unit or the E-Field
Unit.
Loading the device firmware: see page 10-6
• Enables additional operating modes on the Basic Unit or the E-
Field Unit.
Enabling operating modes: see page 10-9
Table 10-1 Components of the software “EFA-200/-300 Tools“