10 Maintenance and repairs EFA-200/-300
10-8
10.3 Transferring STANDARDS parameters
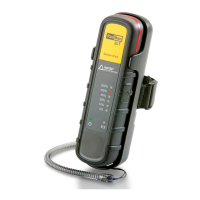
The procedure described below is identical for the Basic Unit and for the E-
Field Unit.
✓ The current version of the software “EFA-200/ -300 Tools”
should be installed.
Installing the software “EFA-200/-300 Tools”: see page 10-5
✓ The connection EFA – PC should be made.
Setting up the EFA – PC connection: see page 10-6
1. If possible, close all open applications on the PC.
2. Power up the EFA and wait for it to boot up (approx 15 s).
3. Launch the application “stnds.exe”.
The “CONF” window should open.
4. Click on the DOWNLOAD button.
The “COM Port” window should open.
5. Activate the serial interface “COM” to which the opto-electrical adapter is
connected and confirm your entry.
The “STANDARDS” window should open.
The standards already programmed into the device will appear on the left
side of the window.
This list of programmed standards can contain a maximum of six entries.
6. In the right half of the window, select further standards for programming
and activate the WRITE field.
7. Start the programming with the WRITE STANDARDS TO EFA key.
A window will open to show the progress.
8. Close the program when this is complete.
9. Power the EFA off and back on again.
Note: Standards can be entered only into free spots in the list. If
necessary, you can use the ERASE key to delete any unneeded
standards from the EFA.