10 Maintenance and repairs EFA-200/-300
10-6
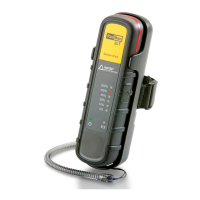
10.2.2 Setting up the EFA – PC connection
1. To update the software of the basic unit, connect the opto-electric
adapter of the basic unit to a serial interface on the PC.
– or –
To update the software of the E-Field Unit, connect the opto-electric
adapter of the E-Field Unit to a serial interface on the PC.
2. Connect the opto-electric adapter to the “REMOTE” socket in the head of
the EFA or to the “EFA-300” socket of the E-Field Unit using a fiber optic
cable.
Note: Do not kink or sharply bend the fiber optic cable.
3. Set the switch in the opto-electrical adapter to the “DTE” position (data
terminal equipment).
10.2.3 Loading the device firmware
✓ The current version of the software “EFA-200/ -300 Tools”
should be installed.
Installing the software “EFA-200/-300 Tools”: see page 10-5
✓ The connection EFA – PC should be made.
Setting up the EFA – PC connection: see page 10-6
1. Copy the file “*.sof” with the current firmware (e.g. “efa01_10.sof”) to the
hard drive of the PC.
2. If possible, close all open applications on the PC.
3. Power up the EFA and wait for it to boot up (approx 15 s).
4. Launch the application “conf.exe”.
The “CONF” window should open.
5. Click on the FIRMWARE... button.
The “COM Port” window should open.
6. Activate the serial interface “COM” to which the opto-electrical adapter is
connected and confirm your entry with SELECT.
The “Warning” window will open.
A message will indicate that the new configuration will cause the old
firmware to be erased.
7. To continue, enter the password and click on DOWNLOAD.