7.2 Recording measurements by timer control
Narda NBM-550 81
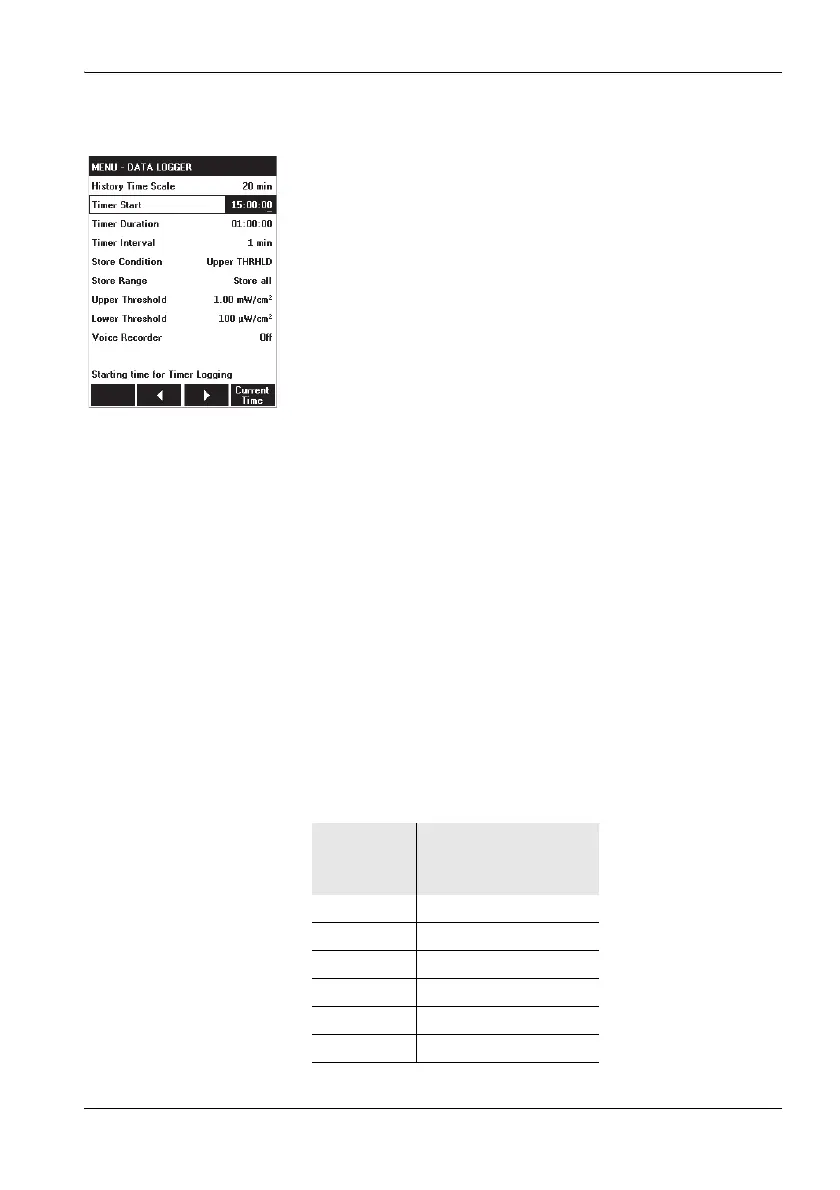
Setting the recording parameters
1. Open the DATA LOGGER menu
(MAIN/DATA LOGGER).
2. To enter the starting time:
– open the Timer Start function,
– select a digit using the / function keys and use the
arrow keys ▲/▼ to change the value,
– press the OK key when you have completed the
settings to confirm them.
Note: The current time can easily be set with the Current
Time button.
3. To enter the recording time:
– open the Timer Duration function,
– select a digit using the / function keys and use the
arrow keys ▲/▼ to change the value,
– press the OK key when you have completed the
settings to confirm them.
4. To enter the recording interval:
– open the Timer Interval function,
– select a digit using the / function keys and use the
arrow keys ▲/▼ to change the value,
– press the OK key when you have completed the
settings to confirm them.
Started measurement intervals are always carried out to
completion. The actual duration is rounded to a multiple of
the interval time.
The maximum duration is determined by the selected
interval time (see table below), because the number of
measurement intervals is limited to 32000.
Interval
time
(seconds)
Maximum duration
(HH:MM:SS)
1 8:53:20
2 17:46:40
3 26:40:00
5 44:26:40
10 88:53:20
> 10 99:59:59