5.4 Measuring in History display mode
Narda NBM-550 53
Changing the time period:
1. Open the History Time Scale function
(MAIN/DATA LOGGER/...).
2. Use the arrow keys ▲/▼ to set the desired time and
press the OK key to confirm the setting.
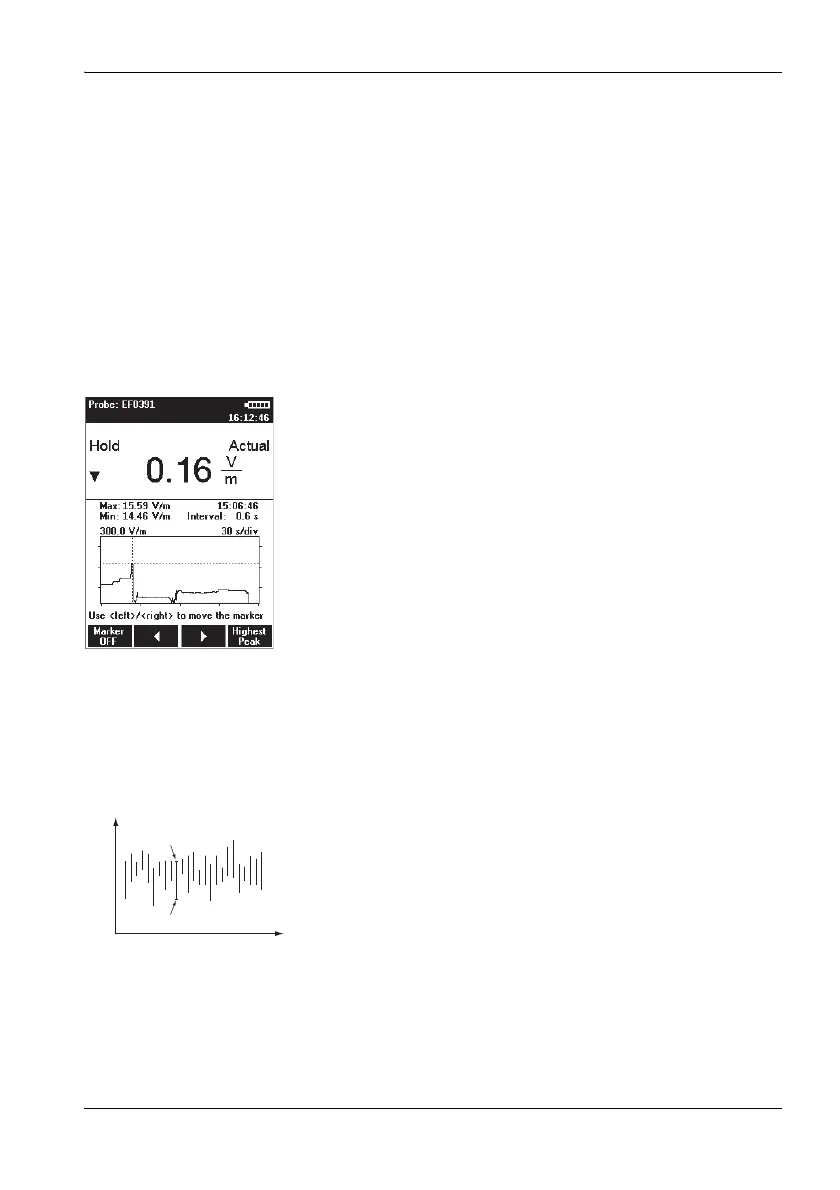
Evaluating the curve
1. Press the Hold key to freeze the curve.
Hold is shown flashing in the display.
Recording continues in the background.
2. Press the Marker ON function key to show the cursor.
Other items will also appear in the display:
– Cross-hairs for selecting the measurement point
– MAX shows the maximum value at the cursor position
– MIN shows the minimum value at the cursor position
– Time shows the time the measurement at the cursor
position was made
– Interval shows the display resolution (cursor step
size)
3. Press the / function keys to move the cursor to the
left or right or press the Highest Peak function key to
move the marker to the highest measured value.
4. Press the Marker OFF function key to switch off the
cursor.
5. Press the Release function key to unfreeze the display.
The measurement record and curve are updated to
show the changes since the Hold key was pressed.
Significance of MAX and MIN values
Measured values are recorded continuously as the curve is
recorded. However, the cursor can only select discrete time
points which have to be used to produce the graphic display.
The maximum and minimum values measured within the
corresponding time window (interval) are displayed for
these time points (see figure, left). A maximum of 200
measurement intervals are shown in the progress memory.