4 Getting started
32 NBM-550 Narda
Note: After connecting to the GPS module, it can take up to
5 minutes for a position display to appear. The waiting time
decreases with short-term switching off and on, i.e. when
the satellite positions are only marginally changed. GPS
reception may be impaired by high field levels and, in
particular, by field levels in the L-band (1 to 2 GHz).
4.2 The NBM-550 operating concept
When the self test is complete, the display switches to
measurement mode.
The settings will depend on the power on behavior that you
have selected (see “Saving and loading instrument
settings” on page 90).
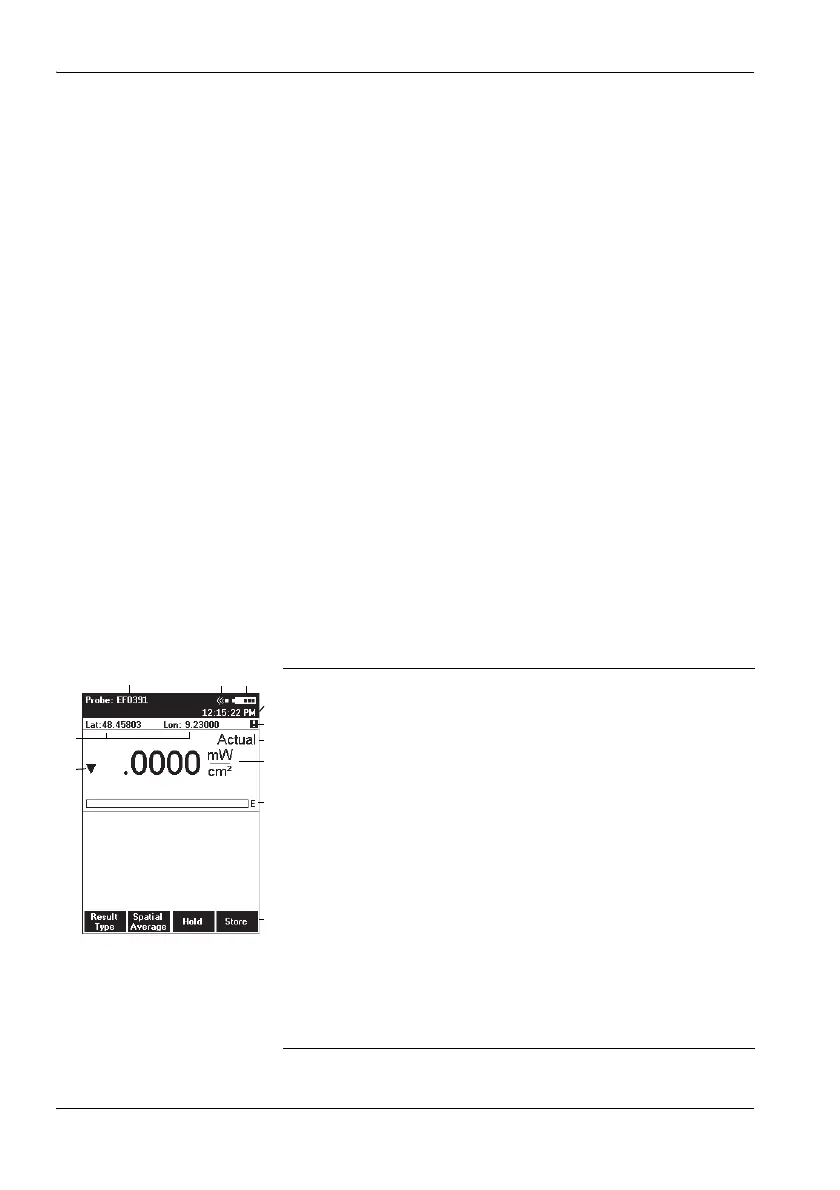
Measurement screen overview
The description below gives you an initial overview of the
display elements in the measurement screen display. Other
elements are described in the chapters dealing with the
individual functions and in the “Overview of all menus and
functions” on page 101.
1 Probe used (also shows the EHP-50 battery charge
state and the selected frequency range if the EHP-50
is used)
2 Alarm function (switched on)
3 Battery charge state
4 Time
5 Warning: displayed GPS data is not up to date.
6 Present display mode selection
7 Measured value and units
8 Bar graph of measured value with display of field
type: E = E field, H = H field, S = S field
9 Function keys
10 Out of measurement range display.
– Down arrow: signal too small
– Up arrow: signal too large.
11 GPS coordinates (optional)