7 Recording and managing measured values
82 NBM-550 Narda
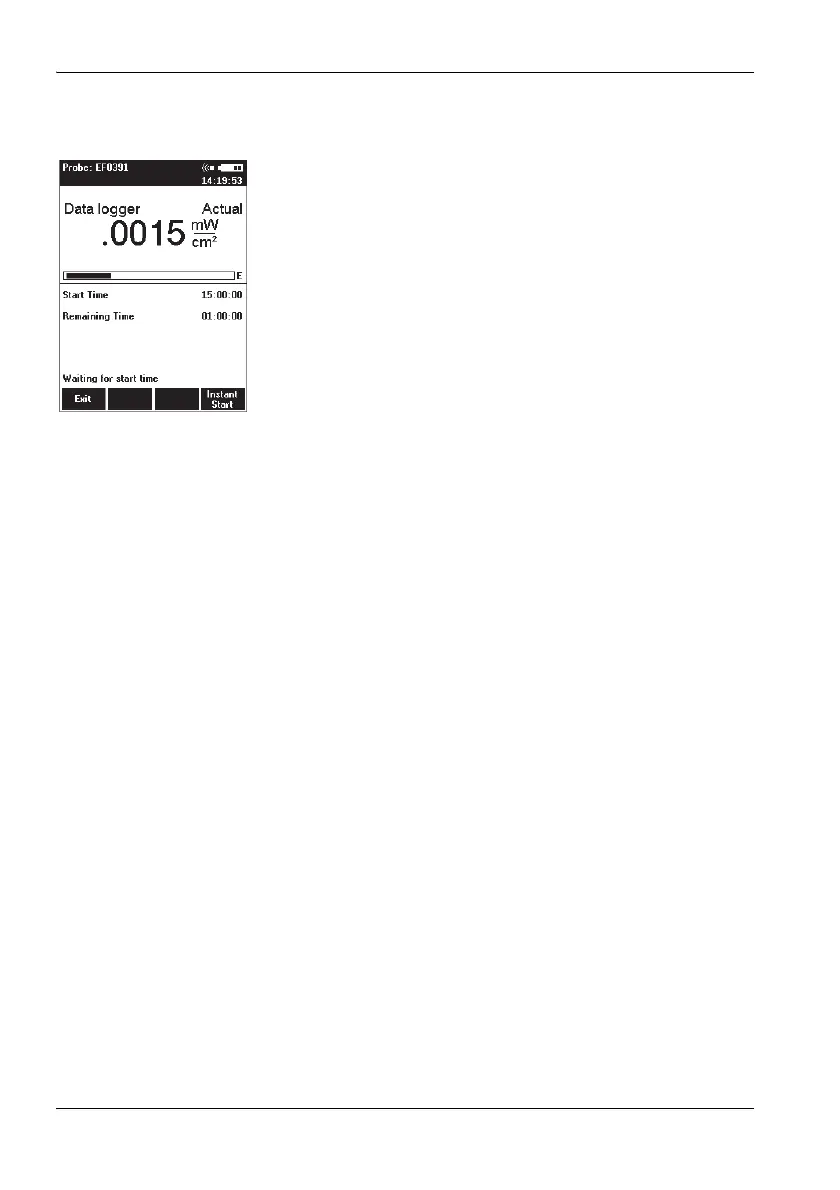
Starting the recording
✓ The DATA LOGGER menu (MAIN/DATA LOGGER) is
open.
Press the Timer Logging function key.
The display switches to measurement mode.
The latest measured value is shown in the upper half
of the display. The values you entered for the starting
time and recording time are shown in the lower half of
the display.
Note: If voice recording is activated, a comment can be
recorded (optional).
The recording starts at a preset time. The remaining
recording time (Remaining Time) is displayed.
The recording is stopped after the preset recording
duration (Timer Duration) has elapsed.
Note: The recording starts immediately when Instant Start is
selected.
The recording can be prematurely stopped at any time with
the Stop and Exit button.
7.3 Recording conditional measurements
(optional)
For conditional recording, the measurement is triggered
when the predetermined field strength values are exceeded
or fallen short of. Up to 32000 events can be recorded.
You must take the following steps to record measurements
conditionally:
1. Set the recording parameters:
– enter the starting condition (Store Condition),
– enter the store range (Store Range),
– enter the upper threshold,
– enter the lower threshold.
2. Start the recording:
– select the Condition Logging function,
–press Start.
These steps are explained below.