3.5 Connecting the probe
Narda NBM-550 25
the data sheets of the NBM-550 and probes. These
documents can also be downloaded from the Narda web
site on the Internet at http://www.narda-sts.com.
„
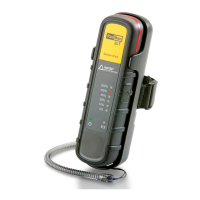
Probe with “Push-Pull” connector
Connecting the probe
✓ The red mark on the probe plug (10) is pointing towards
the front of the instrument.
Push the probe plug (10) straight down into the probe
socket (1) until it clicks into place.
Disconnecting the probe
Slide the sleeve on the probe plug (10) upwards and pull
the probe upwards to remove it.
Probe with threaded coupling
connector
The latest devices use threaded connectors for the link
between the probe and the basic unit. The basic unit is fitted
with a longer socket which can be recognized by the
approximately 1 cm long threaded section. Probes fitted
with "push-pull" connectors can still be used with this
connector. Probes with threaded coupling connectors can
only be used with this new, longer connecting socket.
Connecting the probe
✓ Make sure the guide lug on the probe plug (10) is
pointing towards the front of the instrument.
Push the probe plug (10) straight down into the probe
socket (1) and tighten the threaded coupling using your
thumb and forefinger. Never tighten the coupling using
pliers or other tools.
NOTICE
Wrong handling of the probe
Damage of the probe head
Always hold the probe at the metal plug end.