4.3 Making basic settings
Narda NBM-550 39
Tip: Instead of making the setting manually, you can use
the PC software supplied to synchronize the date and
time.
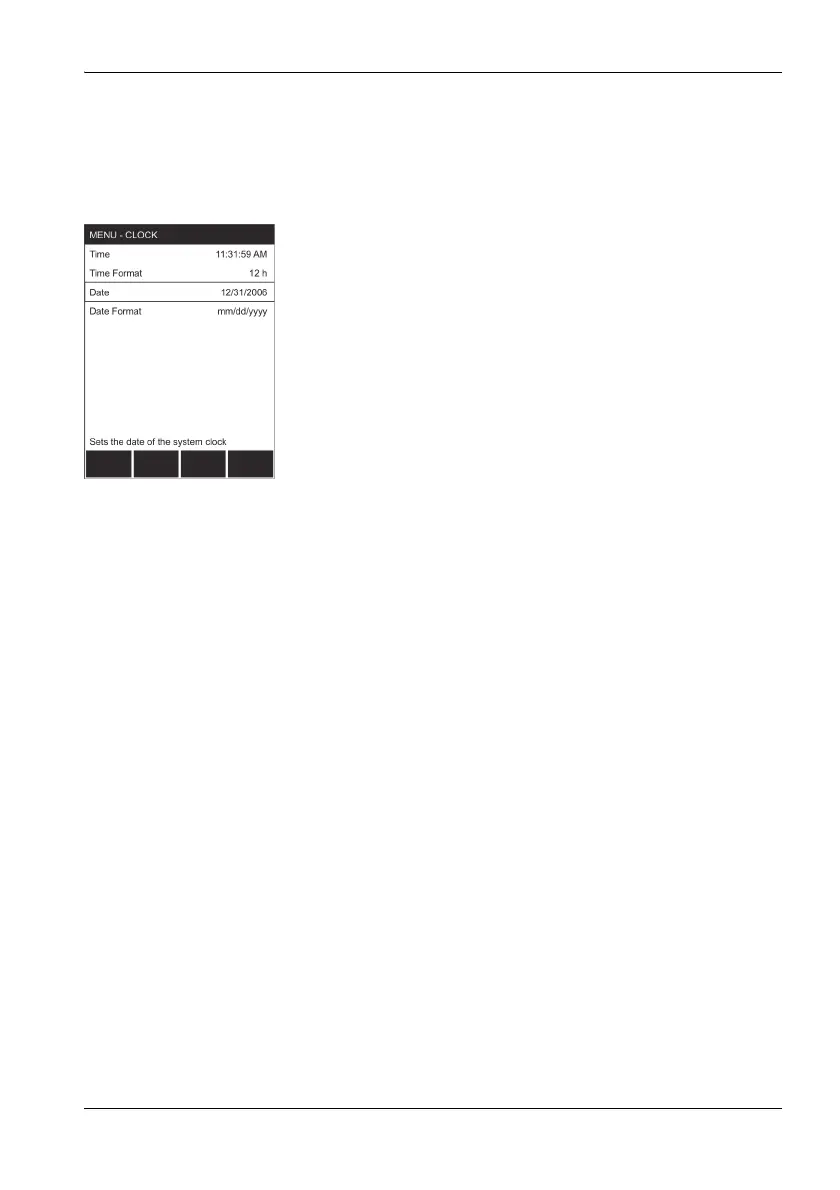
Setting the date and time
1. Open the Clock function in the MAIN menu.
2. Set the time format:
– Select the Time Format function,
– use the arrow keys ▲/▼ to select the 12-hour or
24-hour time format and press the OK key to confirm
the selection.
3. Set the time:
– Select the Time function,
– use the </> function keys to select the seconds,
minutes, or hours, and use the arrow keys ▲/▼ to
change the value. If you choose the 12-hour time
format, you must also select AM or PM,
– press the OK key to confirm the selection.
4. Set the date format:
– Select the Date Format function,
– use the arrow keys ▲/▼ to select the format
(mm/dd/yyyy, dd.mm.yyyy, yyyy-mm-dd) and press
the OK key to confirm the selection.
5. Set the date:
– Select the Date function,
– use the </> function keys to select the day, month or
year and use the arrow keys ▲/▼ to change the value,
– press the OK key to confirm the selection.
Changing the GPS display
There are three formats used for displaying GPS
coordinates:
• DMS: (d)dd° mm’ ss.s’’ N
Example: Lat: 48° 48’ 10.5’’ N / Lon: 9° 15’ 00.0’’ E
• MinDec: (-)(d)dd° mm.mmm’
Example: Lat: 48° 48.175’ / Lon: 9° 15.000’
• DegDec: (-)(d)dd.ddddd°
Example: Lat: 48.29166° / Lon: 9.25000°
The default setting is DegDec.