5 Measuring with the NBM-550 and HF probes
52 NBM-550 Narda
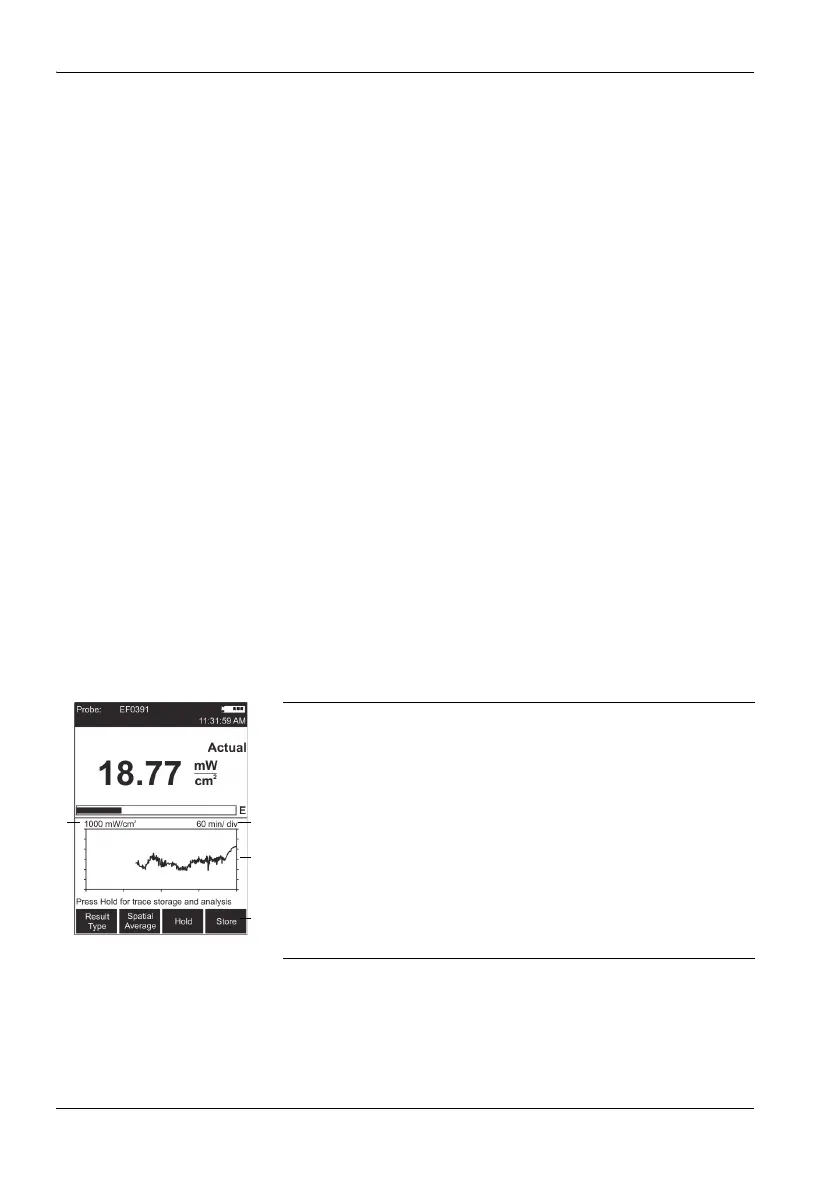
5.4 Measuring in History display mode
You can display the progress of the measurement versus
time in History mode. You can use the cursor to mark
individual points on the curve and display the associated
values.
Changing to History display mode
✓ The display is in measurement mode.
1. Press the OK key to open the MAIN menu.
2. Press the Display function key until Display: History
appears.
3. Press the ESC key to return to measurement mode.
The curve is shown in the lower half of the display
screen.
Note: The progress memory is always active. As a result, a valid
curve already appears when changing to History mode. It
will be deleted, however, as soon as you change a
parameter that affects the measurement result (e.g.
correction frequency or time span). The rolling
measurement memory deletes all values that date back
longer than the set time period.
Display overview
1 Defines the Y axis display range as the maximum
measurable field strength
2 X axis time resolution (time period per line of
graduation)
3 Graphic display of measurement progress
The record begins at the right hand edge. The latest
measurement is always shown at the right hand
edge.
4 The functions are the same as in Normal display
mode (see “Measuring in Normal display mode”
on page 46.