Virtual Private Networking Using SSL Connections
316
ProSecure Unified Threat Management (UTM) Appliance
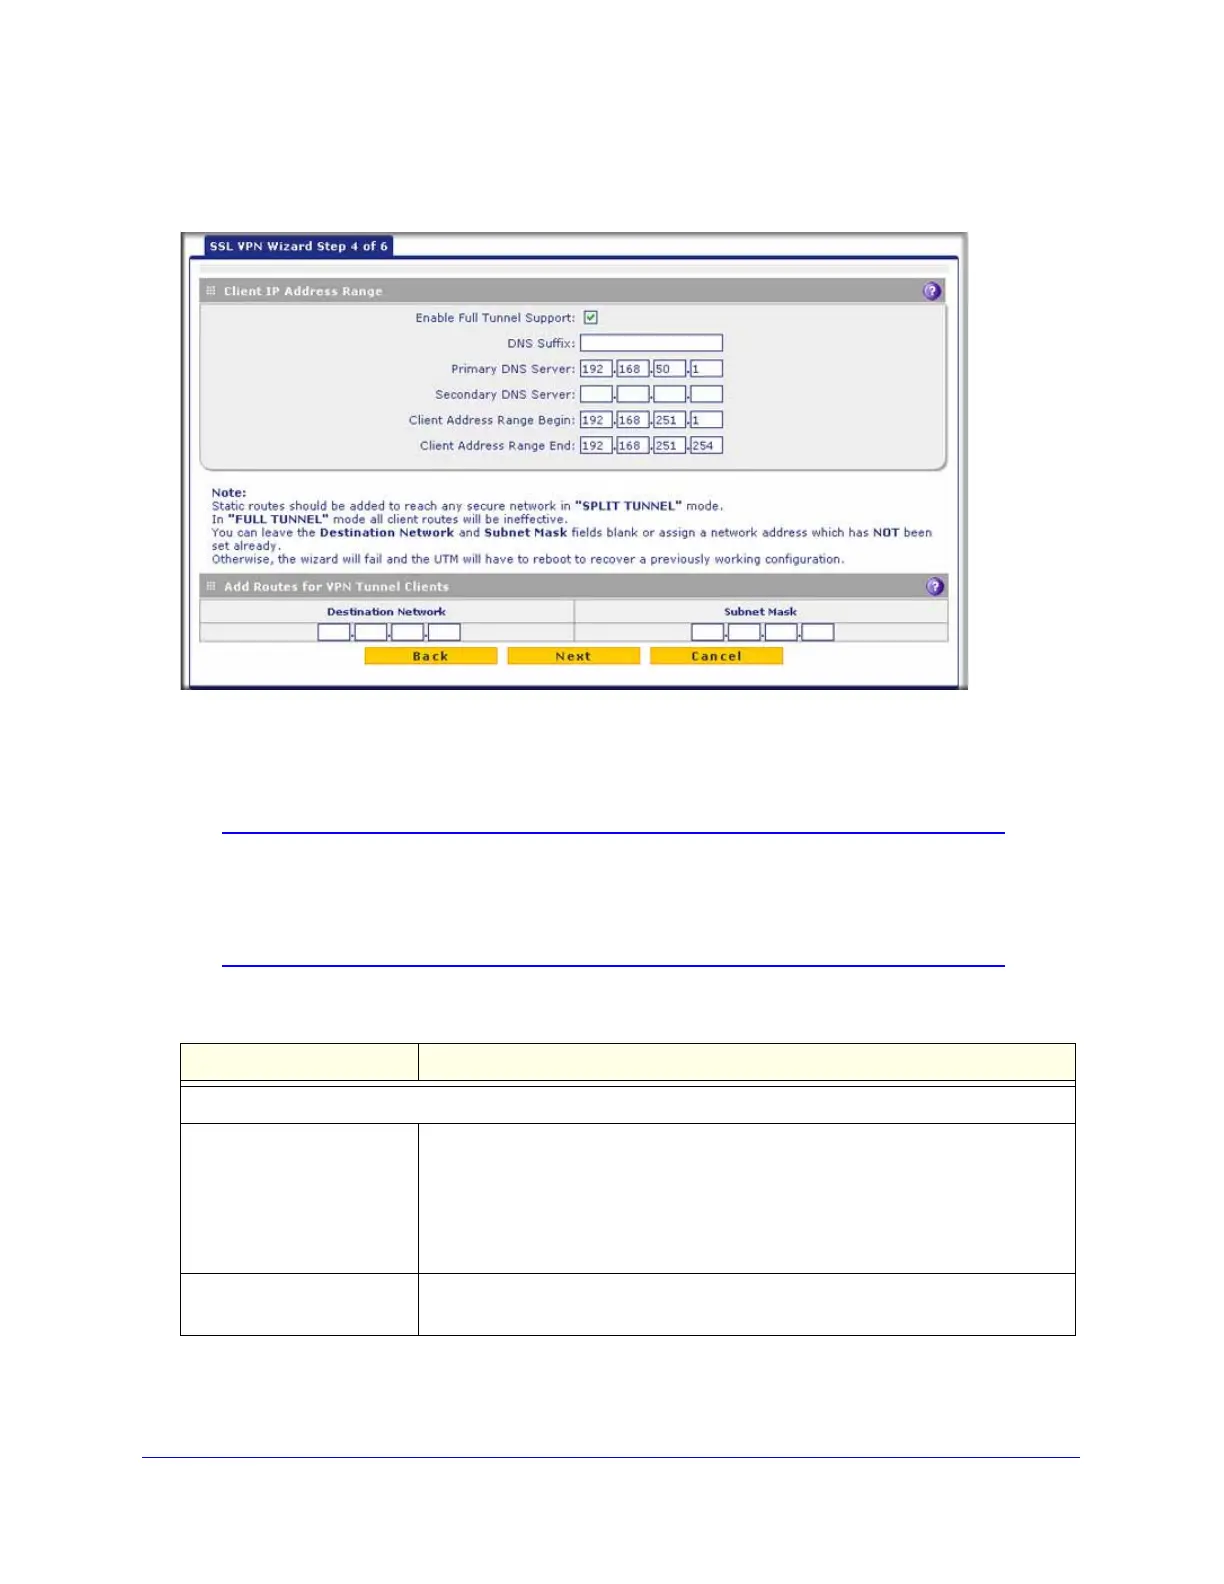
SSL VPN Wizard Step 4 of 6 (Client Addresses and Routes)
Figure 192.
Note that the previous figure contains an example. Enter the settings as explained in the
following table, and then click Next to go the following screen.
Note: Do not enter an existing route for a VPN tunnel client in the
Destination Network and Subnet Mask fields; otherwise, the SSL
VPN Wizard will fail and the UTM will reboot to recover its
configuration.
Table 83. SSL VPN Wizard Step 4 of 6 screen settings (client addresses and routes)
Setting Description
Client IP Address Range
Enable Full Tunnel Support Select this check box to enable full-tunnel support. If you leave this check box
cleared (which is the default setting), full-tunnel support is disabled but
split-tunnel support is enabled, and you need to add a client route by completing
the Destination Network and Subnet Mask fields.
Note: When full-tunnel support is enabled, client routes are not operable.
DNS Suffix A DNS suffix to be appended to incomplete DNS search strings. This setting is
optional.
 Loading...