DMTA-20073-01EN, Rev. C, November 2015
Maintenance
107
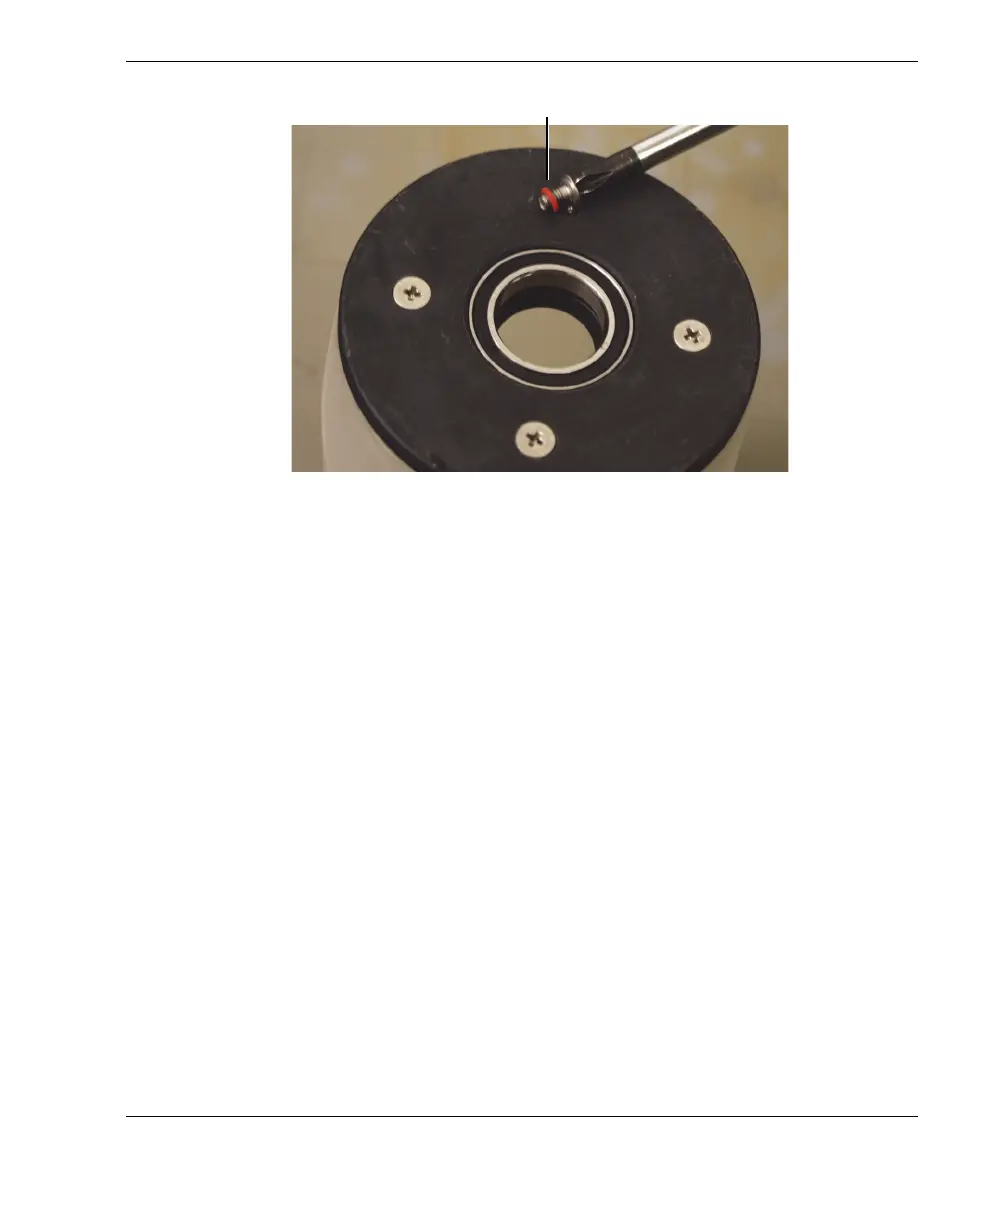
Figure 6-34 Installing the plain flange’s external retaining screws
10. Install the probe inside the acoustic wheel. For more information, see “Installing
the Probe in the Acoustic Wheel” on page 80.
11. Install the acoustic wheel on the RollerFORM. For more information, see
“Installing the Acoustic Wheel on the RollerFORM Scanner” on page 107.
12. Fill the liquid chamber. For more information, see “Filling the Acoustic Wheel’s
Liquid Chamber” on page 39.
6.7 Installing the Acoustic Wheel on the RollerFORM Scanner
After the maintenance procedures on the RollerFORM’s acoustic wheel have been
performed, the wheel is ready to be installed on the scanner.
To install the acoustic wheel on the RollerFORM
1. Install the probe inside the acoustic wheel. For more information, see “Installing
the Probe in the Acoustic Wheel” on page 80.
2. Install the bushing on the end of the probe-axle (see Figure 6-35 on page 108).
Flange’s external retaining screw with gasket