User Manual
Advanced Console Server & RIM Gateway User Manual 81
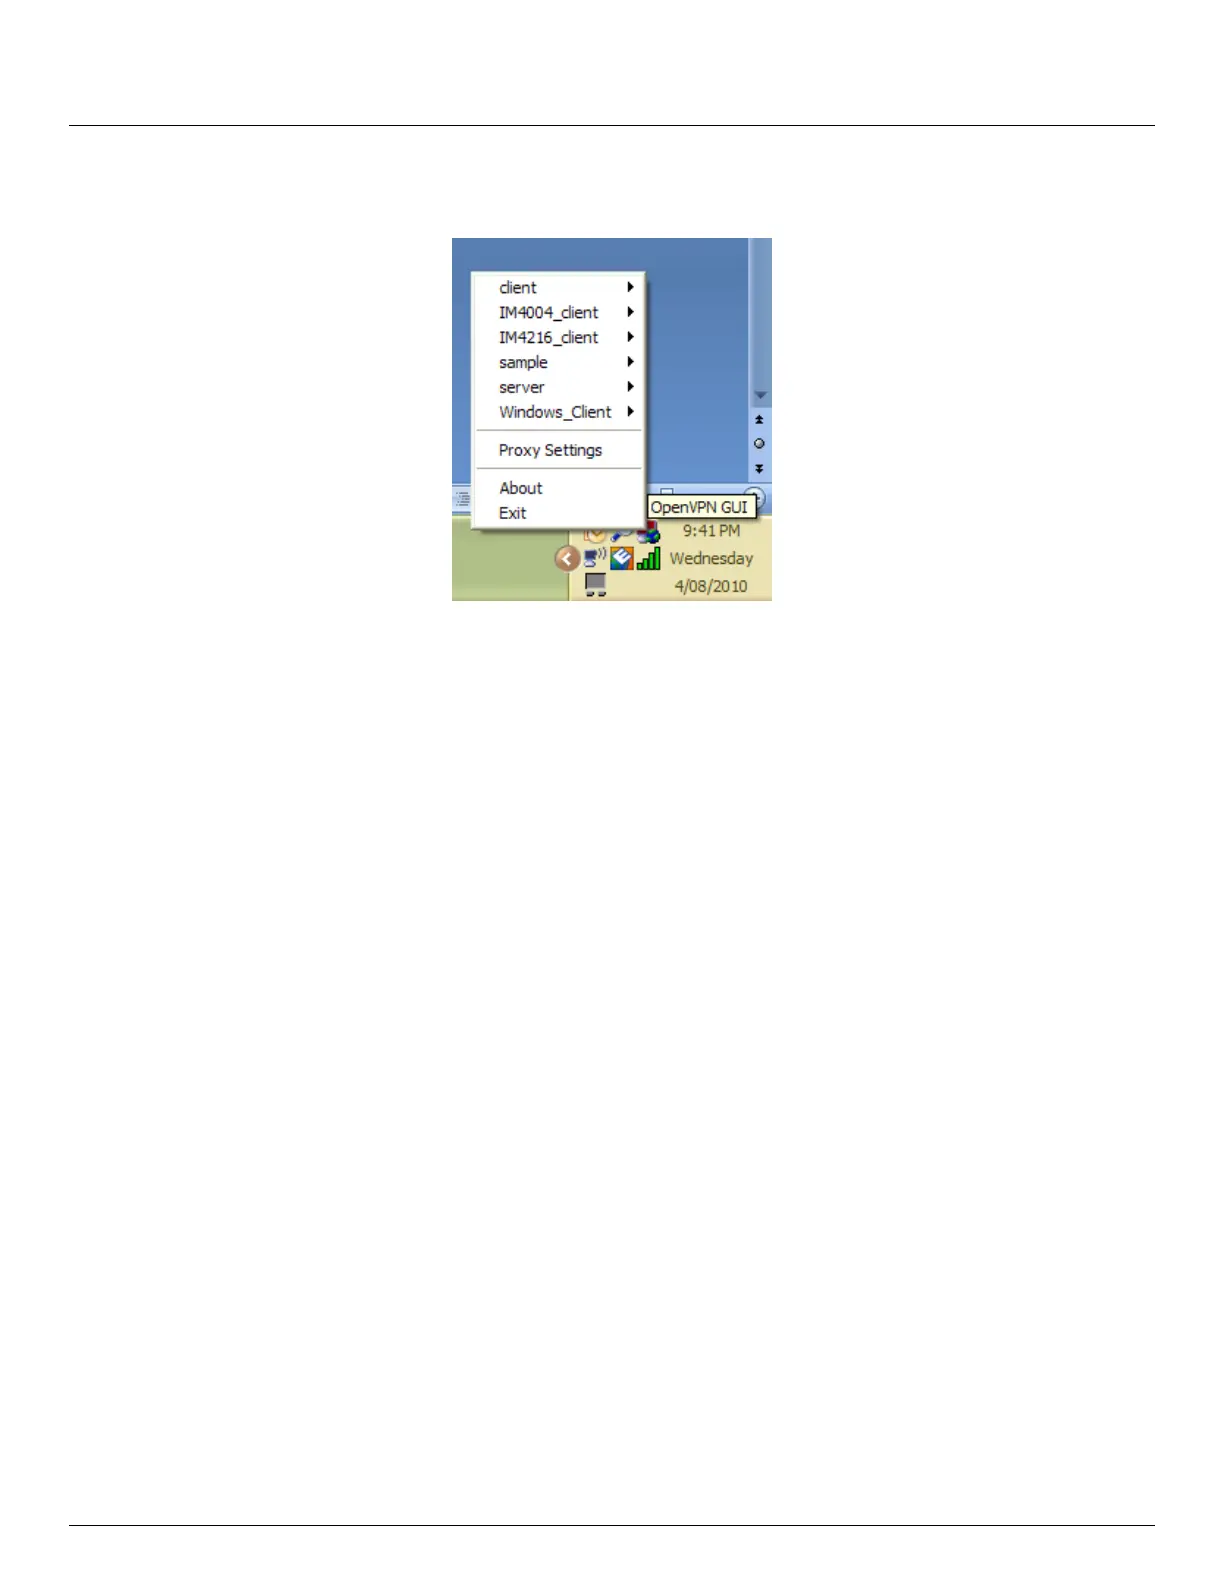
Once installed on the Windows machine, an OpenVPN icon will have been created in the Notification Area
located in the right side of the taskbar. Right click on this icon to start (and stop) VPN connections, and to edit
configurations and view logs
When the OpenVPN software is started, the C:\Program Files\OpenVPN\config folder will be scanned for “.opvn” files.
This folder will be rechecked for new configuration files whenever the OpenVPN GUI icon is right-clicked. So once
OpenVPN is installed, a configuration file will need to be created:
Using a text editor, create an xxxx.ovpn file and save in C:\Program Files\OpenVPN\config. For example,
C:\Program Files\OpenVPN\config\client.ovpn
An example of an OpenVPN Windows client configuration file is shown below:
# description: IM4216_client
client
proto udp
verb 3
dev tun
remote 192.168.250.152
port 1194
ca c:\\openvpnkeys\\ca.crt
cert c:\\openvpnkeys\\client.crt
key c:\\openvpnkeys\\client.key
nobind
persist-key
persist-tun
comp-lzo
An example of an OpenVPN Windows Server configuration file is shown below:
server 10.100.10.0 255.255.255.0
port 1194
keepalive 10 120
proto udp
mssfix 1400
persist-key
persist-tun
dev tun
ca c:\\openvpnkeys\\ca.crt
cert c:\\openvpnkeys\\server.crt
key c:\\openvpnkeys\\server.key
dh c:\\openvpnkeys\\dh.pem
comp-lzo
verb 1